Invoice Management
With Quantic Charge you can generate invoices, share them with customers, or get paid instantly from the Charge itself. Also, you can stay updated on the paid, pending, and overdue invoices and make sure that you are getting paid on time.
Generating an Invoice from the Invoice Section
You can generate an invoice in three ways either from the Charge screen or directly from the Customer section.
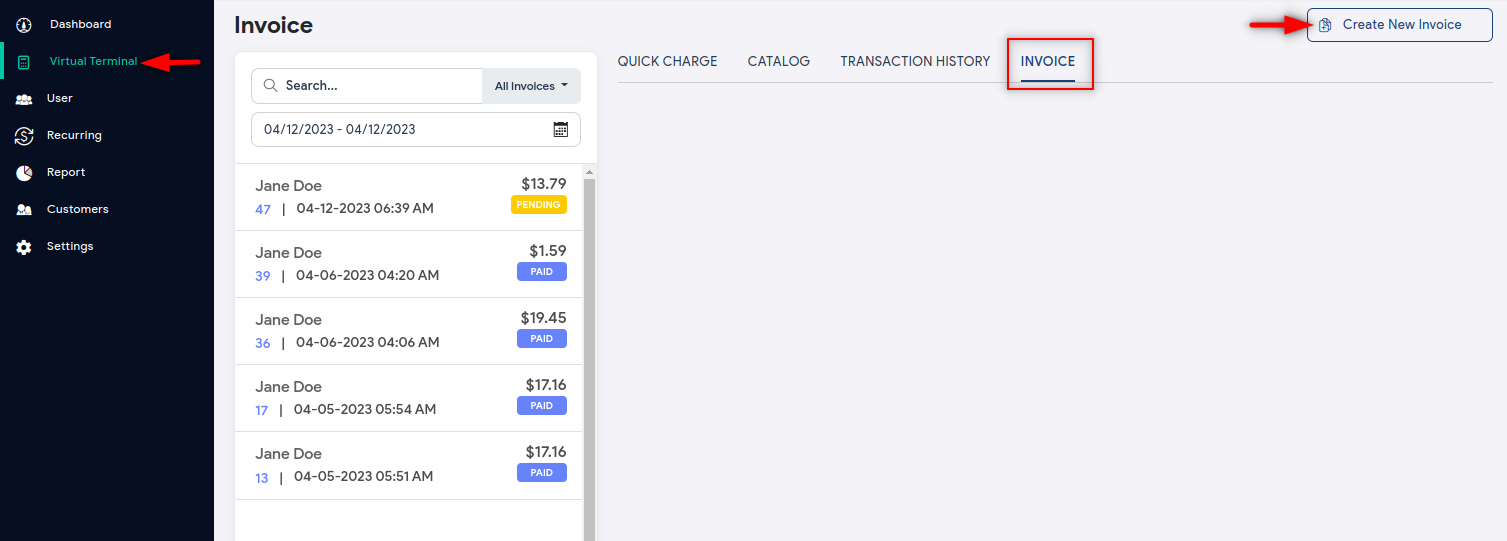
- Go to the Virtual Terminal section on the left.
- Click Invoice.
- Click Create New Invoice button on the top right.
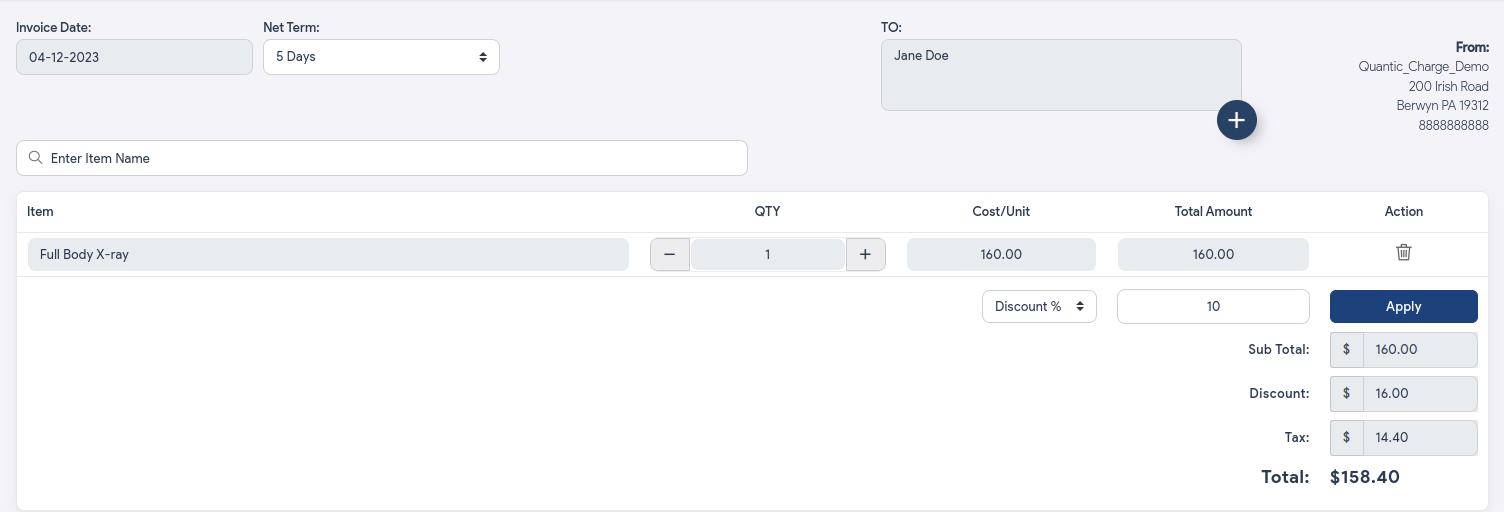
- Fill in the invoice details with the following information:
- Set the Net Payment Days from the Net Term drop-down. You can select from 5, 7, 14, and 30 days.
- Add a customer by clicking the icon.
- Search for the item (only the listed items will appear) that you want to add to the invoice.
- Add discount (if any) and click Apply.
- Finally, click Generate Invoice at the bottom right corner. The invoice will be shared with the customer and the “Invoice Sent Successfully” popup will appear on the screen.
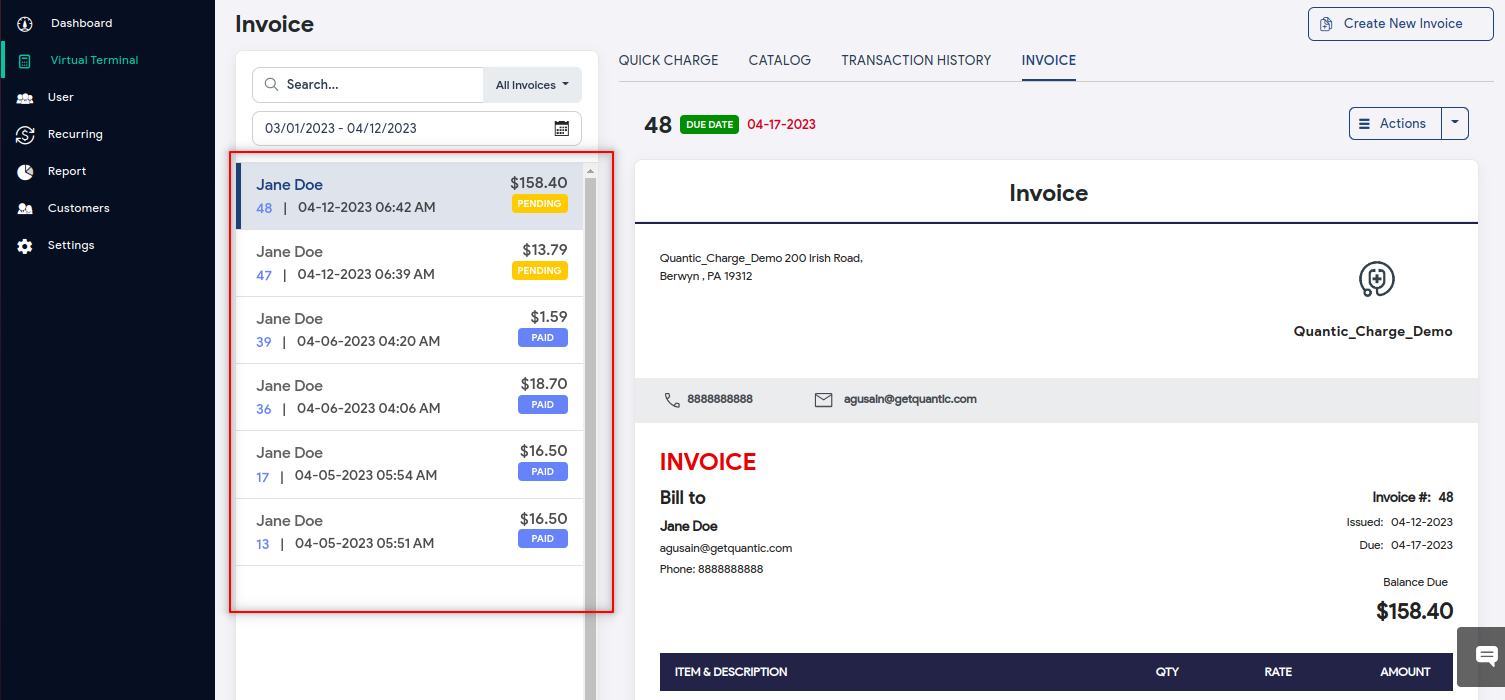
- The list of all the invoices will appear on the left with payment status displayed next to them.
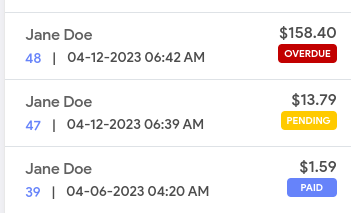
- Invoice labels and their meanings:
- Paid: The invoice has been paid by the customer and is closed.
- Pending: The invoice is yet to be paid by the customer, however, the due date is yet to come.
- Overdue: The invoice is pending for more than the committed date (net term) and it needs to be paid immediately.
Generating an Invoice from the Charge Screen
Alternatively, you can also generate invoices from the Charge screen.
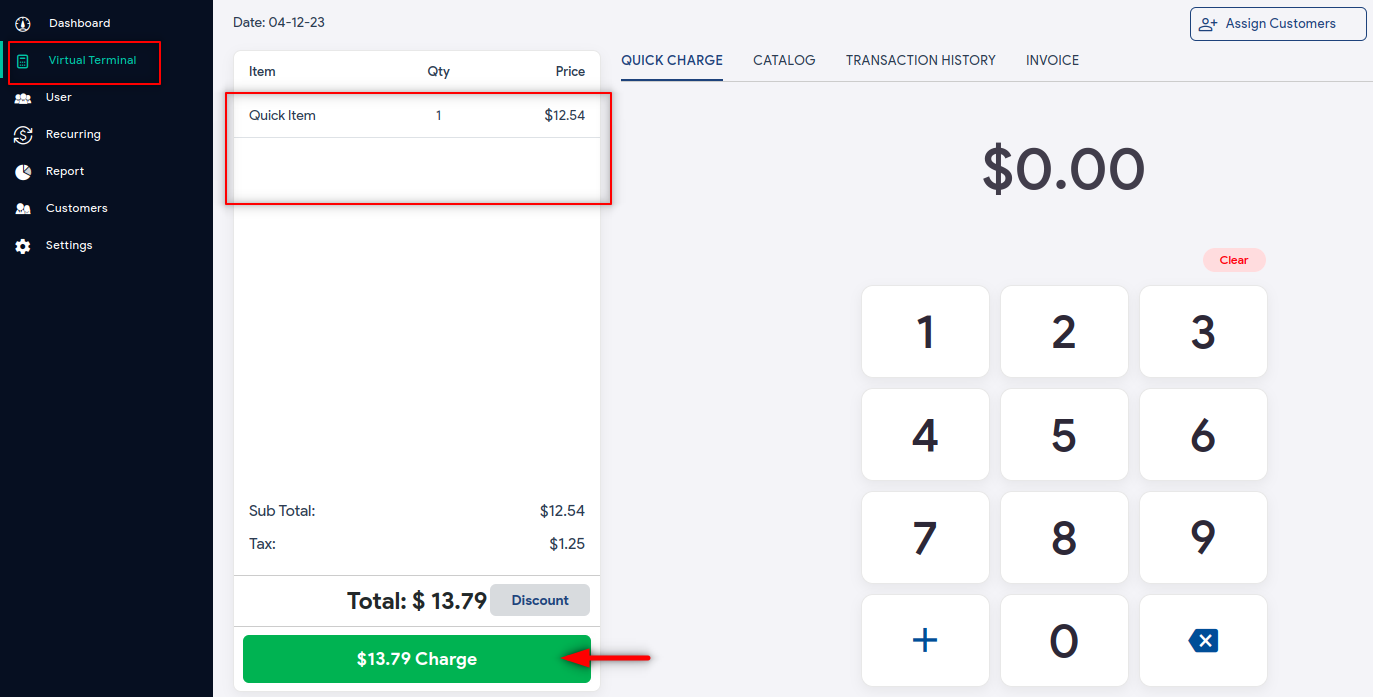
- Go to the left navigation menu and select Virtual Terminal.
- Stay on the Quick Charge screen and enter the amount to be charged using the keypad.
- Select + to add the item to the cart.
- Click Charge at the bottom of the Cart.
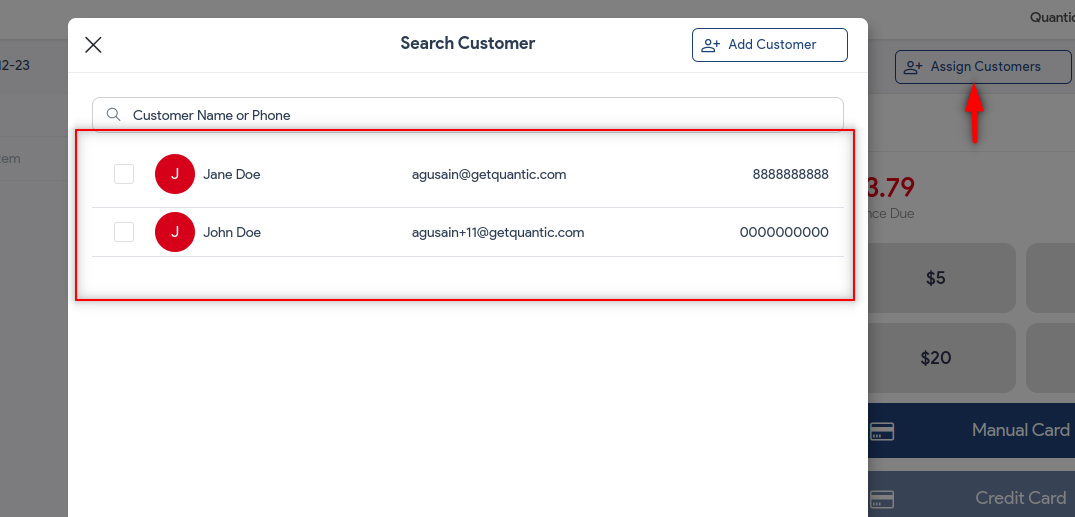
- Click Assign Customers on the top and select the customer you want to create an invoice for.
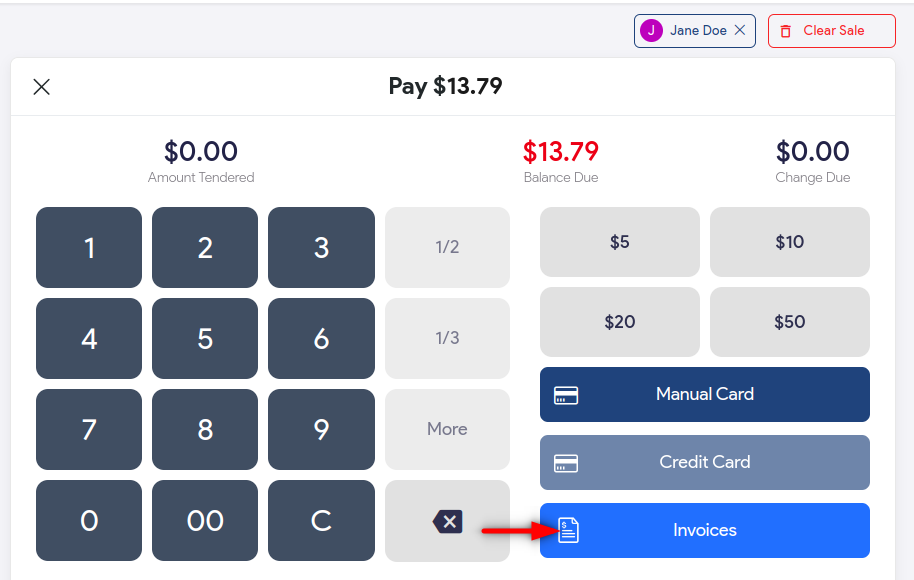
- Select Invoice on the payment screen.
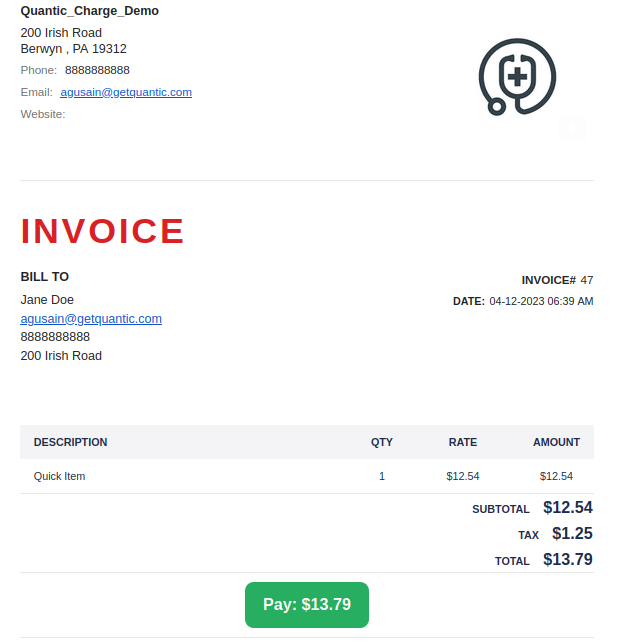
- The invoice will be generated and forwarded to the customer’s email address. See the above screenshot.
- Customer can click the Pay button to pay the invoice amount.
Generating an Invoice from the Customer Section
You can create an invoice straightaway from the customer section. Here are the steps.
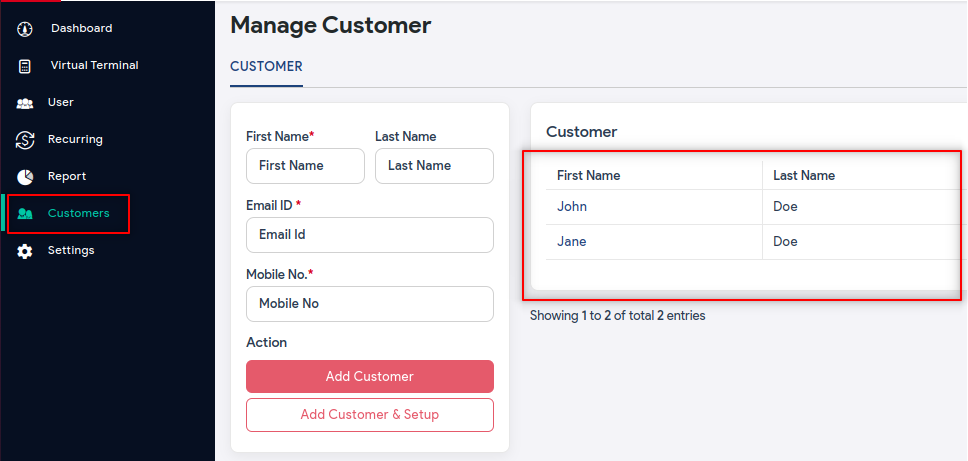
- Go to the Customers menu from the left navigation.
- Select the customer whom you want to create an invoice for.

- Select the Invoice from the top navigation bar.
- Click the Create New Invoice button.
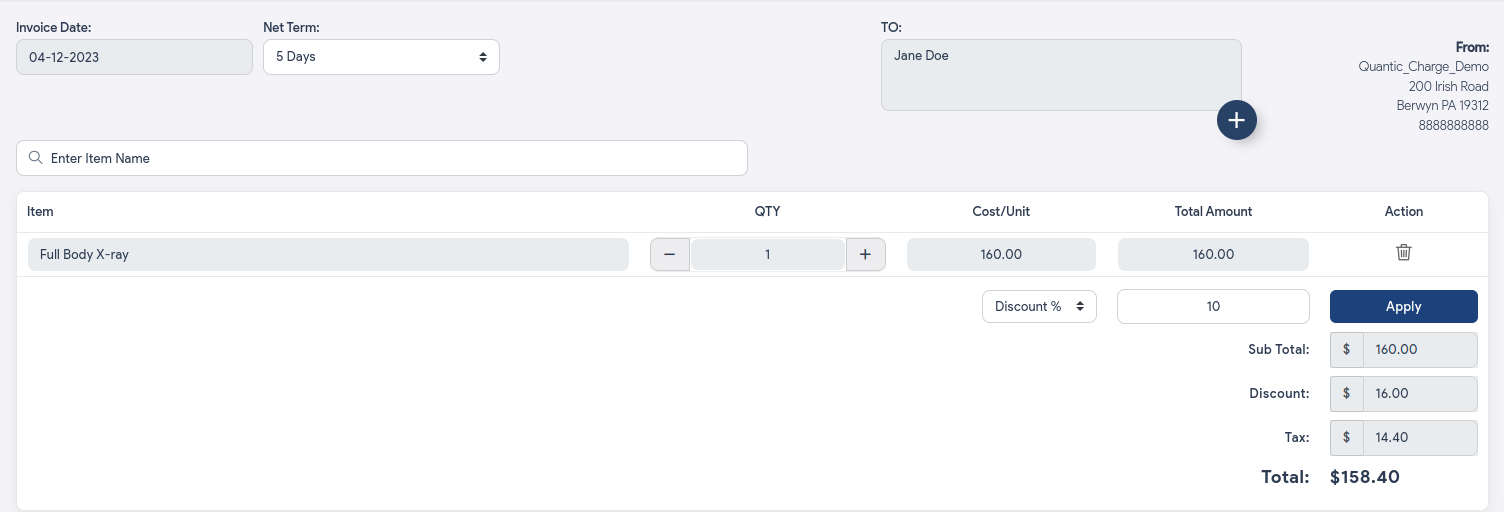
- Fill in the invoice details with the following information:
- Set the Net Payment Days from the Net Term drop-down. You can select from 5, 7, 14, and 30 days.
- Search for the item (only the listed items will appear) that you want to add to the invoice.
- Add discount (if any) and click Apply.
- Finally, click Generate Invoice at the bottom right corner. The invoice will be shared with the customer and the “Invoice Sent Successfully” popup will appear on the screen.
Receiving payments for old Invoices
You can follow the below steps to receive payments for the old invoices.
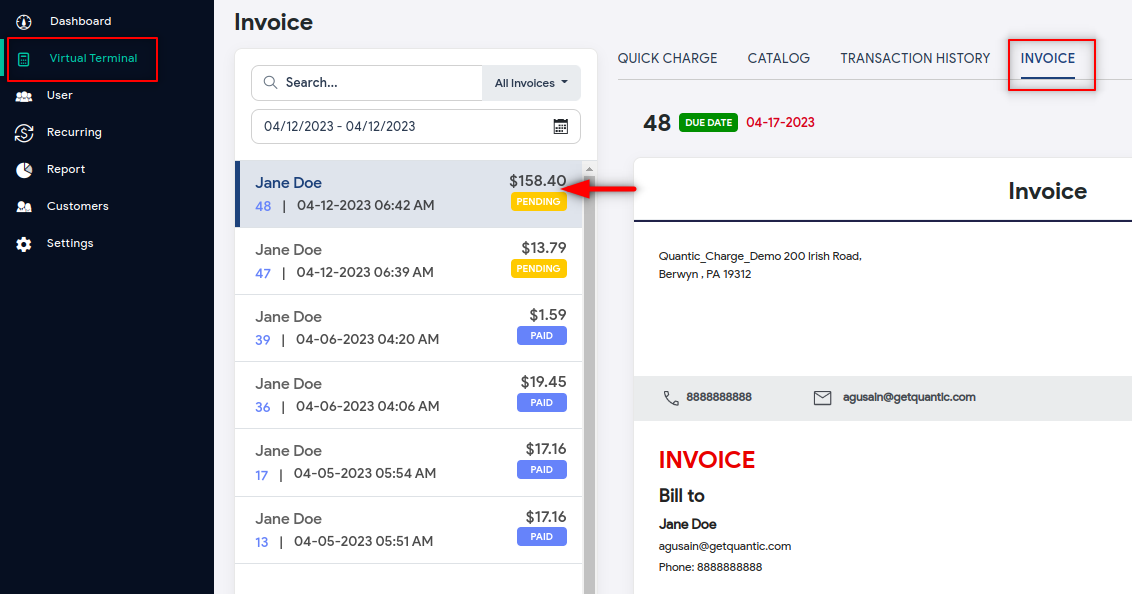
- Go to the Virtual Terminal section on the left.
- Click Invoice.
- The list of all invoices will appear on the left.
- Select the invoice that you want to receive the payment for.

- Click the Action button as shown in the image.
- Select Pay Invoice.
- The payment page will open, there the customer can enter the card details to pay the due amount.
Sharing an Invoice (with payment link) to the Customer
Just like receiving payments, sharing an invoice is also quite simple. You can do it in the following way
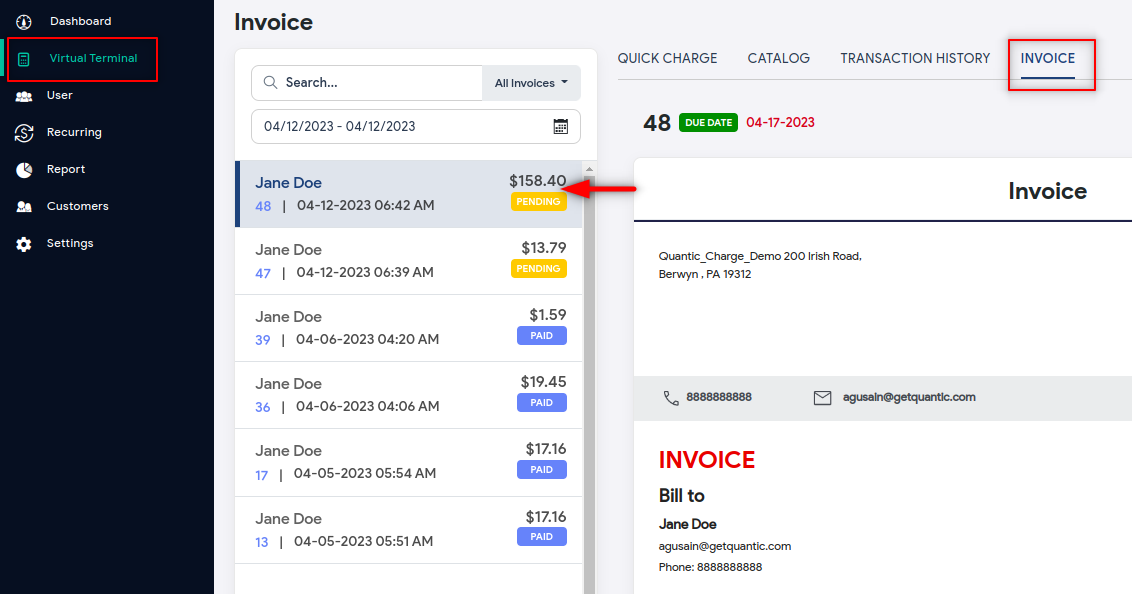
- Go to the Virtual Terminal section on the left.
- Click Invoice.
- The list of all invoices will appear on the left. Use the customer name or invoice number to search invoice.
- Select the invoice that you want to share.
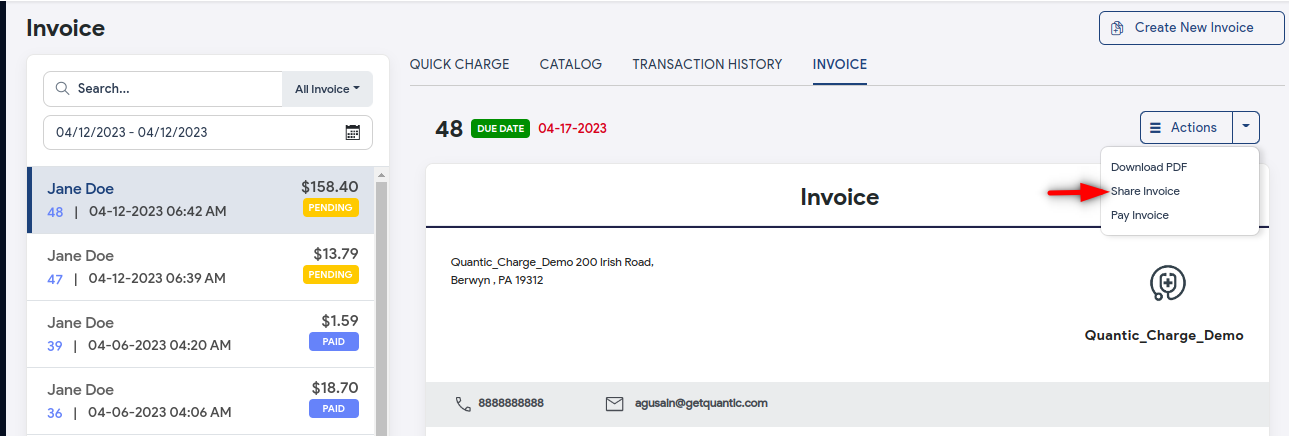
- Go to the Action column and select Share Invoice.
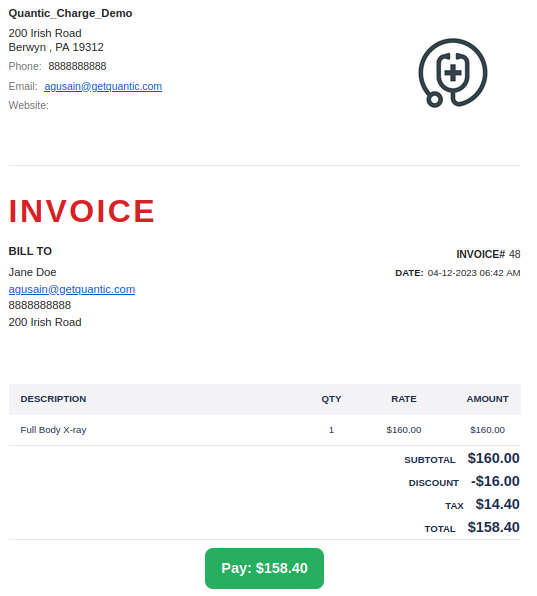
- The customers will receive the invoice in their inbox, they can click the Pay button to pay the invoice.
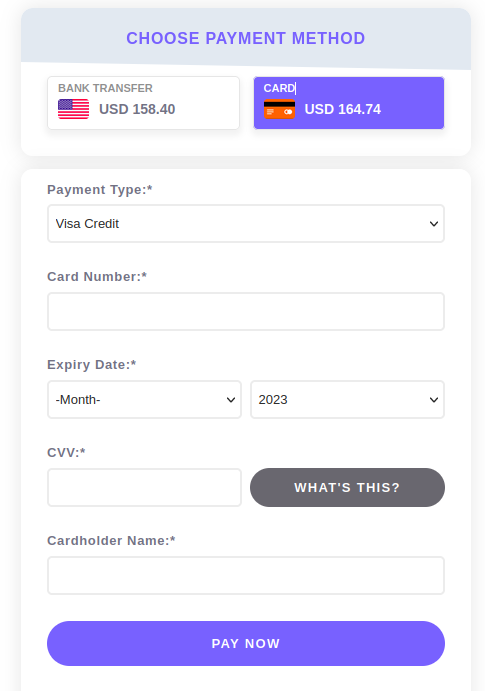
- This will take them to the payment page where they can complete the transaction. You can check the payment status on the Invoice dashboard.