Restaurant Menu Management
Restaurant staff can add a menu directly from the Quantic POS. The items can be added to any category from the POS screen without having to visit the backend portal. Also, the items can be enabled for some essential features such as track inventory, negative inventory, insufficient quantity alert, and enable on the web.
How to add restaurant menu items from the POS?
- Log in to the location’s POS app.
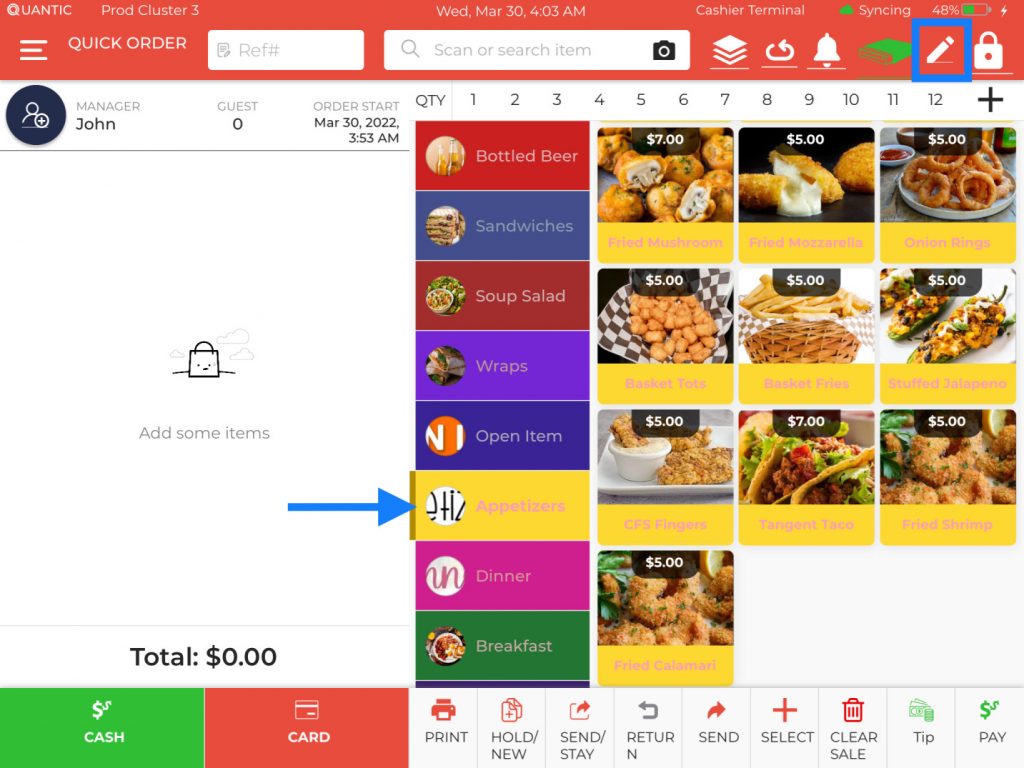
- Tap the category where you want to add items. For example, in this illustration, we want to add a new item – Demo Appetizers in the Appetizers category, so we tapped on the Appetizers category.
- Now tap the
icon in the top right corner.
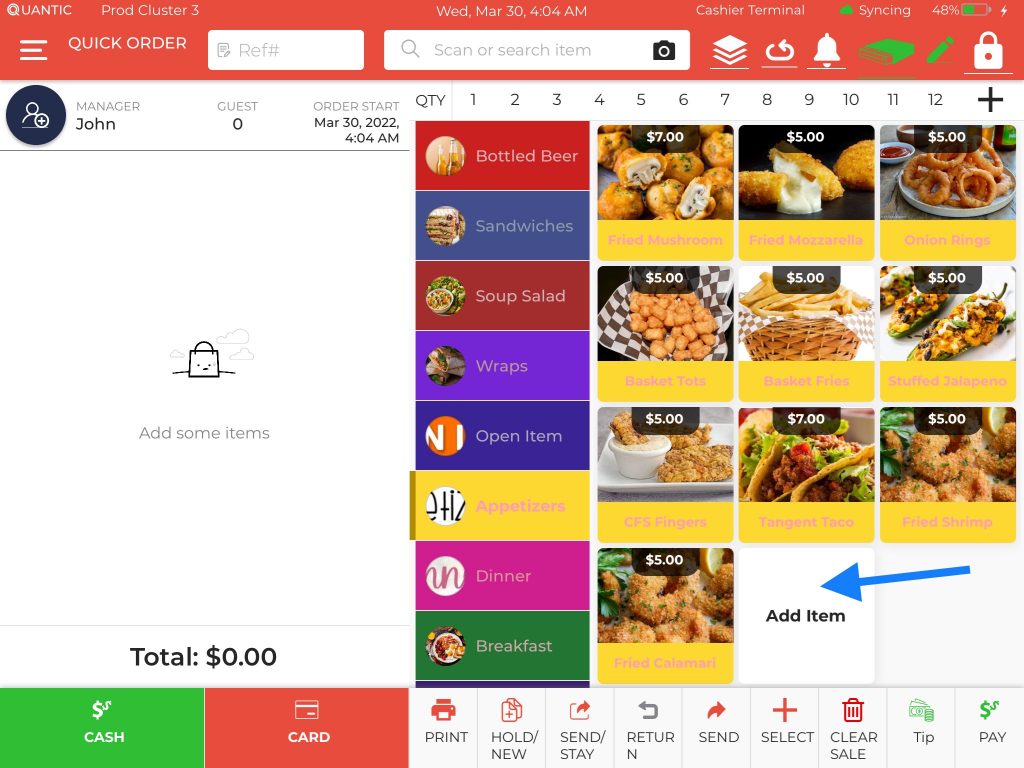
- A new block named Add Item will appear at the bottom.
- Now tap on the add Item block, a new window will appear where you can add the item details such as item name, price, etc.
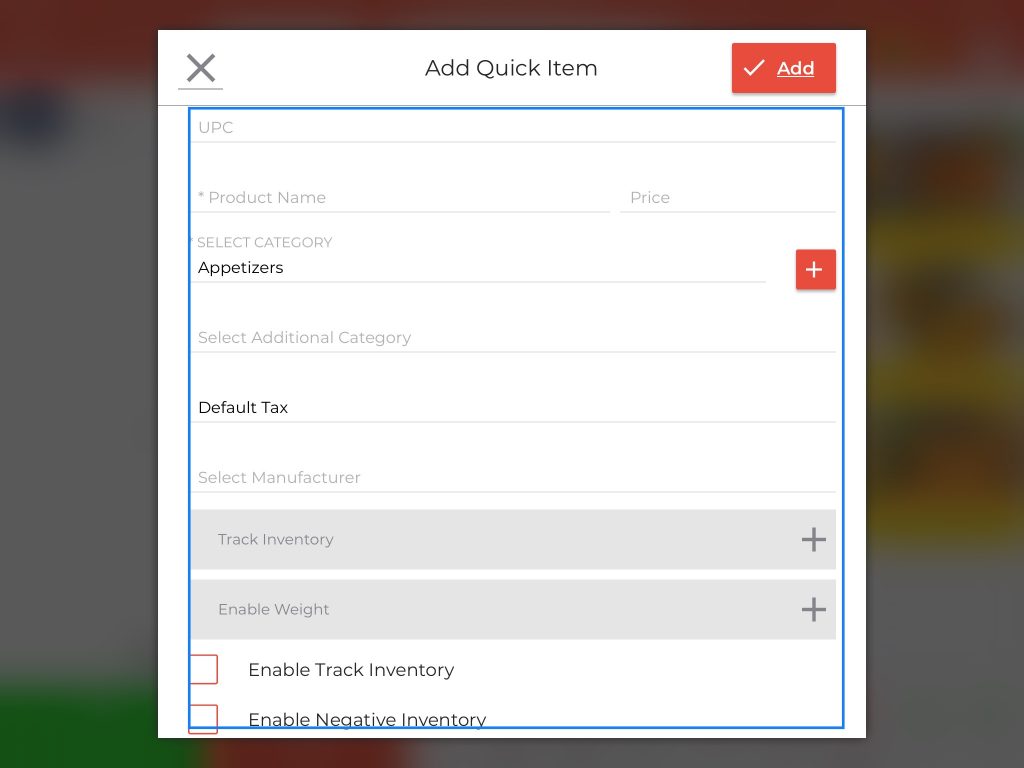
- The following are the details that need to be entered to add an item to the menu.
- UPC: Enter the Unique Product Code.
- Product Name: Enter the name of the product in this field.
- Price: Enter the selling price of the product. It shouldn’t include the taxes.
- Select Category: The item category will appear preselected in this field, though you can alter the category and supercategory by tapping the
icon.
- Select Additional Category: You can associate this item with additional categories. Tap the Select Additional Category field and choose the category from the drop-down.
- Tax Field: Select the tax category from the drop-down. The tax amount will be added to the final item price at the checkout.
- Select Manufacturer: You can choose the item manufacturer from the drop-down.
- Similarly, fill in the empty fields under Track Inventory and Enable Weight.
- The following are some additional features that you can enable or disable before saving an item.
- Enable Track Inventory: Enabling this feature will allow you to track the item inventory so that you can keep a tab on how much has been sold and how much is left in the store.
- Enable Negative Inventory: Enabling this feature will allow the item quantity to go negative.
- Enable Insufficient Quantity Alert: Enable this feature to get notified during the item quantity.
- Enable on Web: Enable this feature to allow an item to be sold on the location’s eCommerce platform.
9. Once done, please don’t forget to click the button to save the changes.
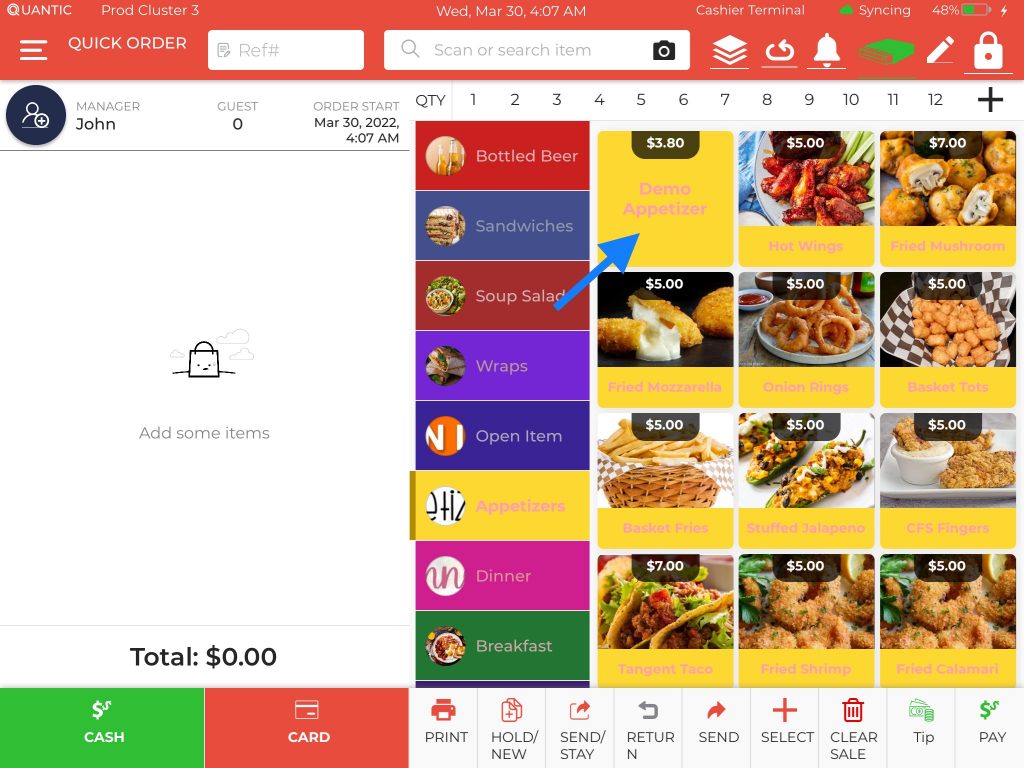
- Once the item is successfully added to the restaurant menu, it can be sold to the guests the same way you used to sell other items. This illustration shows the item that has been newly added to the Appetizers category. You can tap on the item to add it to the cart. Also, you can long-press on the item to do some basic modifications like set count, set an item out of stock, and print the label. Get on the Gift Cards module.
- However, there are some limitations in that you cannot add an item image and implement other advanced features on items from the POS. To customize the newly added item, you can navigate to the location’s backend portal, go to the Catalog on the left panel, search for the item under the Items tab and modify the item from there. Check the screenshot. Get on the Gift Cards module.
