Chowly integrates the third-party online ordering platforms such as Grubhub, UberEats, Doordash, and more with your restaurant’s point of sale (POS). This lowers staffing costs, increases revenue, and reduces errors making your customers happier so you can spend more time on your business and less time manually entering orders. Chowly allows you to display your restaurant menus on leading online platforms- Grubhub, UberEats, and Doordash, giving you an opportunity to grab the untapped market.
Integrate Quantic with Chowly
You can integrate Chowly with your Quantic account by following the steps given below. Subscribing to the Chowly module is the first step toward integrating Chowly with Quantic POS
- Navigate to the myquantic website (backend portal) and log in to it using your location’s username and password.
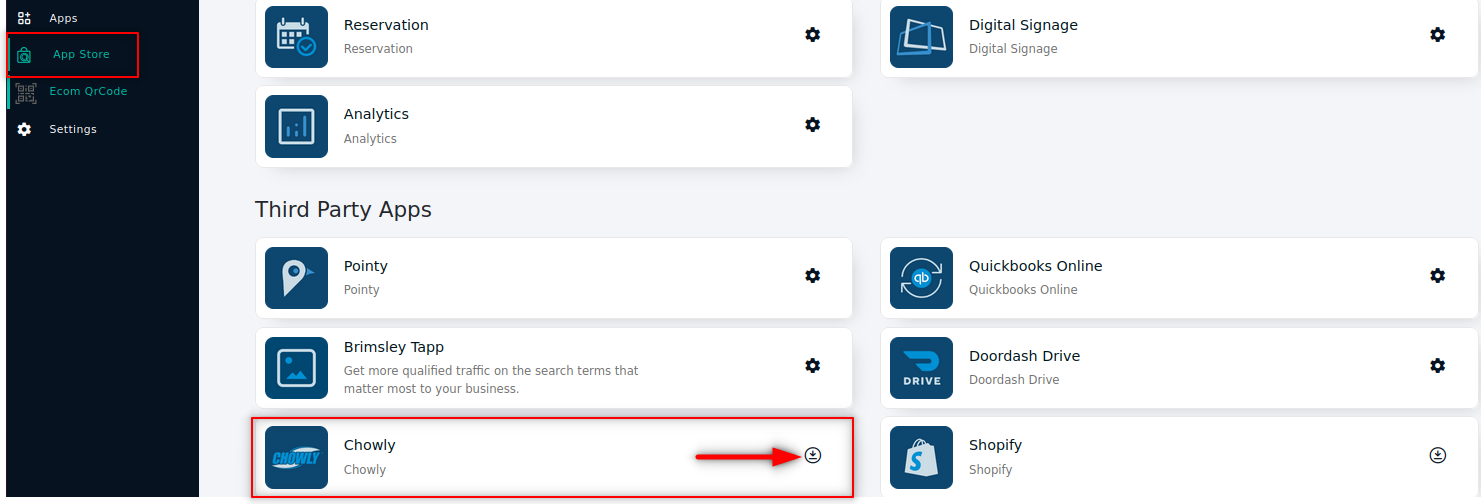
- Go to the left navigation panel and click App Store.
- Scroll down to the Third-Party Modules section, locate Chowly and click the Download icon next to it.
- Again click Get on the pop-up that appears on your screen.
- Now click Settings to start setting up Chowly.
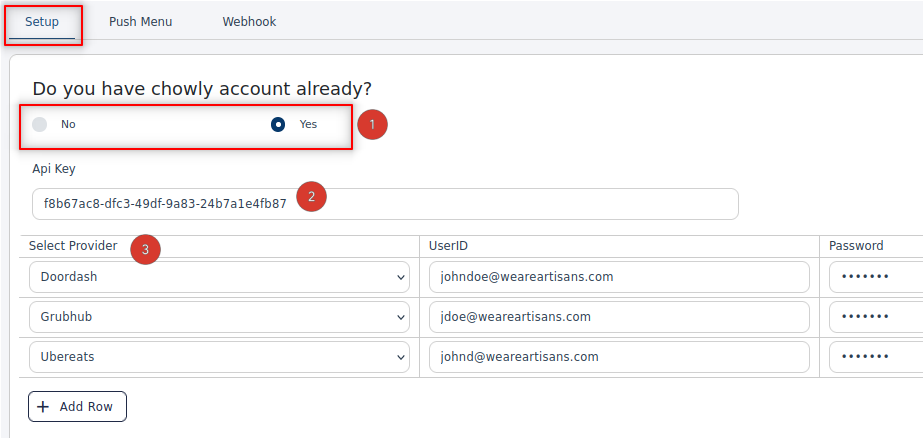
- Click the Setup tab and select Yes or No based on whether you have an account with Chowly or not.
- If you already have an account with Chowly, you may be prompted to provide the API key.
- Enter the API key in the field and select the online ordering providers from the Select Provider drop-down. Your menus will be displayed on the online platforms of these providers.
- If you do not have an account with Chowly, simply select No and fill in the details underneath.
- You may add more providers by clicking the
 button. Currently, you can add three providers- Doordash, Grubhub, and Ubereats.
 - Once you are done with settings, please click Submit to save the changes.
Enabling items for Chowly
Please make sure you have enabled the items for Chowly. You can enable Chowly for items from the backend portal. The below steps will walk you through the process of enabling the items for Chowly.
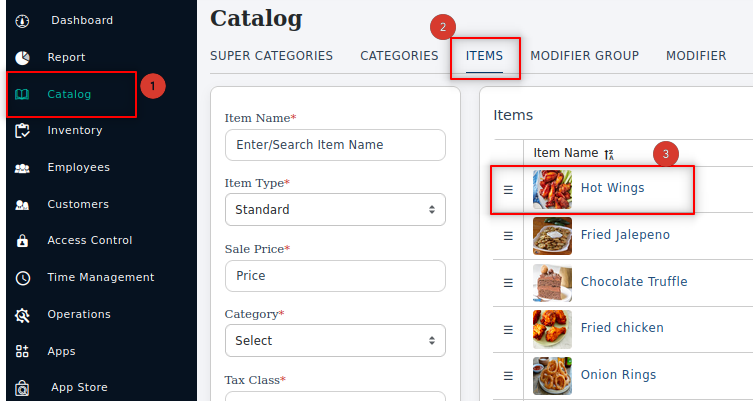
- Go to the Catalog section of the backend portal.
- Tap the Items tab, and select the item name that you want to display on the Chowly.
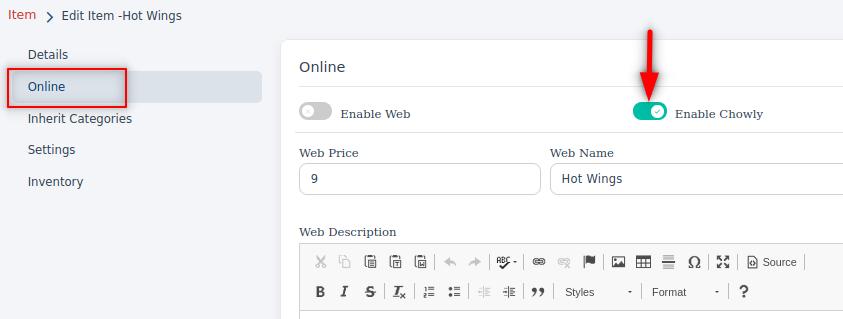
- Click the Online tab and tap
 underneath Enable Chowly, when it turns green
 it means this item is enabled for Chowly.
- Once done, click Save.
- Similarly, you can enable other items for Chowly.
Webhook Setup

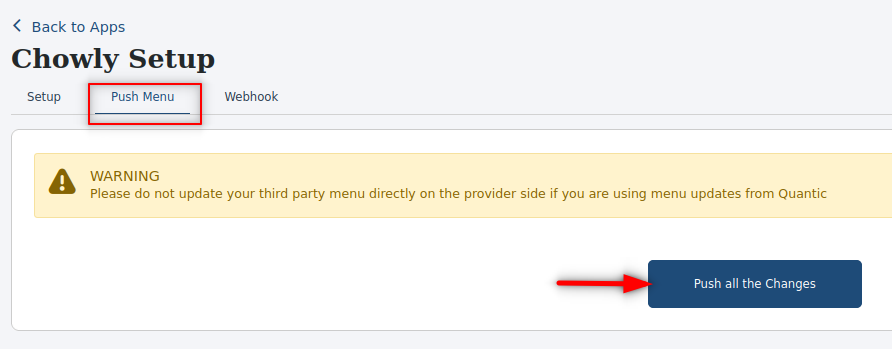
- In the end, go to the Webhook tab, copy the URL and forward it to Chowly to get the setup completed.
- Now you can exit the Chowly module and wait until the menu updates on Chowly.
Chowly Reports
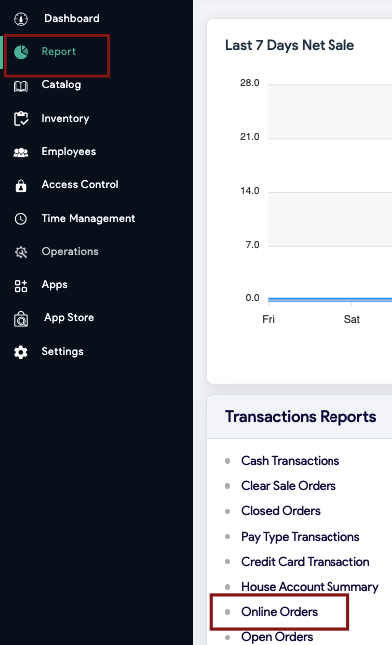
- Go to the Reports from the left navigation in the backend portal.
- Select Online Order under Transaction Reports.

- Now set the date range for which you want to see the Chowly order.
- Chowly orders can be identified with Chowly written under the Platform.
