How to Setup the Promotions/Happy Hours?
Restaurants can offer special promotions or discounts to guests for special events.
The promotional pricing can be applied to the entire group of items in the store.
Rather than changing the price of items individually, you can create a promotion rule that will apply to all the items in a category.
Also, you can apply the promotion rule to the individual items and set the start and end dates of the promotion rule.
Setup the Promotion Rule
You can customize the promotion rules here, such as the start and end date/time of the promotion, the price of the item during the promotional period, and whether the promotion should keep repeating without any end date.
For example, you can offer promotional prices for summer holidays, weekends, clearance sales, etc.
Below are the steps to set up the promotion rule in Quantic.
- Navigate to the Promotion in the left navigation menu.

- Select the Promotion Rule tab as shown in the screenshot.
- Click
 to create a new promotion rule.
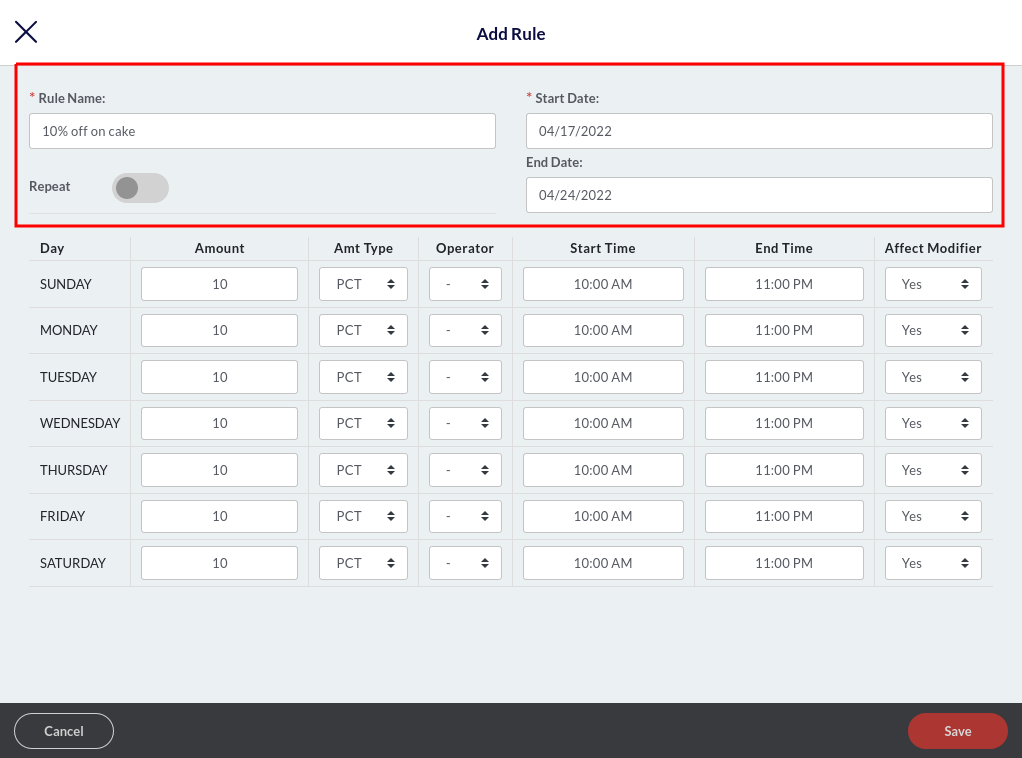
- A new window will appear here. You can create a new rule and customize it the way you want. Below are the descriptions.
- Rule name: Enter the name of the promotion rule such as 10% off on cakes, Happy Hours, Friday 20% off, etc.
- Start Date: Select the start date of this promotion rule. From this date onwards, the promotion rule can be applied to items. So if you select April/17/2022 as the start date, the promotion rule will come into effect from the 17th of April.
- End Date: Select the end date of this promotion rule. The promotion rule will end on this date. If you select April/24/2022 as the end date, this promotion will end on the 24th of April.
- Repeat: Tap the Repeat button if you want the promotion rule to keep repeating every day, without any end date. This will apply the same promotional price every day on the associated items.
So, for example, you want the “10% off on cake” promotion rule to be applied every Sunday from 10:00 am till 5:00 pm, here’s how you can do it.
Set the start date, tap the Repeat button to make it red
, enter 10 in the Amount section, set PCT in Amt Type and select (
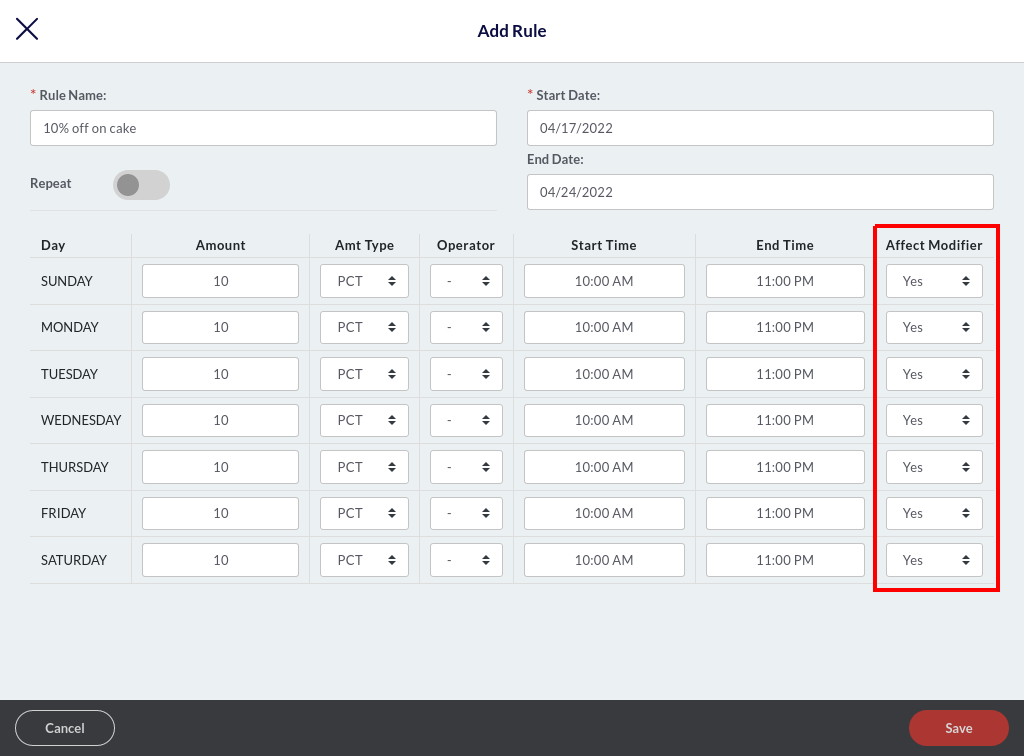
) in the Operator field. Now select the Start Time as 10:00 am and End Time as 5:00 pm. Select Yes in Affect Modifier if you want the discount to be applied on the modifier as well, select No, if you want the discount to be applicable on item price only (modifier excluded). Finally, click Save to save the changes.
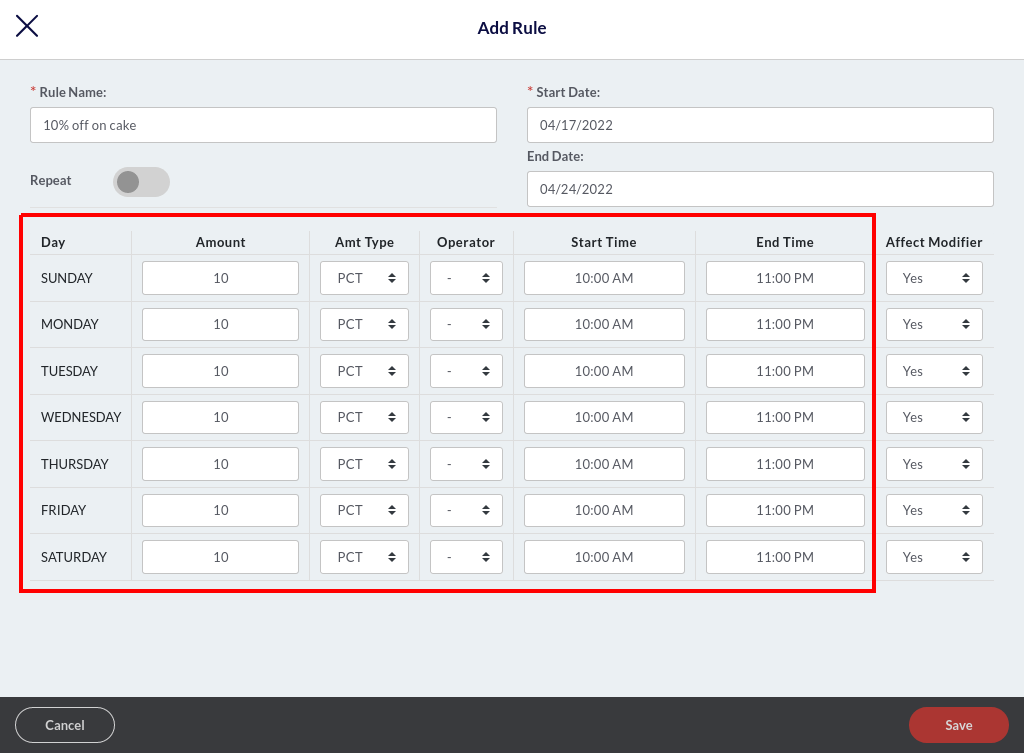
- Enter the amount next to the day. The amount should be in numbers. So, if you want to offer the 10% off on cakes, enter 10 next to Friday, select PCT (percent) in Amt Type, and select (
 ) in the Operator Type. Below are some important abbreviations to help set up the rules.
- PCT: Percentage%. For example, 10%.
- AMT: Amount. For example, $10.
- Operator (
 ): Apply this operator when you want to offer a discount. For example, to activate the 10% off on items, simply put 10 in Amount and () in Operator.
 - Operator (
 ): Apply this operator when you want to increase the price of items. For example, to raise the price of items by 10%, simply put 10 in Amount and () in Operator.
 - Operator (=): Apply this operator when you want to override the existing amount of the item. For example, if you put 10 in the Amount field and select (=) operator, the existing price of the associated item will be overridden to $10.
- Next, you should select the start and end time to choose the duration during which you want the promotion rule to remain in effect during the day. For example, you want the 10% off on cakes promotion rule to stay active between 10:00 am to 11:00 pm, so select 10:00 am as the Start Time and 11:00 PM as the End Time.
Note: Please note the promotion rule will only be applicable to the modifier when Amt Type is selected as PCT(%).
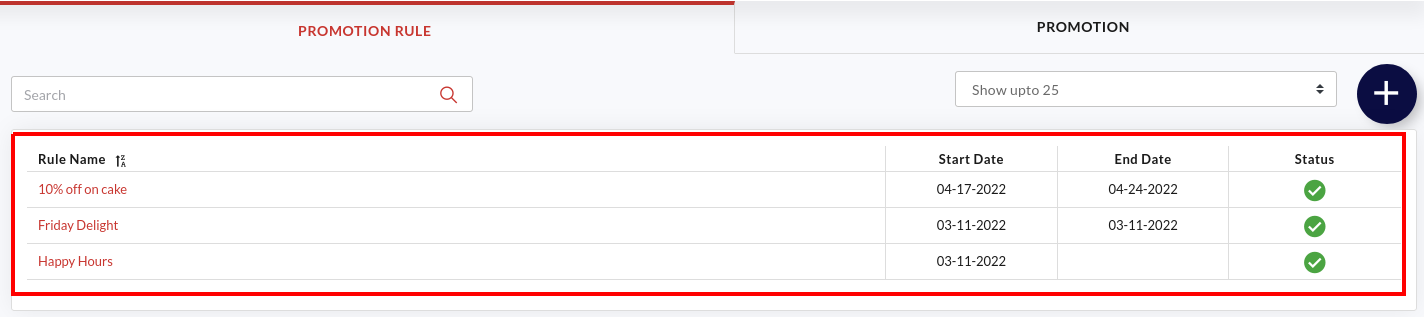
- The added promotion rules will appear under the Promotion Rule tab, as shown in the screenshot above.
- The Start and End Date will also appear next to the promotion rules.
- The
 under Status symbolizes the promotion rule is active and means a promotion rule is inactive. You can tap on the or to reverse the action
Setup the Promotion
Once you have set up the promotion rules, it’s time to create an event and associate a promotion rule with it.
This section will allow you to choose employees who can apply the promotion rule to an item and the service areas and terminals where the promotion rule can be applied.
For example, you have an Easter Event around the corner. And you want to offer 10% off on chocolate truffles.
Here is how you can do it: create a promotion rule called 10% off on chocolate truffles, create a promotion called the Easter Event, and associate the chocolate truffles item with the Easter Event.
Follow this path to associate an item with a specific promotion – Catalog > select chocolate truffles cake > Additional Settings > Enable Event.

- Tap the Promotion tab as shown in the screenshot above.
- Click
 to create a new promotion.
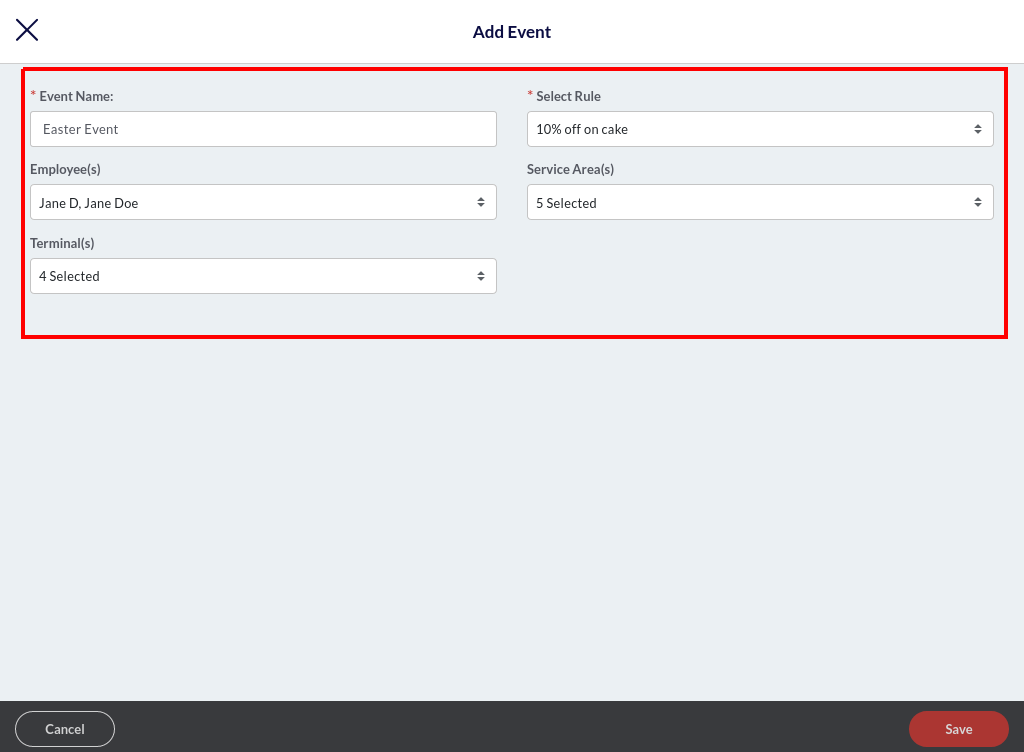
- A new window will appear, here you can create an event and customize it the way you want.
- Event Name: Enter the event name. For example, Easter Event.
- Select Rule: Tap this field and select the promotion rule from the drop-down. This will associate the event with the selected promotion rule, and the preset prices will apply during the promotional period. For example, you can select 10% off on cake promotional rules for the Easter Event.
- Employees: Select the employees to authorize them to apply this promotional price. Other employees won’t be able to apply the Promotion.
- Service Areas: Select the service areas where you want this promotion to be applicable.
- Terminals: Select the terminals where you want this promotion to be applicable.
- Once done, please click the Save button.

- The added events will appear under the Promotion tab as shown in the screenshot above.
- The under Status symbolizes the promotion rule is active and means a promotion rule is inactive. You can tap on the or to reverse the action.
Associate an Item with the Promotion
Once you have created the promotion and set up the rules, the next step is to associate the items with an apt event.
It allows you to offer the items as per the rules set in the promotional rule.
For example, you can set the chocolate truffle to be associated with the Easter Event (10% off promotion rule).
Note: You can also associate the entire category with a promotion. This will apply the promotion rule to all the items in that category.
To apply the category-level promotion, go to the Catalog > Category > select category from the list > Additional Settings and tap the checkbox next to the Enable Event.
Now select the event to be applied and click Save.
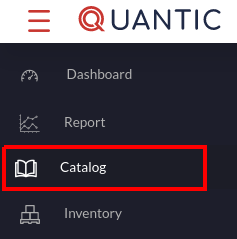
- Navigate to the Catalog section on the left panel.
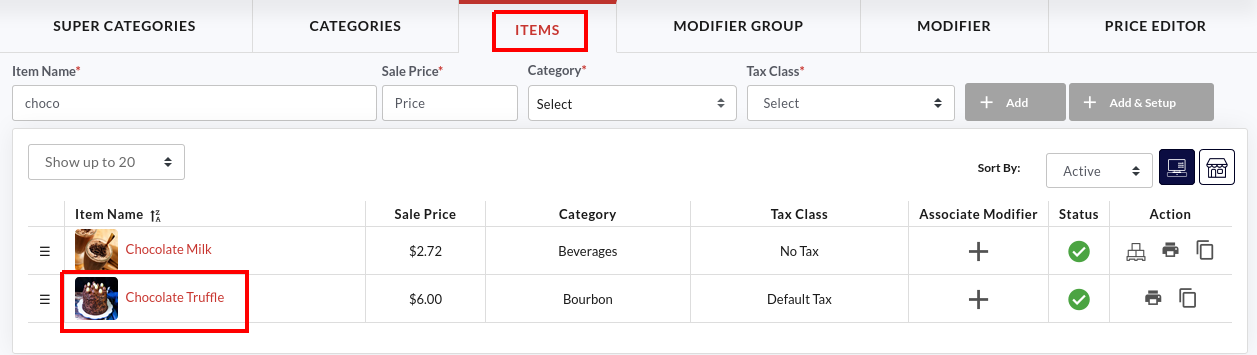
- Click the Items tab and tap on the item that you want to associate with an event.
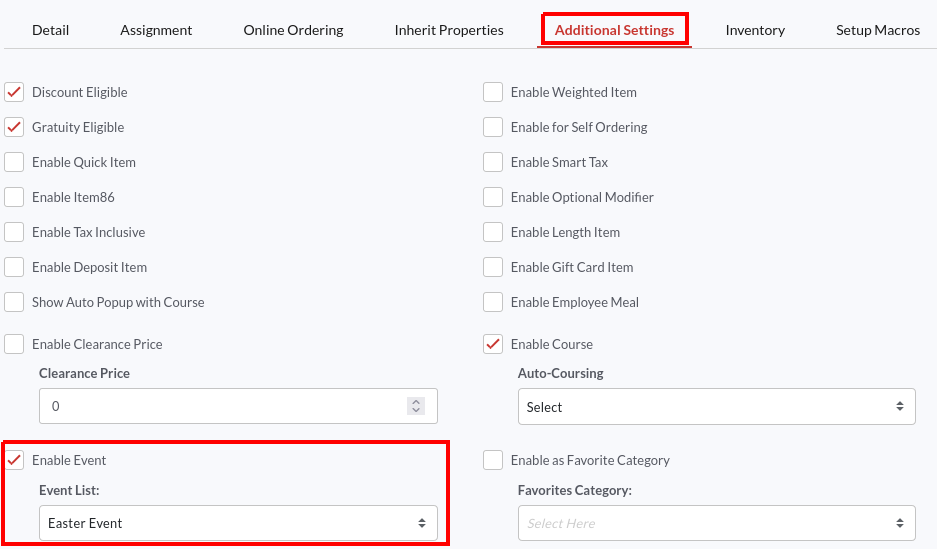
- Go to the Additional Settings tab, select the Enable Event option and select the promotion from the Event List. The preset rules of the promotion will be applicable to this item. In this example, we have associated the chocolate truffle cake with an Easter Event promotion, and during that period, the chocolate truffle cake will be offered at 10% less price.
- Once done, click Save.
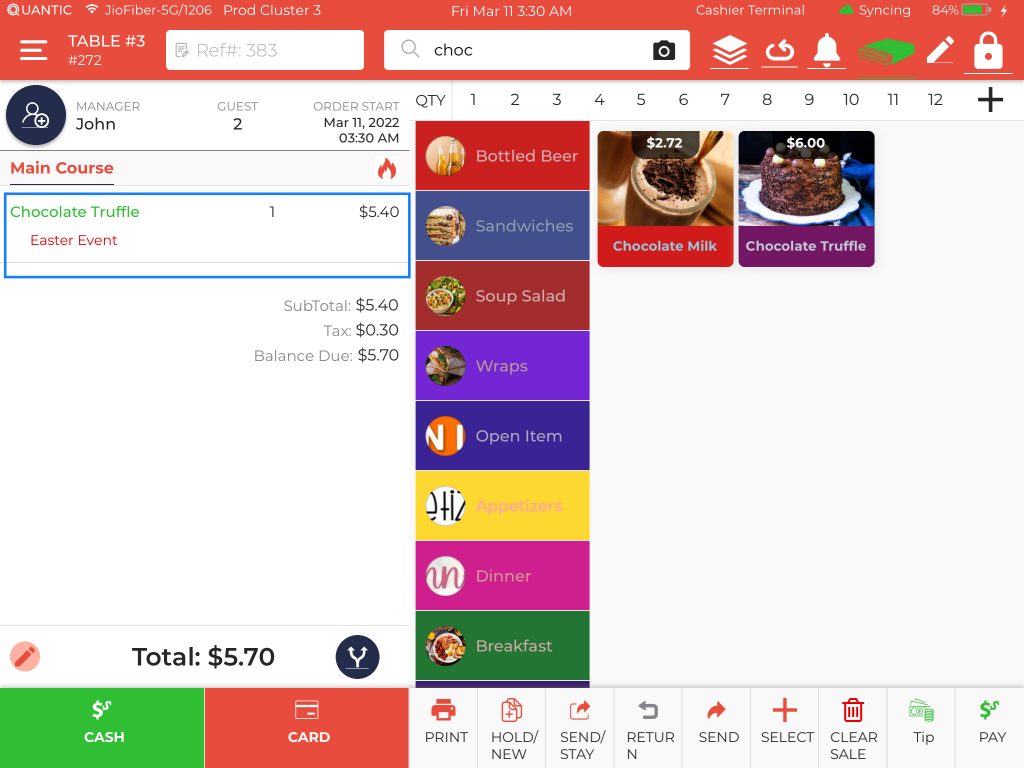
- Take a look at this POS screen, the chocolate truffle cake has been ordered during the Easter Event promotion period. The Easter Event name will be displayed at the bottom of the item on which it is applied. The revised item price will be displayed next to the item. Here, you can see the actual price of chocolate truffle cake was $6.00, but during the Easter Event (10% off on cakes), the new price comes out to be $5.40.
