eCommerce Enterprise
How to Enable the E-Commerce Enterprise?
E-Commerce Enterprise is built specifically for retailers.
It has to be subscribed to and set up from the Module section in the Quantic backend portal.
Here are the steps.
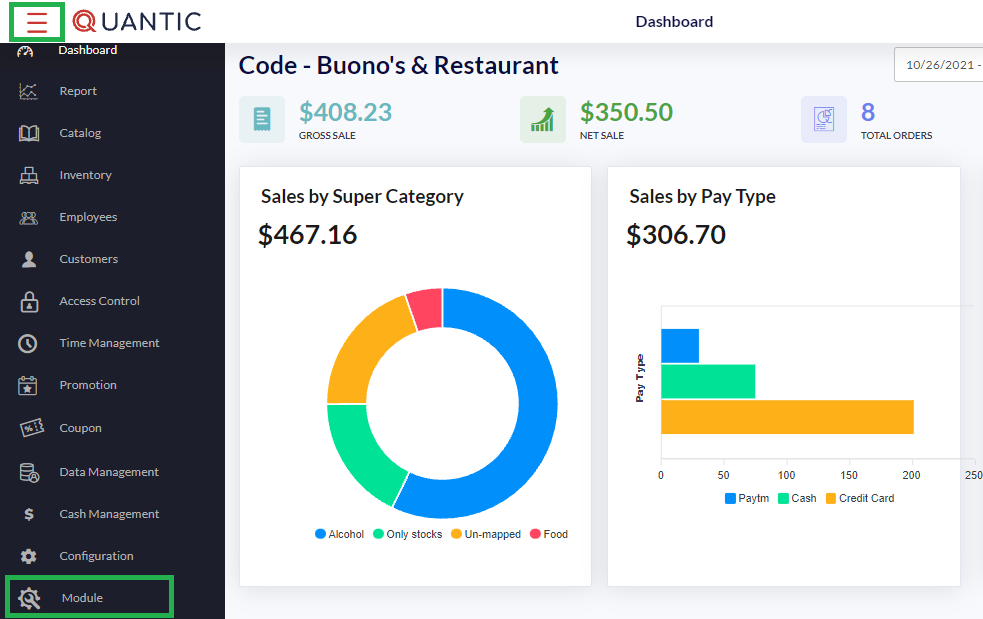
- Login to the Quantic back-end portal.
- Click the Hamburger button to open the left Navigation menu and click Module.
- Scroll down to locate the Quantic Modules section.
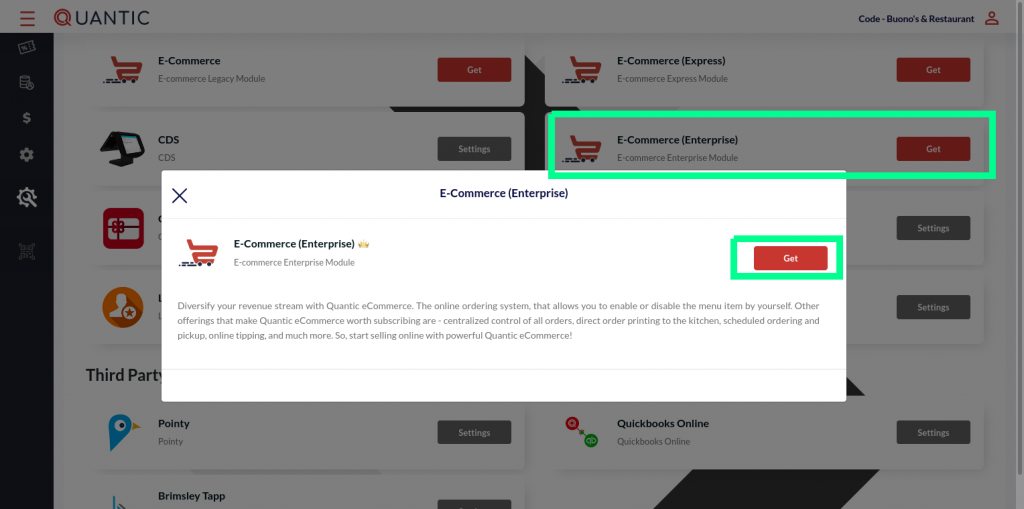
- Click the Get button on E-Commerce (Enterprise).
- A new pop-up appears; click Get again and click Settings to begin setting up your online ordering site.
Note: If you cannot see the E-commerce Enterprise module, click the Settings button on the E-commerce module you have subscribed to and click Unsubscribe on the next screen. This will enable you to see all the available E-commerce modules.
How to enable or disable the logo?
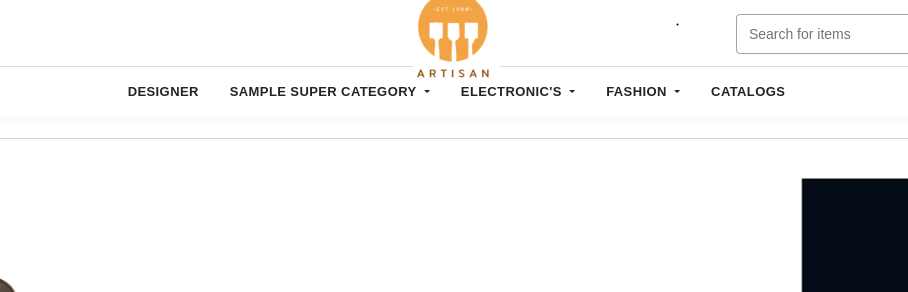
Real website example displaying the brand logo.
Your business logo will appear on the top, as shown here in the screenshot.
You can enable or disable the logo by following the steps given below.
- Make sure you have subscribed to the eCommerce Enterprise module.
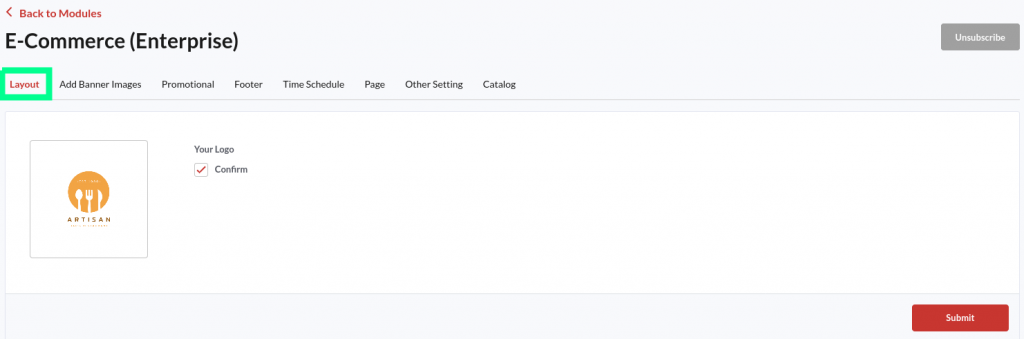
- Now click the Layout tab as shown in the screenshot.
- Tap the checkbox adjacent to the logo to add it to your e-commerce website. Leave it unchecked if you want to disable the logo.
- Once done, click Submit.
Note: To change the logo, navigate to the backend portal dashboard, go to the left menu > Configuration > Setup > General Information.
How to create a banner?
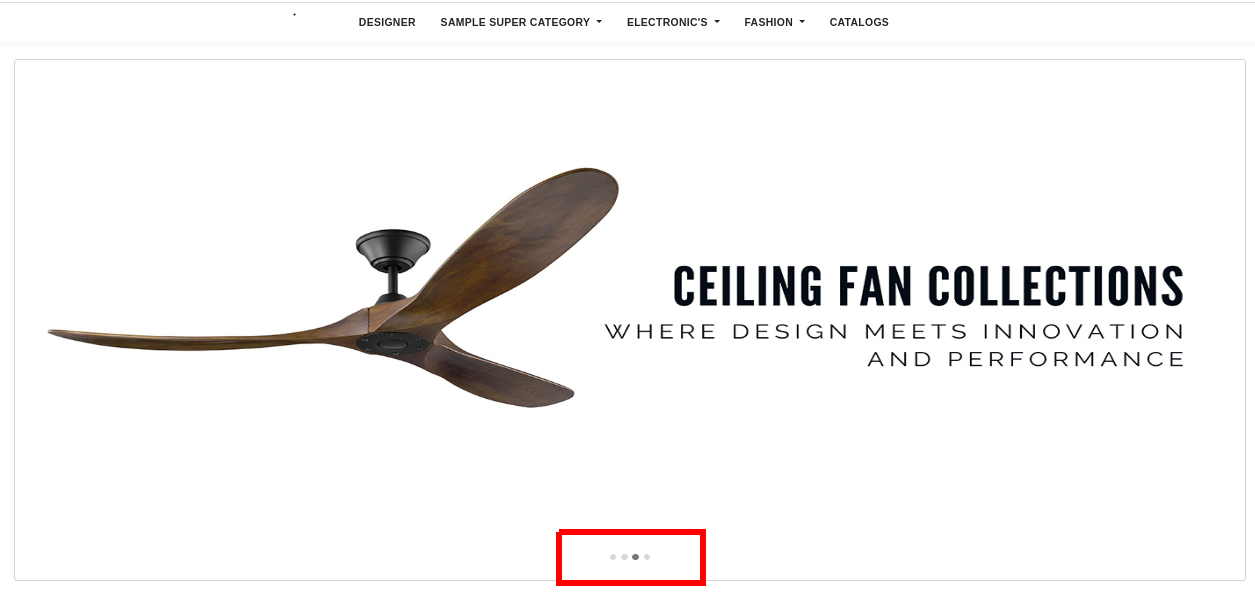
Real website example displaying the carousel banner.
You can run the slideshow of important pages on top of your website.
Those are the clickable banners that can be linked to the custom pages or existing categories, items, or super categories.
Check out the screengrab above to see how a typical carousel banner appears.
A carousel is a set of rotating banners that display on your store’s homepage.
Here are the steps to set up a carousel banner, add images, and redirect the banners to another link.
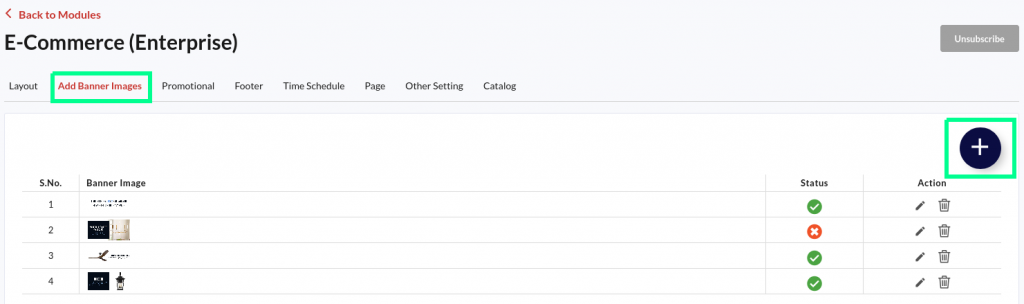
- Click the Add Banner Images tab.
- The already added banners will display in the list.
- Click
 to add a new banner.
Note: The disabled and enabled banners are displayed by ![]() and
and ![]() icons respectively. You can tap on them to reverse the action. To edit a banner, click
icons respectively. You can tap on them to reverse the action. To edit a banner, click ![]() and click
and click ![]() to delete a banner.
to delete a banner.
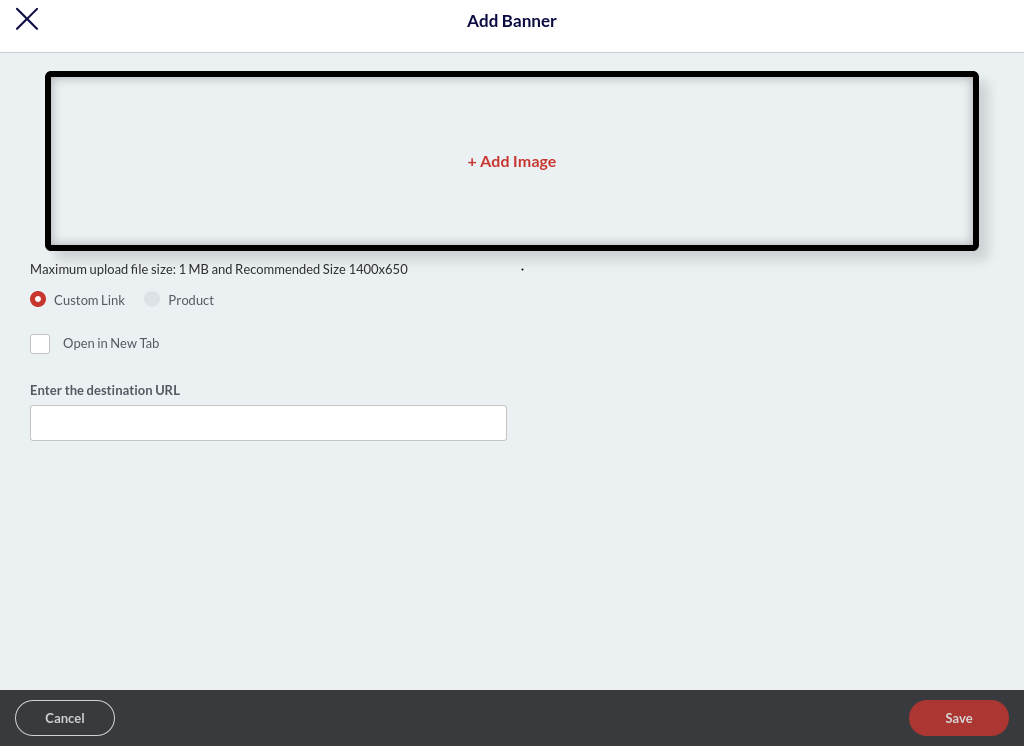
- Click ➕Add Image to add an image to the banner. You will need to choose the image from your system location. The recommended image size is 1400 x 650 and the max upload file size should be 1 MB.
Redirecting the banner to a custom link
Now that you have added an image to the banner, you can add a link to it as well, so that when visitors click on the banner image, they will be redirected to a new page.
Here are the steps that you can follow to redirect a banner to any custom link.
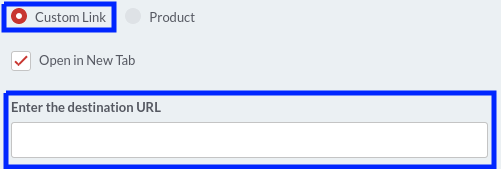
- Click the Custom Link button as shown in the screenshot.
- Now, enter the destination URL to which you want to redirect a visitor when they click on this banner.
- Click Open in New Tab if you want the link to open in a new window.
- Once done, click Save.
Redirecting the banner to a product/category
You can also redirect the banner to the existing product or category.
It allows your visitors to take a look and buy the products or services you are offering.
Check the steps to set up this process.
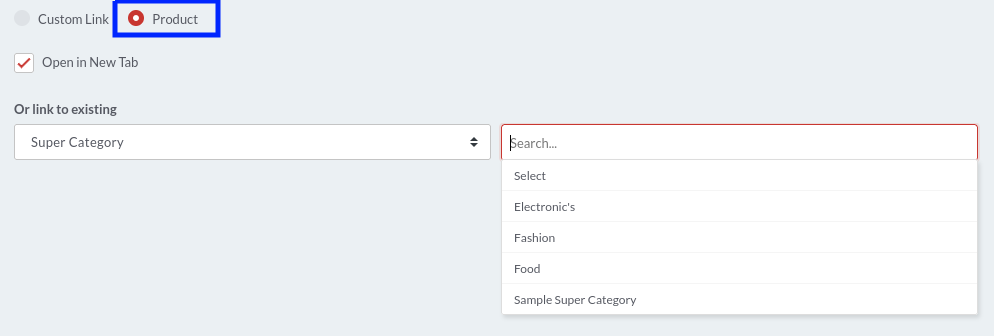
- Click the Product button as shown in the screengrab.
- Click Open in New Tab if you want the link to open in a new window.

- Tap on the first field under “Or link to existing” and select the option with which you want to associate the banner. Those options are Super category, Category, or Item.
- Now tap on the second field to select the option based on the selection you have made in the first field. So, if you have chosen the items in the field, the list of items will open the second field.
Note: To alter the super-categories, categories, or items, go to the Catalog in your Quantic backend portal.
Click Here to learn the detailed steps on how to add a super-category, category, or item.
How to add a promotional banner?
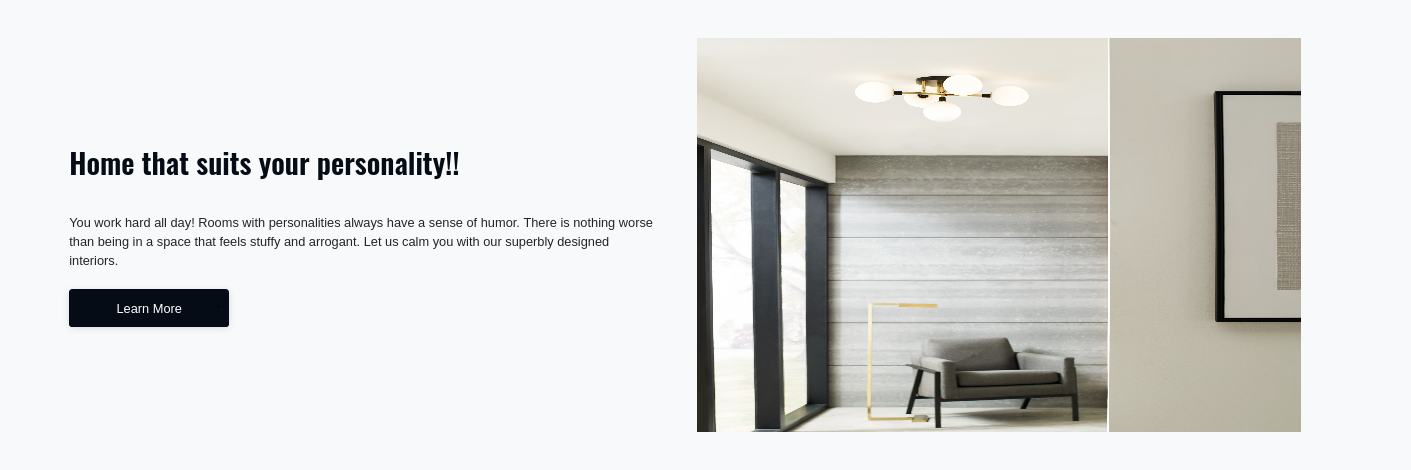
Real website example displaying the Promotional Banner.
Highlight the promotional stuff through banners on your website and let your visitors know more by adding a Learn More button.
You can embed a link on the Learn More button by adding a URL.
This promotional banner will be located at the center of your website as shown in the screenshot.
Below is the complete set of instructions to add a promotional banner to your website.
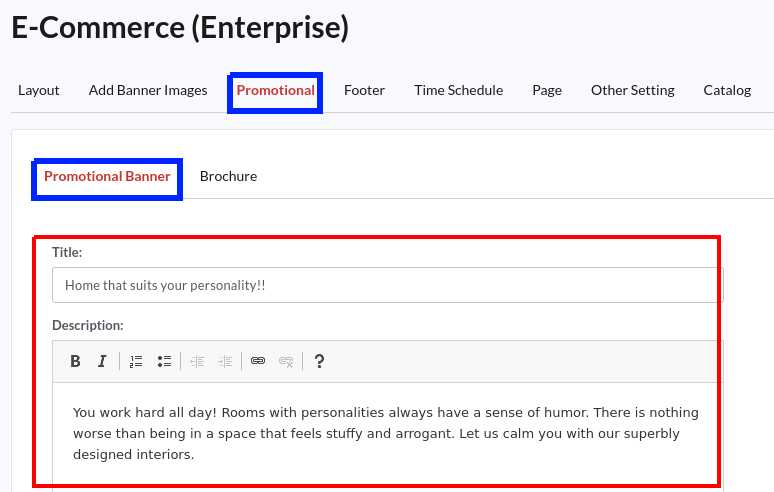
- Click the Promotional tab.
- To add a promotional banner:
- Click the Promotional Banner tab.
- Enter the title for the promotional banner in the Title field. It will be displayed big and bold on the promotional banner.
- Enter the description in the Description field. It will appear underneath the title on the website. In the description field, you can write any important promotional message.

- Under the Image field, you can upload an image from your system location.
- Insert a URL in the Link section that you would like to associate with the Learn More (click-to-action) button. Users will be redirected to this link when they click Learn More under the promotional banner.
How to add a brochure?
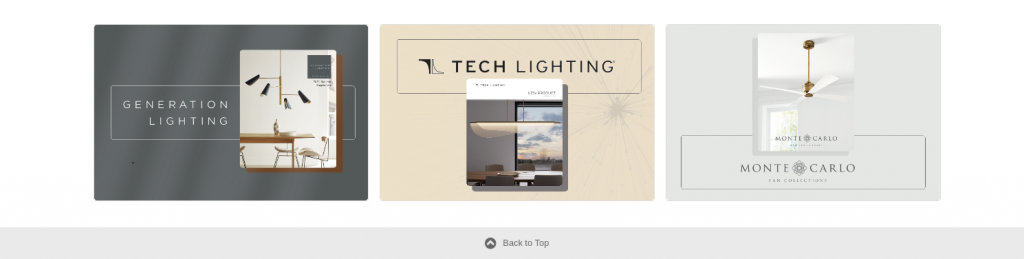
Real website example displaying the Brochure.
Brochures are a great way to advertise your products and services on a single piece of paper.
With Quantic’s eCommerce Express module, you can place the brochures categorically at the end of your website (check the screenshot).
The visitors can click on any of the brochures to view the products in a bit of detail.
The following section explains how you can add a brochure to your website.
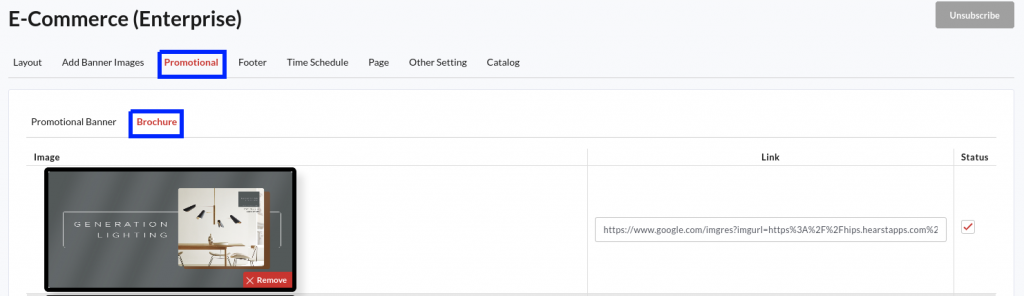
- To add a brochure.
- Click the Brochure tab.
- Click the ➕Add Image on the box to add a new image for the brochure. The recommended image size is 750 x 450.
- Insert a brochure URL in the Link section. The URL will be associated with the images. Guests will be redirected to this link when they click the image.
- You can enable or disable any brochure by selecting or deselecting the checkbox in the Status column.
- Once done, click the Submit button.
How to create a page and add it to the Footer?
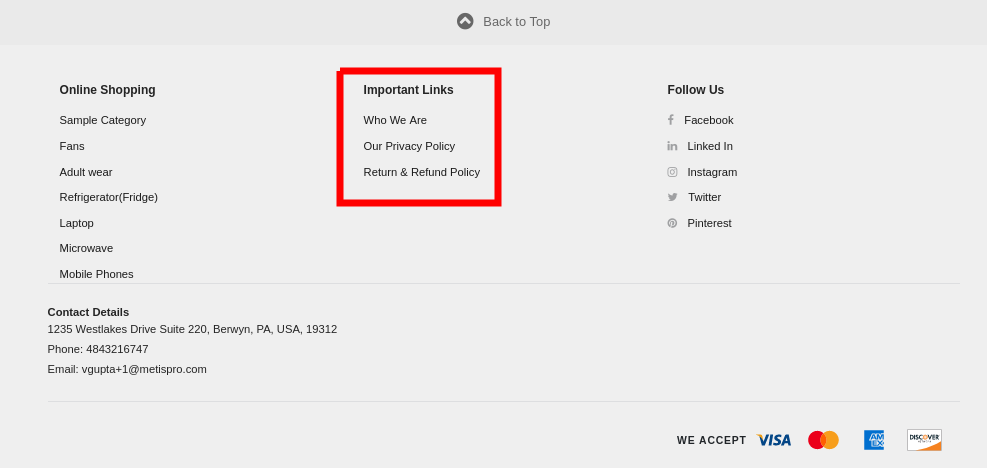
Real website example displaying the Important Links at the Footer
The footer is an essential part of your eCommerce website where you can add the essential navigation links to make it easy for your visitors to explore your site better without going back up.
At the footer, you can add some important links such as About Us, Contact Us, Privacy Policy, or whatever you think is important for the users to know about.
Check the screenshot above, here you can see the pages being added under the “important link” tab at the footer.
Create a page

- First of all, you need to add a page to the eCommerce Enterprise module. Open the module as shown in the illustration and click the Page tab.
- Click to add a new field.
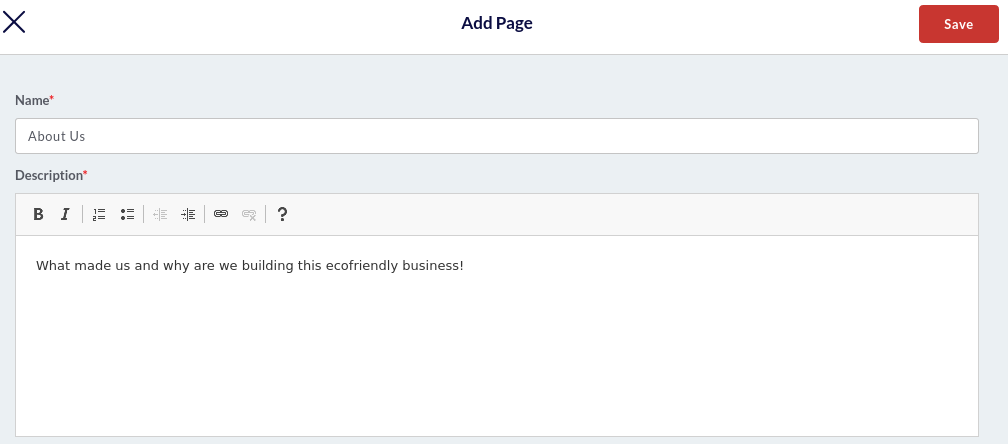
- Enter the name of the page you want to add in the Name field.
- Write a page description and click Save.
- Now revisit the page section to review the pages you have just created.
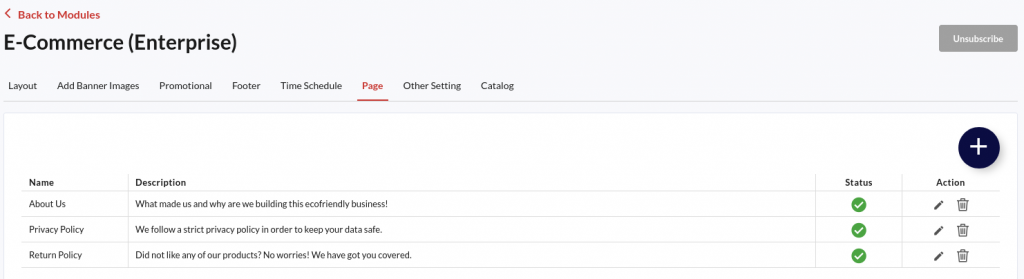
- For example, here we have created the About Us, Return Policy, and Privacy Policy pages.
- The Status column shows the activated
 and deactivated
  pages. You can tap on the and buttons to reverse the action.
 - Also, under the Action column, click
 to edit the page and click
 to delete it at any time.
Adding pages to the footer
Once you have created the page, it’s time to add it to the footer. Below are the steps to do that
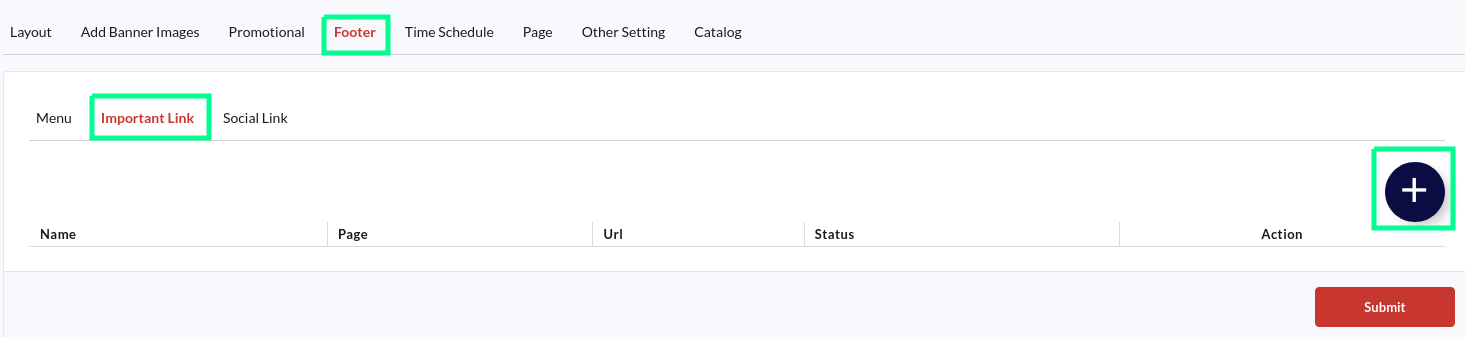
- Go to the Footer tab as shown above.
- Click the Important link tab.
- Now click the
 button to add a new field.
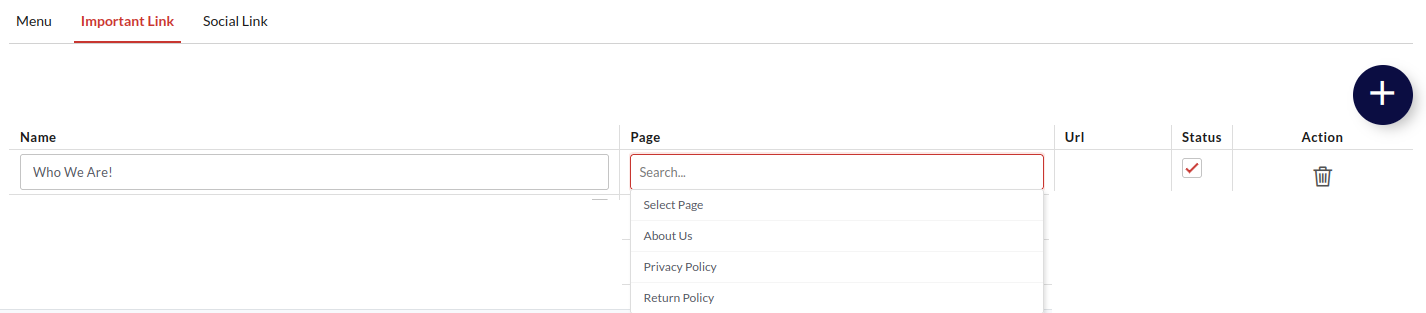
- Select the page from the drop-down, enter the name you want to display on the footer for the chosen page, and ✔️ mark the checkbox in Status to activate it.
- To add more links to the footer, repeat steps 3 and 4.
- Once done, click Save at the bottom right corner.
Alternatively, you can link the page on the footer to any URL as well.
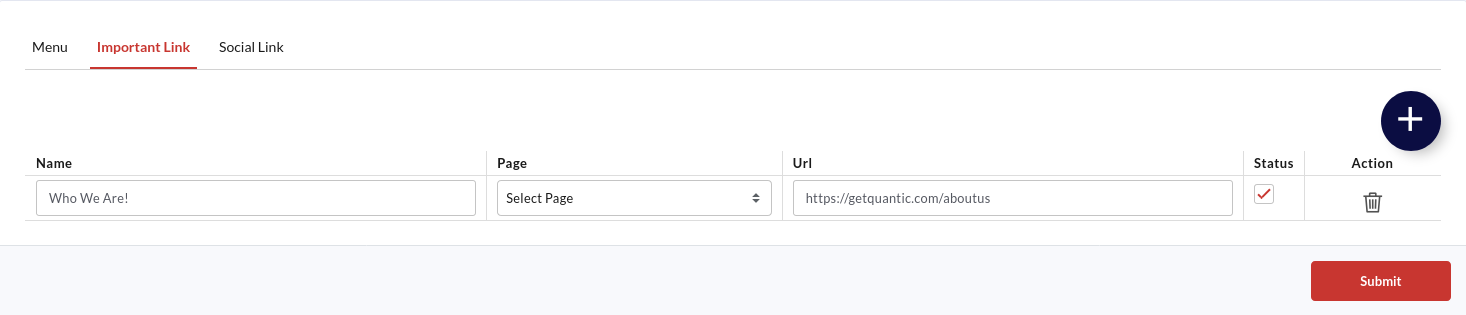
- Just paste the URL in the URL field, enter the page’s name in the Name field and click Save at the bottom right corner. If you have a URL, you don’t have to select the page.
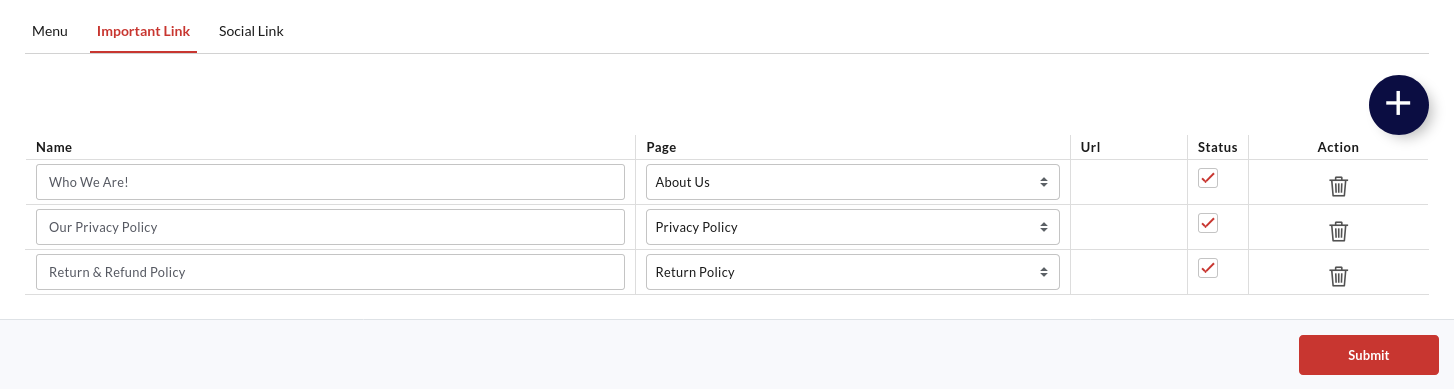
In this example, we have created three important links and associated them with the pages. If you want to delete any of the links, click ![]() adjacent to that link and click the Submit button to confirm the selection.
adjacent to that link and click the Submit button to confirm the selection.
How to display the top-selling categories at the footer?
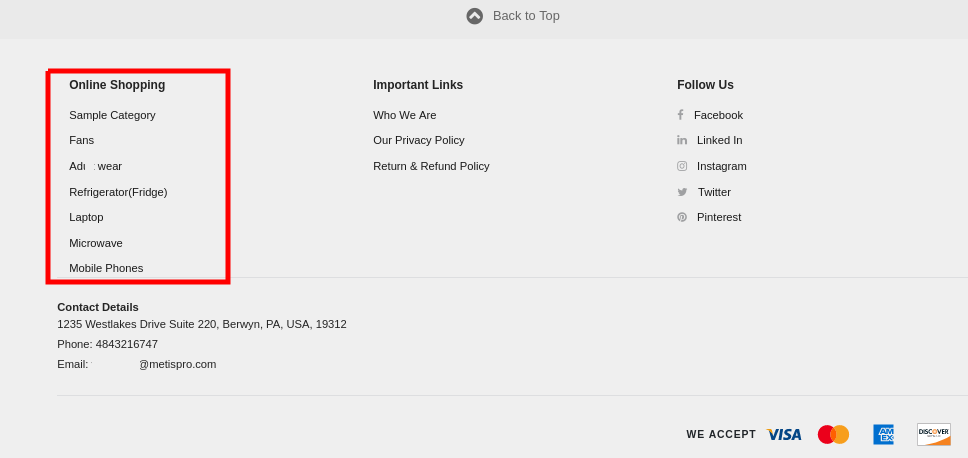
Real website example displaying the Top Selling categories at the Footer.
At the footer, you can also display the top revenue-generating categories, on which the visitors can click and navigate through a wide range of products.
These categories are displayed under the “Online Shopping” link as shown in the screenshot.
Check out the steps below to learn how to add these categories to the footer.
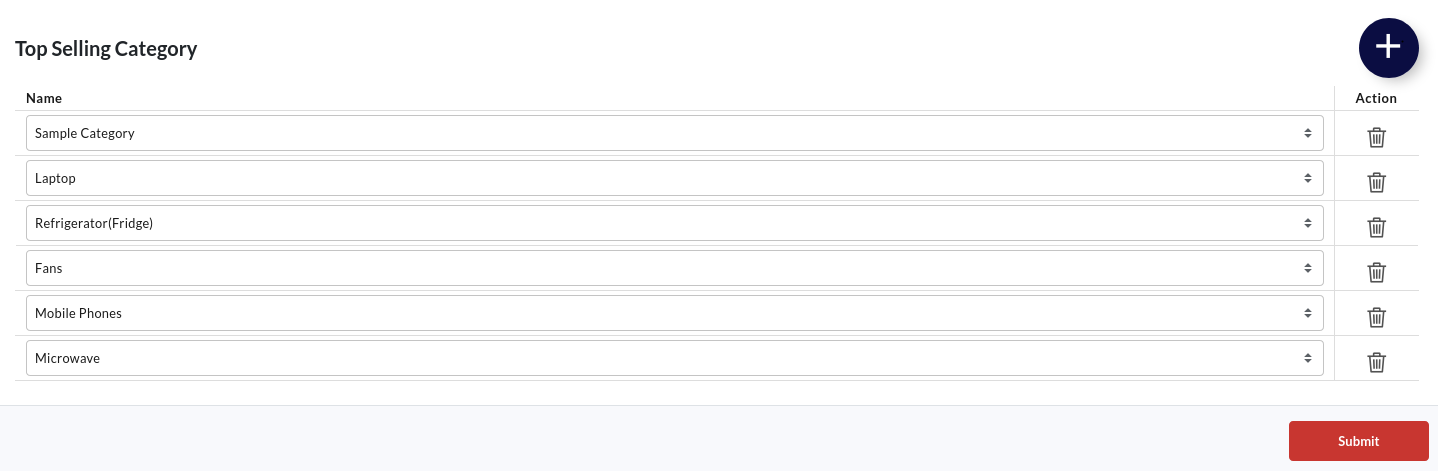
- Go to the Footer tab and click Menu tab.
- Scroll down to the Top Selling Category and click . A new field will be added under the top-selling category field.
- Tap on the field under Name and select the category that you want to display at the footer.
- Click Submit to save the settings.
How to add business details at the footer?
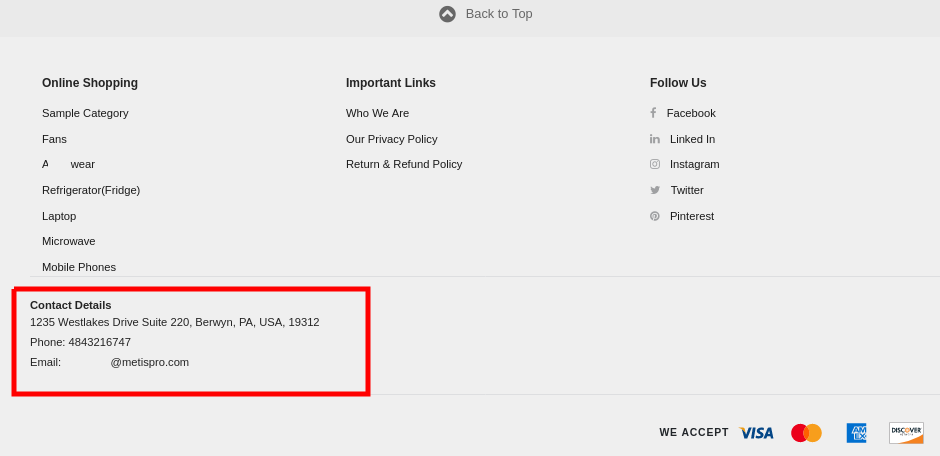
Real website example displaying the Business details at the Footer.
On the footer, you can also add business-related information such as email, phone number, and address.
Here is how you, too, can add your business details to the website footer.

- Click the Footer tab.
- Click Menu and perform the following actions.
- Tap the toggle switch adjacent to Enable Email and enter the email in the blank field underneath the Enable Email.
- Tap the toggle switch adjacent to the Enable Phone and enter the phone number in the blank field that just appeared.
- Tap the toggle switch adjacent to the Enable Address and enter the business address in the blank field.
How to show the accepted payment methods at the footer?

Real website example displaying the Accepted Payment Methods at the Footer
You can show the accepted payment methods at the bottom of your website.
Check out the screengrab to view how this section looks.
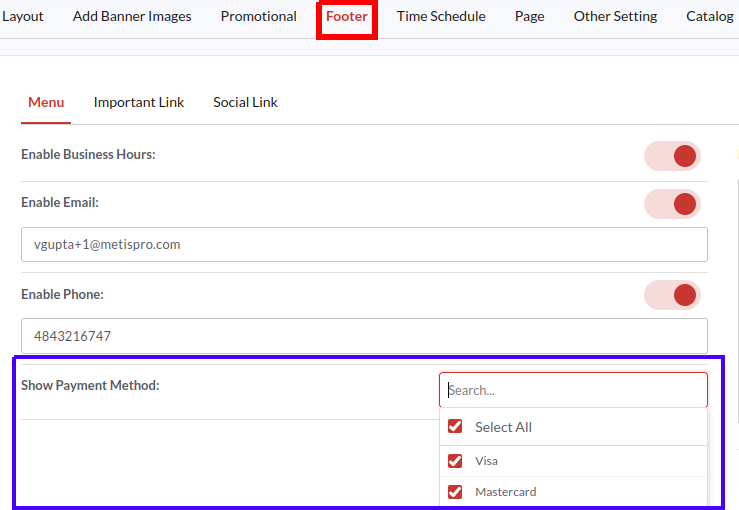
- Go to the Footer tab.
- Click Menu as shown in the screenshot.
- Click the drop-down field next to the Show Payment Method and select the accepted payment methods to show at the bottom of the website. If you want to display all of them, tap on Select All.
- Click Submit to save the settings.
How to display the social media links at the footer?
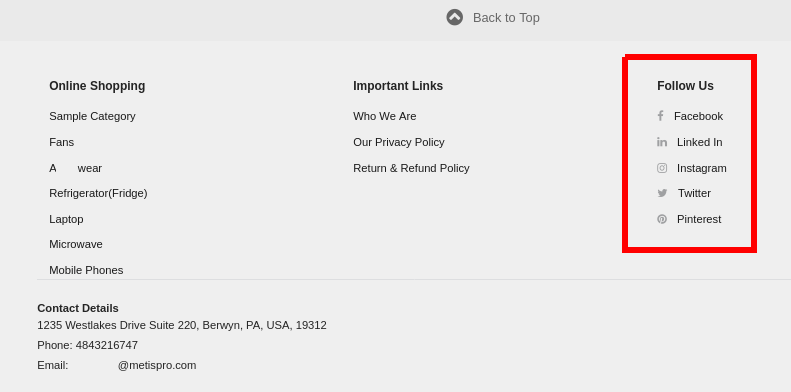
Real website example displaying the Social Media links at the Footer
In addition, you can increase your reach by including the social networking links- Facebook, Insta, LinkedIn, Pinterest, etc. at the website footer.
Here are the detailed steps on how you can do that.

- You can add the social media handles of your business in the Social Link tab. It allows you to increase your outreach by connecting the potential customers on social media. Following are the steps through which you can add social media links at the footer of your website.
- Go to the Footer tab.
- Click the Social Link tab as shown in the screengrab.
- Put the name of the social media handle or write it as it is and put the URL. To copy the URL of the social media handle, go to the social media website (make sure you are logged in to your social media channel), select the link from the top URL, copy it, and paste in the blank field under the URL as shown in the screenshot.
- ✔️ mark the checkbox in Status to activate the social media page.
- Once done, click Submit.
How to set up the Business Hours?
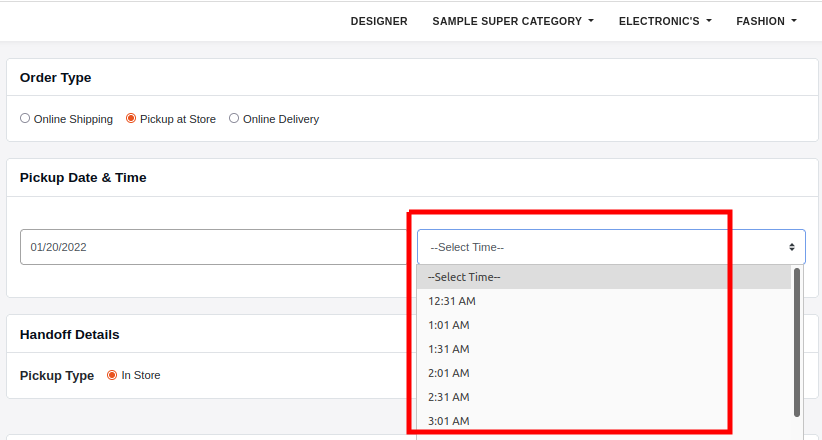
Real website example displaying the business hours.
Setting up the business hours comes in handy when we want to display the permitted time range for the order pickup from the store.
The above screengrab shows the order pick-up time on the eCommerce store that a customer can choose at their convenience.
Below are the steps to help you learn how you can set the business hours from the Quantic eCommerce Enterprise module.
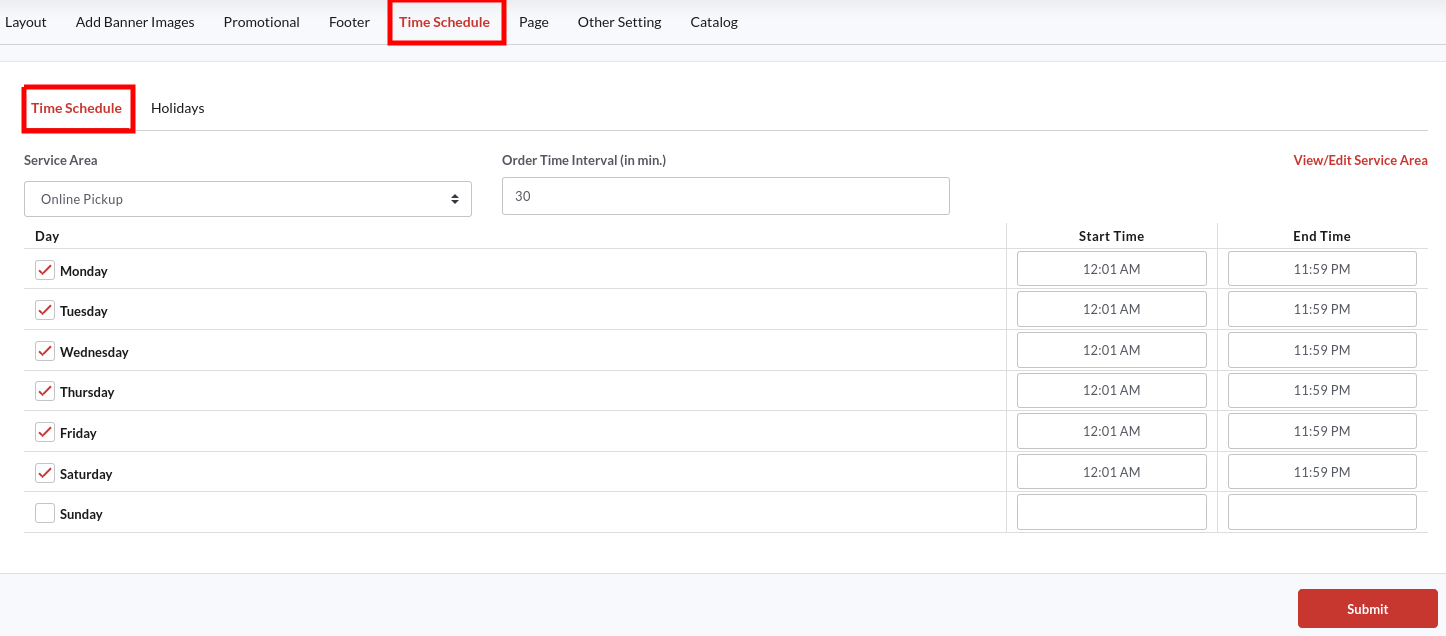
- Go to the Time Schedule tab and proceed with the following steps.
- Click the Service Area drop-down, here you can select the service area for which you want to set up the time schedule. If you are not able to see the Service Area in the drop-down, make sure to enable the Enable Online option from the service area configuration. To enable it, you can simply click the View/Edit Service Area, you will be redirected to the Service Area Configurations section,
- Order Time Interval: Here, you can set the time interval (in minutes) for order pickup.
- So, if you’ve set the order time interval as 30 minutes and if one order picks up at 6:30 am, the next available time to pick up the next order will be 30 minutes later, i.e. at 7:00 am.
- Day: It shows all seven days of a week. You can set the store’s time schedule for every day from this section.
- Enter your store’s Start Time and End Time for that day using the time picker.
- Uncheck the box adjacent to a day to disable orders for that day and checkmark the box to show you are open the day.
- Once done, click Submit to save the settings.
How to set up the holiday closures?
Holiday closure lets your customers know when you are open or close for the business.
Here are the steps to set up the holiday closures.

- Navigate to the Time Schedule tab and tap the Holidays tab as shown in the screengrab.
- Click the button to add a holiday closure day. A new row will appear, here you’ll need to fill in the relevant information.
- Name: Enter the occasion.
- Start Date and End Date: Select the start date and end date using the date picker.
- Start Time and End Time: Select the start time and end time using the time picker.
- Status: Check the box if you want to activate the holiday for this occasion or uncheck if you want to deactivate it.
- : Click the bin icon to delete the holiday.
- Repeat all the above steps to add a new holiday closure.
- Once done, click Submit.
How to add a catalog?
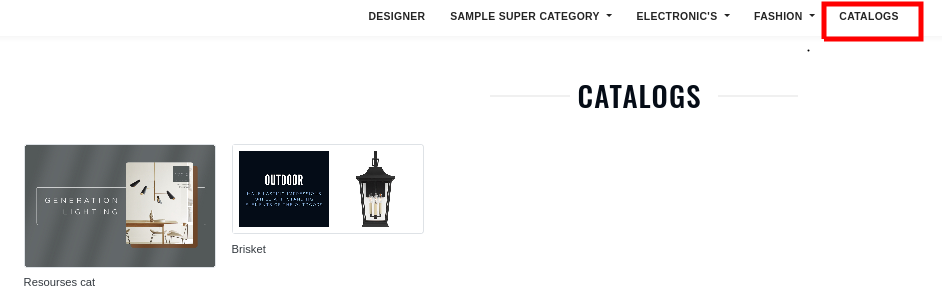
Real website example displaying the Catalog.
The catalog you add is displayed on the main menu of your website, as shown in the screenshot.
The catalog section has all resources that customers can take a glance at and see in detail what you have in store for them.
Including a catalog on the website allows you to showcase what you have in the store in a more appealing way to the customers.
Here are the detailed steps on how to add a catalog to your website.

- Go to the Catalog section on the eCommerce Enterprise module.
- The list of existing catalogs will appear on the screen.
- Click to start adding a new catalog.

- Select the type from the drop-down.
- Enter the name you want to display for the catalog or resources.
- Enter the catalog link in the blank field under the Catalog Link.
- Add a cover image by clicking the ➕Add Image button and selecting the image from the system location.
- Once done, click Save at the bottom right corner.
How to add a background image in the newsletter subscription section?

Real website example displaying the newsletter subscription section.
This screenshot displays the default background of an email subscription section.
The following steps can be implemented to change the background image.
Note: The default image (as shown in the example) will display if you do not add any subscription background.
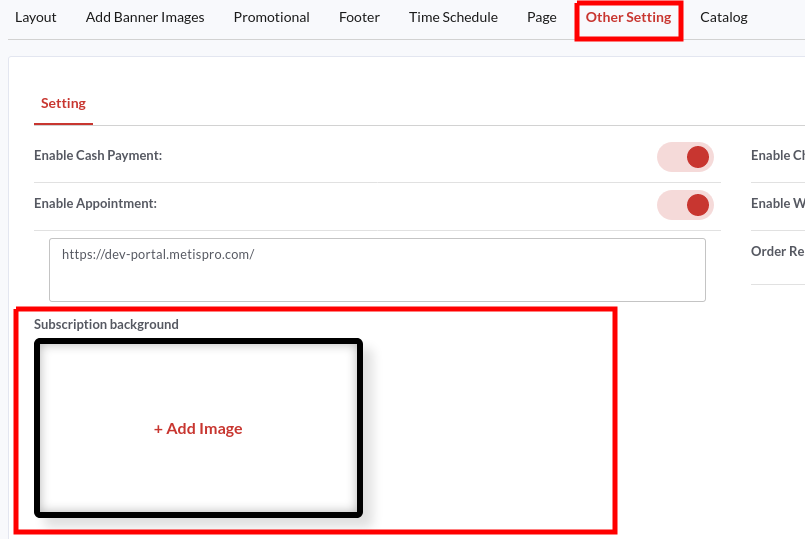
- Go to the Other Settings tab as shown in the screenshot.
- Now click ➕Add Image under the Subscription background section.
- Select the image from your system location. The recommended image size is 1450 x 650.
- Click Submit to save the settings.
How can merchants receive an order receipt?
Merchants can receive the order receipt in their inbox by providing the email address in the eCommerce Enterprise module’s backend portal.
The following steps explain the entire process in an easy way.

- Log in to the location’s backend portal.
- Navigate to the Module under left navigation.
- Click Settings on the eCommerce Enterprise module.
- Click the Other Setting tab.
- Enter the email address under Order Receipt Email.
- Click Submit at the bottom right corner.
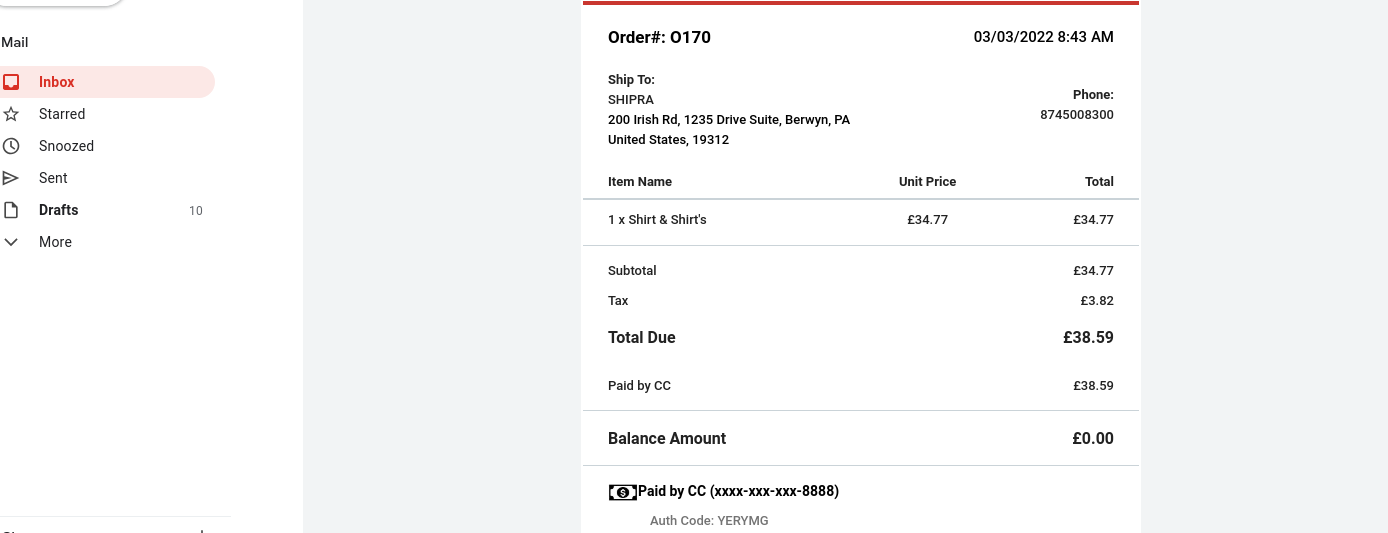
- Now when the guests place their orders on the web portal, the order receipt will be forwarded to the registered email address.
