Quantic Digital Signage
Quantic Digital Signage is a revolutionary technology to display your most updated menu items or promotional stuff on a digital screen.
With it, you don’t have to worry about updating the menu boards manually as it’s completely automated.
You just have to set it once and forget it forever.
How to Subscribe to the Digital Signage Module?
The digital signage module can be subscribed from the backend portal.
All the existing clients can see it in the Module section in their backend portal.
Here are the steps to subscribe to it.
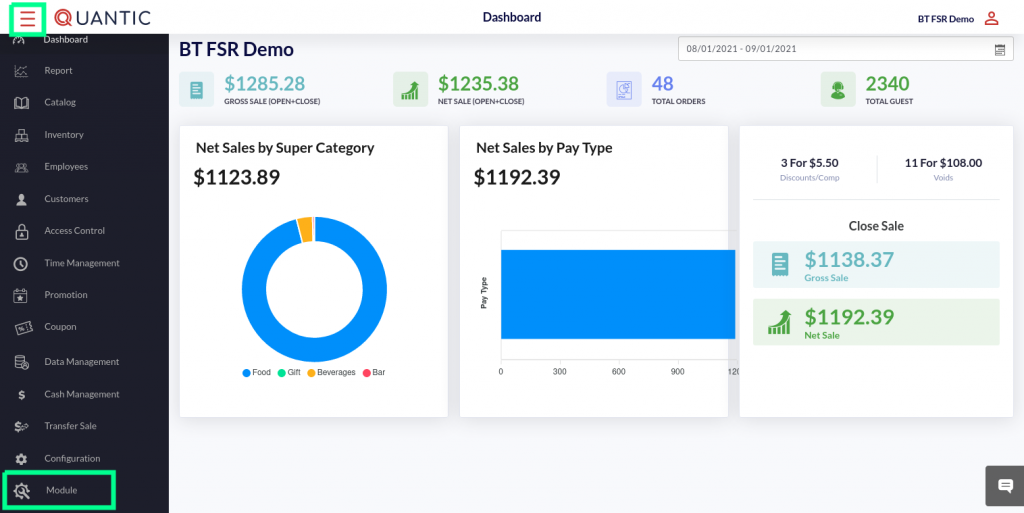
Login to the Quantic back-end portal.
Click the Hamburger button to open the left Navigation menu and click Module.
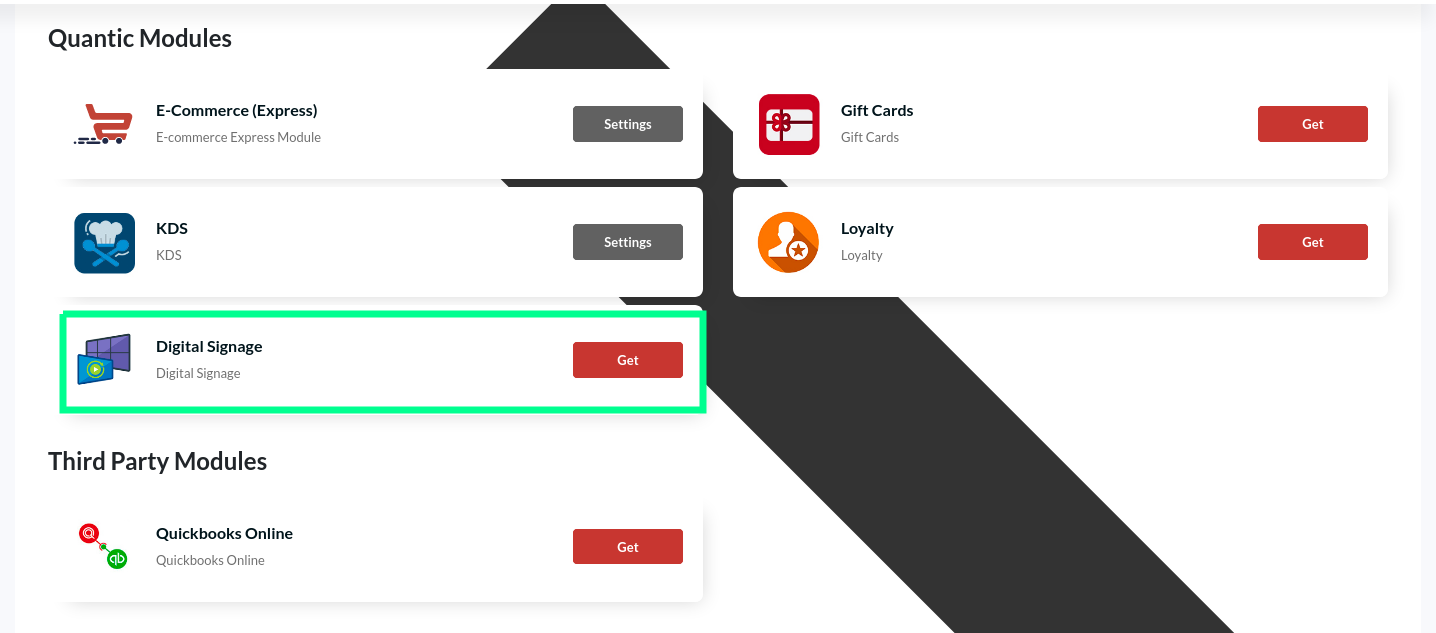
Scroll down to locate the Quantic Modules section.
Click the Get button on Digital Signage.
A new pop-up appears; click Get again and click Settings to begin setting up your digital signage.
Adding and setting up the TV
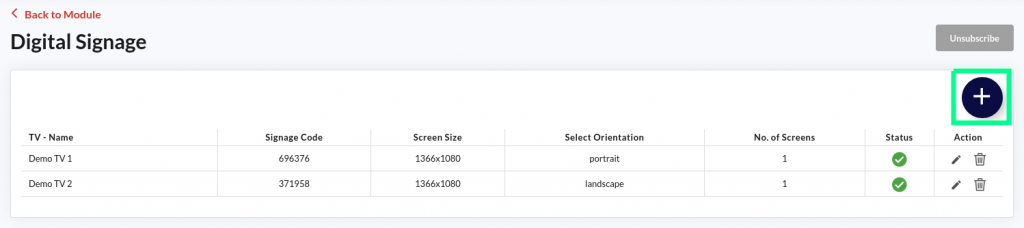
Once you enter the Digital Signage module, the already added TVs will appear on the list. In this illustration, Demo TV 1 and Demo TV 2 have already been added. Click ![]() to edit and click
to edit and click ![]() to delete the specific TV.
to delete the specific TV.
Click ![]() to add a new TV.
to add a new TV.
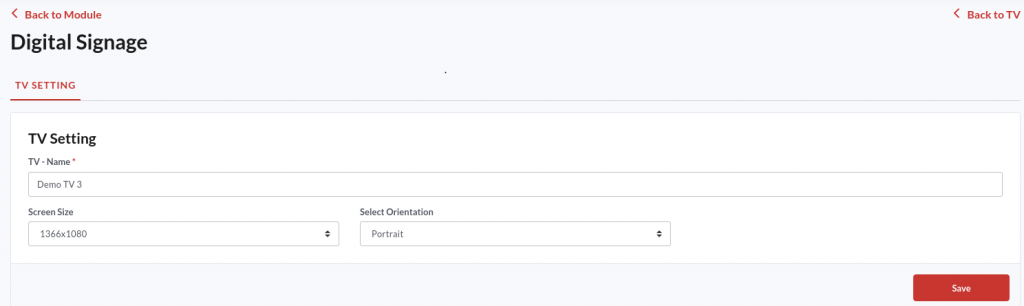
Enter the TV name on which you are setting up the signage. You can allocate any random name.
Select the screen size that fits your TV screen. You can choose from two screen sizes- 1366x1080 and 1080x1920.
Select the Portrait or Landscape orientation from the Select Orientation drop-down menu.
Make sure to choose the correct option as per your TV screen’s orientation.
Once done, click Save.
Adding and setting the Screen

Now you can proceed to add the screens to the digital signage.
From the screen tab, you can edit the existing screens or create new ones.
Here is what you need to do.
Click the Screens tab.
Click ![]() to create a new screen.
to create a new screen.

Enter the screen name. You can name it anything like screen 1, S1, or just 1, or anything else that you like.
Select the number of columns you want to display on the signage.
If you have chosen the Portrait orientation, at max two columns can be added to the screen.
However, the third column can also be added if you choose the Landscape orientation.
Tap ![]() to select one column,
to select one column, ![]() to select two columns, and
to select two columns, and ![]() to display three columns on the screen. The chosen one glows red, and the unchosen one is in grey.
to display three columns on the screen. The chosen one glows red, and the unchosen one is in grey.
Like in this illustration, the three-column button is selected, which turns red from grey.
Here you can set the background for the screen.
Tap on Color to set a color background for the screen.
Click the color picker and select the desired color. You can also enter the color code to set the preferred color on the background.

Or, alternatively

You can make the signage theme-based by adding an image in the background.
Just click Image as shown in the screenshot, click ➕Upload Image button, and select the image from the system location.
The selected image will appear on the left, as shown in the illustration.
In Menu Setting, you can choose whether you want to show just an Item name or Item Name with Description.
The Quantic Signage will automatically pick up the item name or description from the backend portal based on your selection.


In Image Setting, you can choose whether you want to show just an Item without image or an Item with image.
The Quantic Signage will automatically pick up the item name with or without an image from the backend portal based on your selection.
The Header Image section allows you to set the image on the signage header. It can be your restaurant’s logo or any promotional stuff.
You can choose different positions for the image position - left, right, center, or no image.
To set a new image, click ➕Upload Image and select the image from the system location.

How to set up a Digital Menu on the signage screen?
Quantic digital signage allows you to run a digital menu, slideshows, and videos, individually in different columns.
You can add background images to the signage, choose a color, or add menu items in different fonts.
Here are the steps to create a digital menu on the signage screen.
Step 1. Set the Background

Select the Digital Menu from the field as shown in the screenshot.
Select the background theme for the signage.

If you have selected the Color tab, choose the desired color from the color picker.
Or, you can simply enter the hex code for the preferred color in the blank field.
Or, alternatively
You can choose the Image tab to add an image to the background.
This way you can make your signage theme-based by adding the image that suits your restaurant’s theme.
Moreover, you can keep changing the background image based on different festive seasons.
Click the +Upload Image button, select the picture for background from the system location (PNG, JPG, JPEG), and the image will appear on the left in the preview screen.

Or, alternatively

If you want to keep your signage simple without color or image, you can do this as well.
Just select No Background and that’s it.
Step 2. Set the Featured Image

If you want to set the feature image, click Yes.
Click ➕Upload Image button, select the picture from the system location (PNG, JPG, JPEG), and the image will appear on the left in the preview screen.
You can choose the position of the featured image by selecting any of these options - Top, Middle, and Bottom.
Step 3. Set the Category’s font, font size, and color
Here you can choose how you want the item category to appear on the signage screen.
Adjust the category name’s font, size, and color to make it look appealing and catchy.

Tap the Font drop-down field and select the one you need.
We would suggest you create the menu and select the appropriate font after a hit-and-trial.
That way you would be able to judge the font style better.
Click the Font Size field, select the font size from the available options.
Make sure to choose an appropriate font size to make your signage look clearer and appealing.
Finally, tap on the Color field and select the appropriate color for the category name.
If you know the hex code of the preferred color, put that into the editable field box.
To make the category name stand out, please make sure its color is different from the background color.
Step 4. Set the Item’s font, font size, and color
Here, you can choose how you want the item name to appear on the signage screen.
Adjust the item name’s font, size, and color to make it look appealing and catchy.

Tap the Font drop-down field and select the one you need.
We suggest you create the menu and select the appropriate font after a hit-and-trial.
That way you would be able to judge the font style better.
Click the Font Size field, select the font size from the available options.
Please make sure the item font size is smaller than that of the category.
This way, your signage will look more formatted and clear to the guests.
Finally, tap on the Color field and select the item name's appropriate color.
If you already know the hex code of the preferred color, put that into the editable field box.
To make the item name stand out, please make sure its color is different from the background color.
Step 5. Adding a Menu
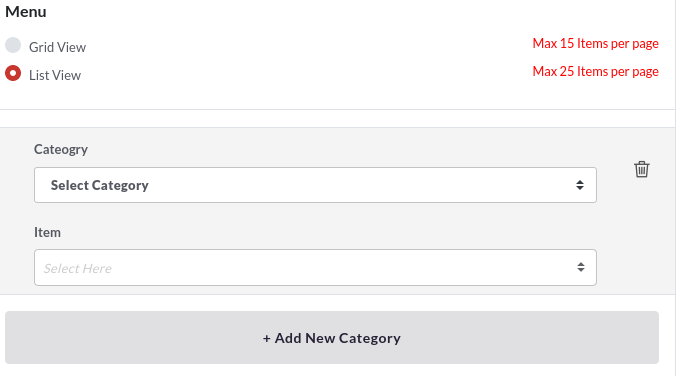
You can choose either a grid view or a list view to display items on the signage.
The grid view allows you to show a max of 15 items per page, while the list view allows you to show a max of 25 items per page.
Select the category you want to choose the item from.
Select the item to be displayed on the signage.
To add a new category, click +Add New Category and repeat points 9 and 10.
You can keep adding a new category by repeating the above steps.
How to set up a Slideshow on the signage screen?
With Quantic digital signage, you can display a number of images and videos through a slideshow.
The below steps can be followed to add images and run a slideshow on Quantic signage.

Select the Slideshow on the field as shown in the screenshot.
Click +Add New Image to add a new image.
Make sure the image you have chosen is in PNG, JPG, or JPEG format.
Repeat this step until you add all the images you want to display on the signage.
How to add a Video on the signage screen?

Select the Video on the field as shown in the screenshot.
Paste the URL of a video you want to run on the signage.
Once you are done with settings, click Save at the bottom right corner.
