Quantic Smart Terminal (QST)
Quantic Smart Terminal (QST) is a credit card terminal that helps you take payments from your customers and print the receipts on the go. Not just that, it also allows you to perform many essential functions in order to make your business efficient. You can view reports, email receipts, check the employee sales summary and see cash and credit sales—all from your powerful Quantic Smart Terminal.
How to run a transaction?
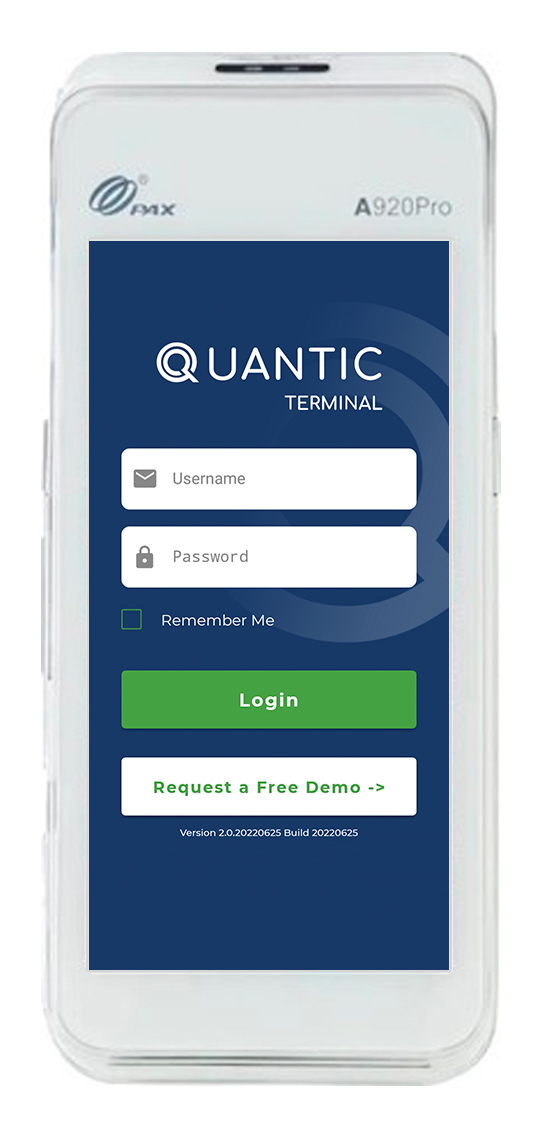
- Log in to your Quantic Smart Terminal with the Username and Password.
- Enter the unique four-digit pin that has been provided to you in the welcome letter.
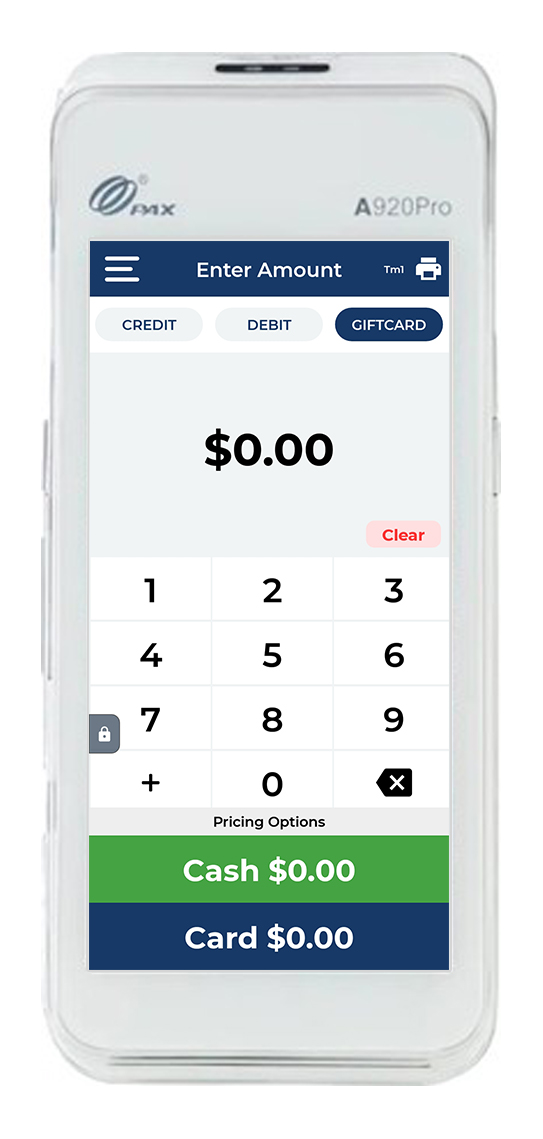
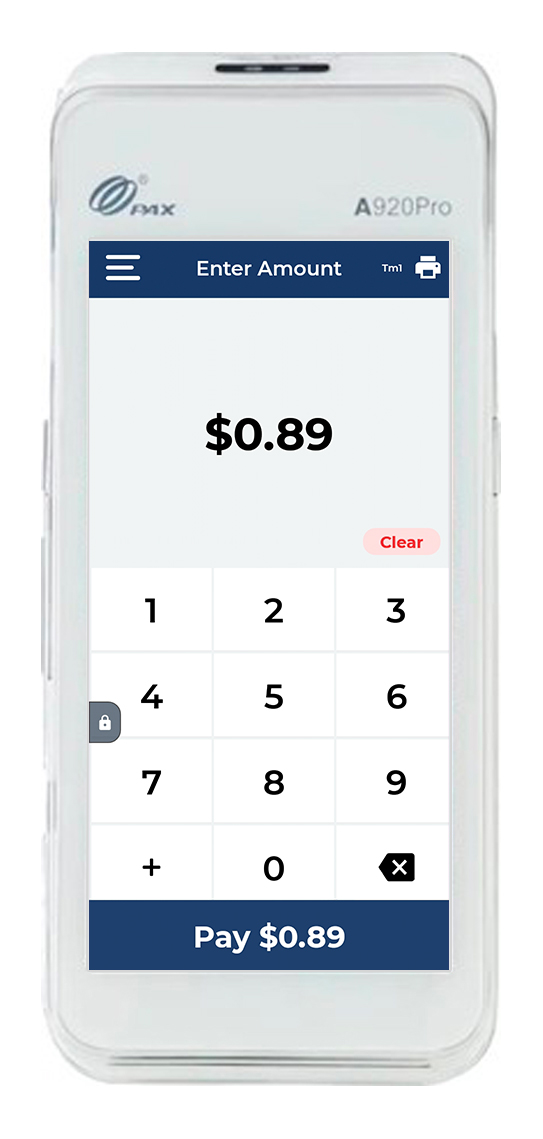
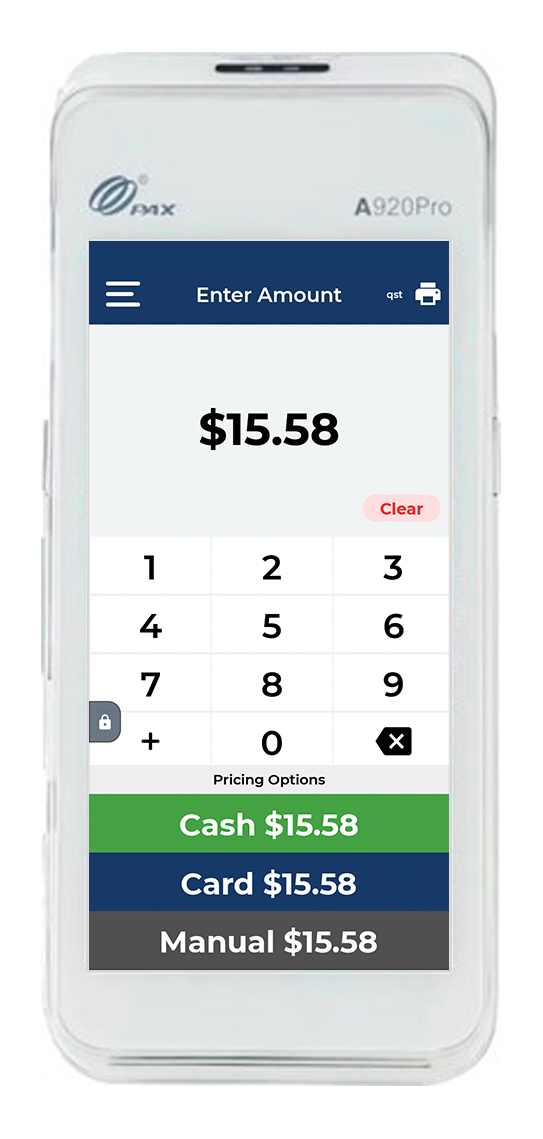
- The Enter Amount screen appears. Here you need to enter the amount that you want to charge from your customer.
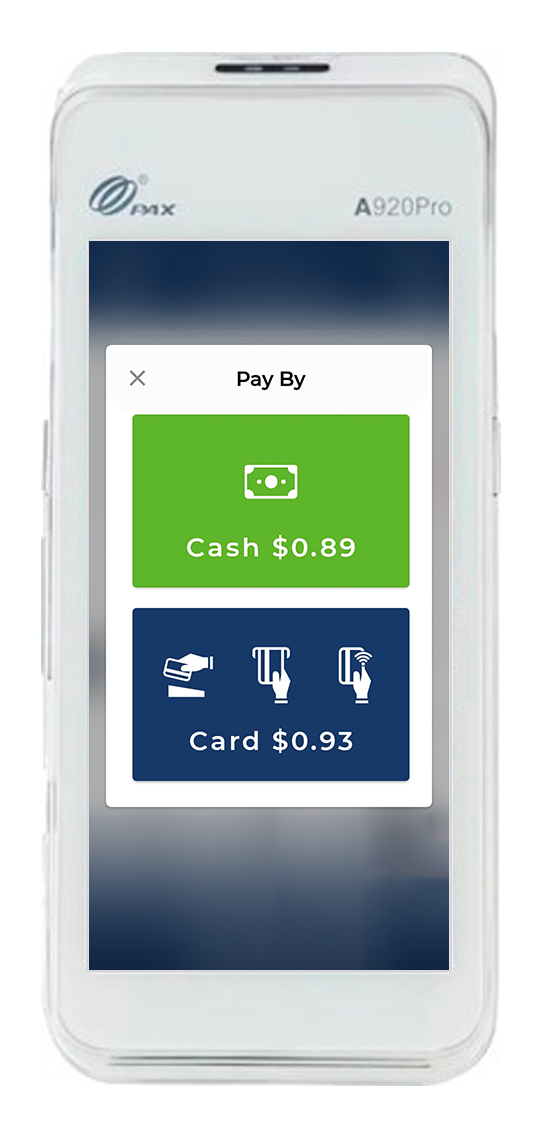
- Select Cash or Card depending on how your customer wants to pay. In case you have a cash or a credit surcharge program, you will see a different price on the card option.
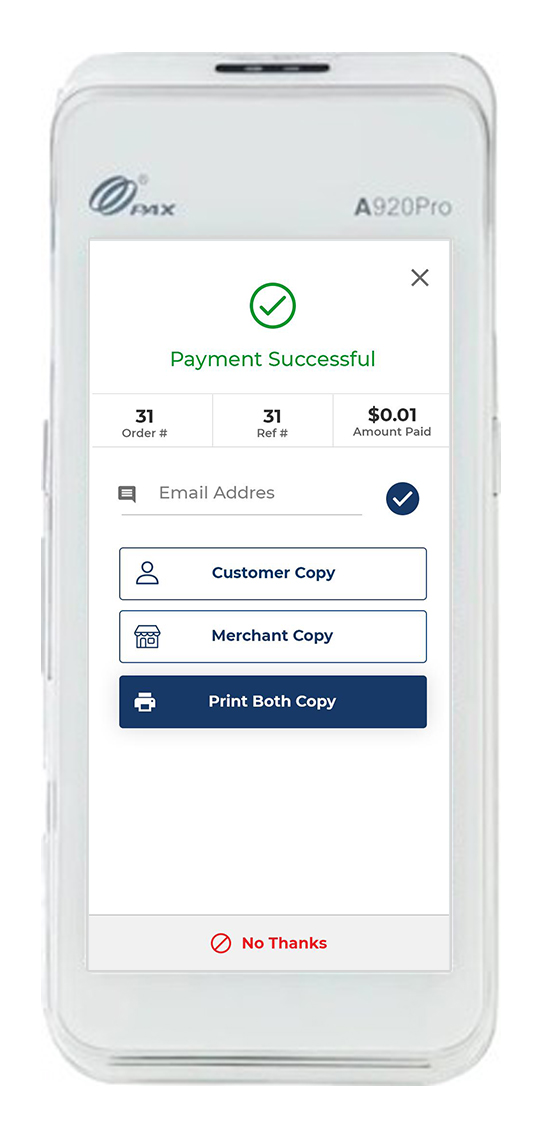
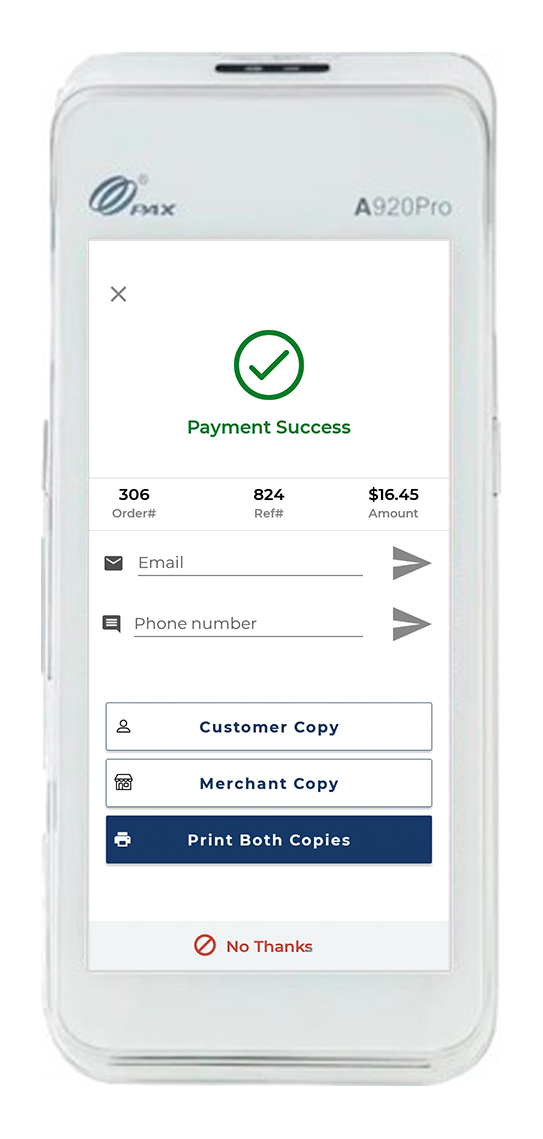
- Once the payment is successful, you will see the same on the confirmation screen and it will be displayed with the Green Tick
.
- If unfortunately, the payment fails, you will see a Red Cross on the screen with a Payment Unsuccessful message underneath.
- Now enter the customer’s email address to send a soft copy of the payment receipt. Once done, hit
to send.
- Or, you can also print the Customer Copy or Merchant Copy by clicking over the appropriate option.
- Click
, if you don’t want to print a receipt copy.
How to refund a transaction?
- After logging in to your Quantic Smart Terminal portal, tap on the Navigation button
(on the top left corner) or simply swipe the screen to the right.
- A new screen will appear, click the Refund tab and enter the amount to be refunded.
- On the Refund screen, enter the amount to be refunded by using a virtual keyboard. Use the Clear button to edit the amount.
- And finally, click the Refund button at the bottom.
How to void a transaction?
- After logging in to the Quantic Smart Terminal, click the Navigation
button and select Transactions.
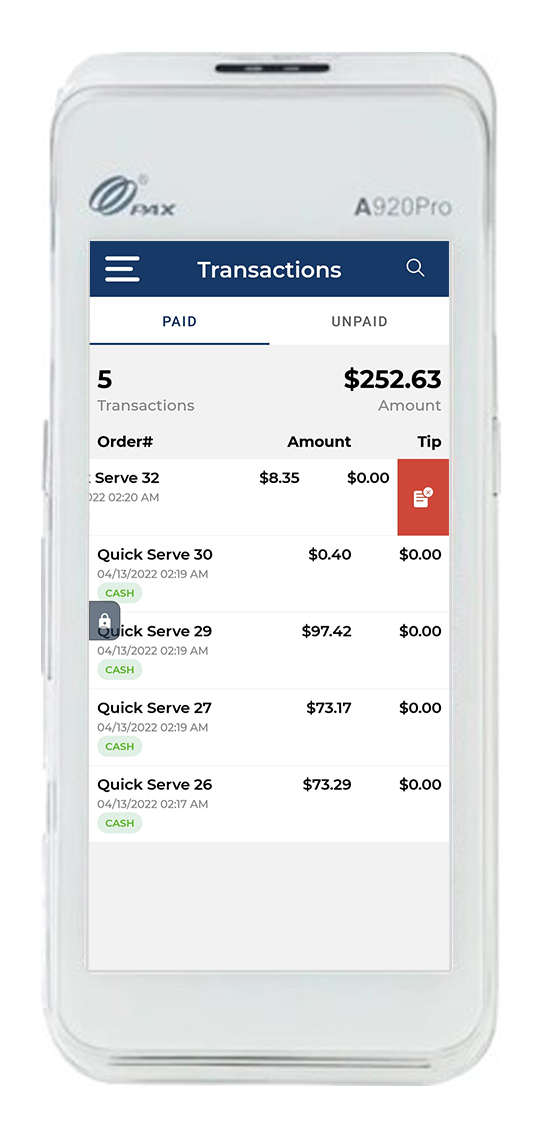
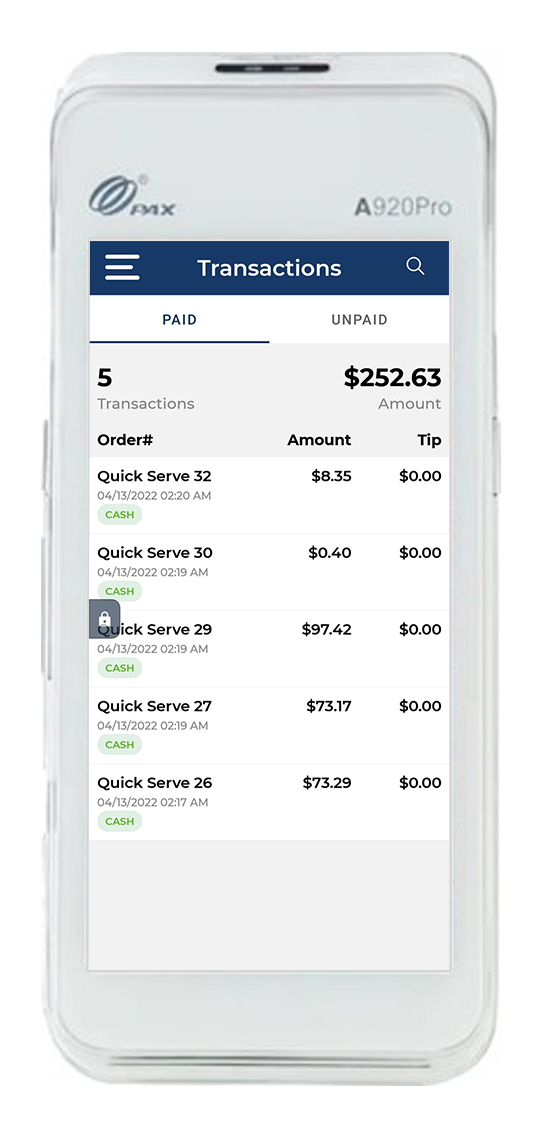
- Now the Transactions screen will open, click the Paid tab.
- The list of transactions (credit/cash) will appear in the drop-down.
- Drag the order (that you want to void) to the left, the
button will appear as shown in the screenshot, click over it.
- Finally, click Yes on the confirmation screen.
How to Auto Close the batch?
Let’s understand what is batch processing first! The customer’s credit or debit card is processed at the time of the transaction but the amount is not credited to the merchant’s bank account instantly. Instead, all the transactions processed in a day are stored in a file and sent to the credit card processing company later as one single file. When the file is sent, it is called batch processing. When the merchant’s bank reads this data, the money is released to the payment processor, who then sends the funds to the merchant’s bank. Now it depends on the merchant, at what time of the day they want to close the batch. Due to Batch processing, the transactions between the customer and the merchant become convenient and more secure than ever.
What is Auto Batch Close?
Batch Close is functionality that triggers the closing of debit and credit transactions that were currently open on the terminal. Open transactions are those that have been processed on the terminal since the last batch close time. Quantic allows the merchants to auto-close the batch at any set time of the day. In two ways the batch can be closed automatically.
- Auto Batch Close at Processor end: The merchant can request the processor to set the automatic batch close time at the time of merchant registration.
- Merchant Automated (Application level): This merchant can select the auto batch close time from the backend portal. This will lead to closing the batch automatically at the merchant-defined time. For example, the merchant may decide to close the batch at 5 am.
How to Set Up the Auto-Batch Close Time?
The batch close time can be set up from the location’s backend portal. Please remember when you do the batch close the pending transactions will not be included in a batch. Below is a complete overview of how you can set up the batch close time.
- Log in to the location’s backend portal.
- Navigate to the Configurations tab on the left panel.
- Search Batch Close Time and select the configuration from the drop-down.
- Now tap the Grey toggle button next to the Batch Close Time configuration. The configuration will be enabled if the toggle switch turns red.
- Tap the
button, and select the batch close time for any specific terminal or all the terminals.
- For example, here we have set 5 am as the batch close time for Terminal 3. Now all the open transactions (those that have been processed on the terminal since the last batch close time) will be closed at 5 am every day.
- On a successful batch close completion, the receipt will be generated from the QST terminal stating all the transactions have been processed including tips, refund, void, etc. See the screenshot above, this is how the batch close settlement report will be generated from the QST terminal.
How to receive the alert notification when the batch is not closed?
In the event of a missed batch close, the merchant can now opt to receive a notification via text and email. The alert notification feature will notify the merchant in the event that a trigger event takes place on the selected alert type.
- The alert notification details can be set up from the location’s backend portal. Here is the path to set up the alert notification - Login to the backend portal, select Configurations and click Alert Notification (under Setup).
- Click the Edit button on the Alert Notification page and tap
. A new page will open, there you can fill in the name, email, phone, and alert type details.
- Here’s an example case. The Merchant wants to be notified in the event that a missed batch close takes place. They can simply enter their details such as name, email, and phone number. Next, they can choose the Batch Close under the Alert Type. .
- Once done, the details will be displayed on the Alert Notification page as shown in the illustration above.
- In this case, the batch close time has passed and the batch did not close due to any one of the following reasons (offline device, switched off device, etc.), the location representatives will be notified via text and email.
How to manually close the batch?
- If you have not set up Auto Batch Close, you can close it manually by following the below steps.
- Click the Navigation
tab.
- Hit the Batch button.
- Now click Close Batch on the Batch screen.
How to run a report?
- Login to your Quantic Smart Terminal with the Username and Password.
- Enter the unique four-digit pin that has been provided to you in the welcome letter.
- Now tap on the Navigation
button (present on the top left corner) or simply swipe the screen to the right.
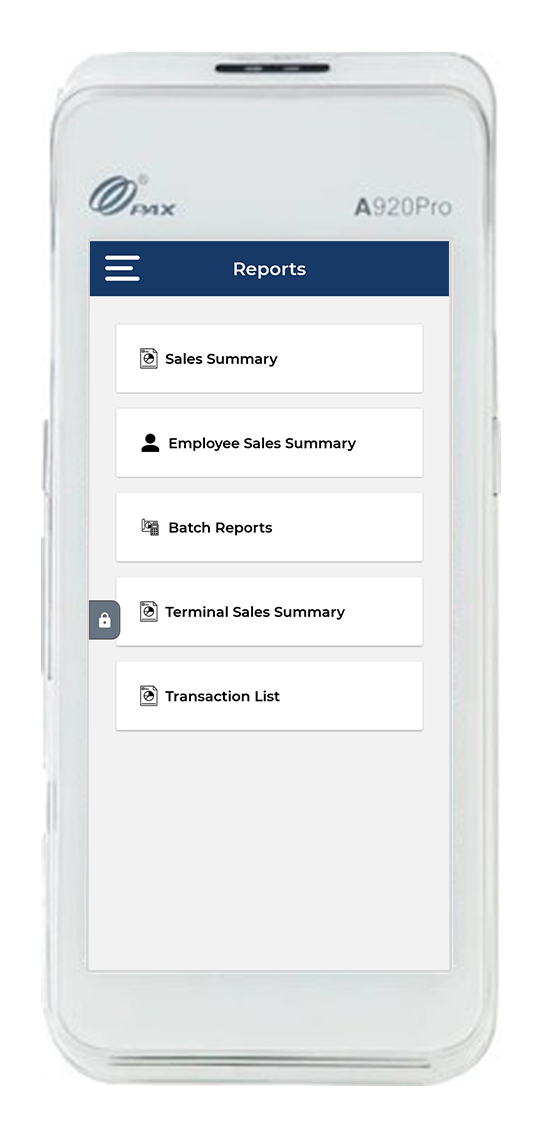
- A new screen will appear, here click Reports.
- Now you will land on the Reports screen where you can run the reports as per your choice.
- Sales Summary
- Employee Sales Summary
- Batch Report
- Terminal Sales Summary
- Transaction List
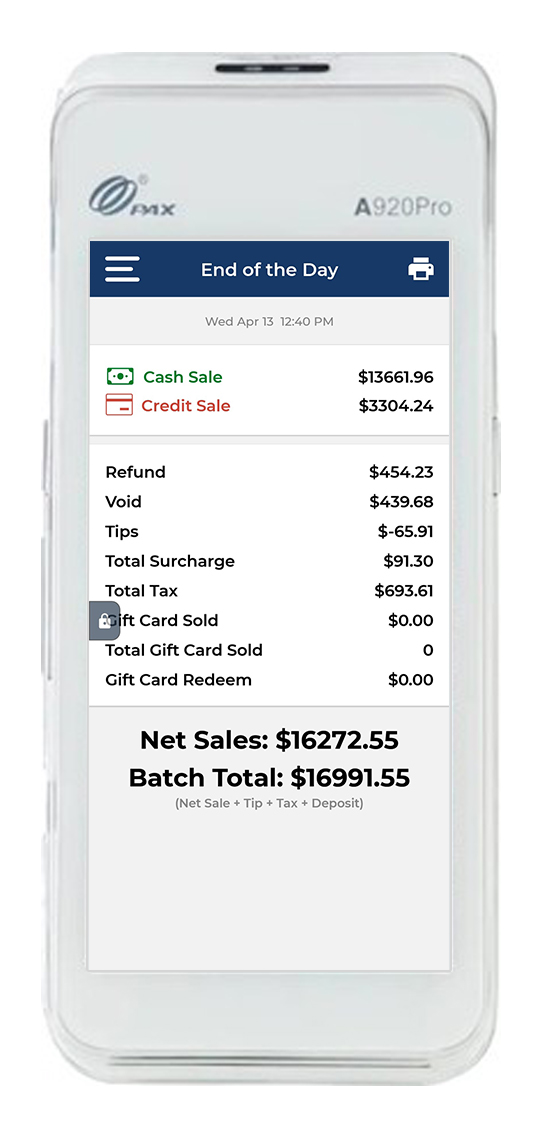
- This is how the Sales Summary looks, which represents Total Cash and Credit Sales.
- You can scroll to the bottom to check Net Sales (Cash + Credit) after deductions and Batch Total (Net Sale + Tip + Tax + Deposit).
Employee Management
Now managing employees is quite simple with your QST device. You can add employees, view employee login pin, add roles and assign privileges from QST with ease.
How to add an employee?
- Once you log in to your Quantic Smart Terminal portal, go to the top left corner and click the Navigation
tab.
- On the list, click over the Employees tab.
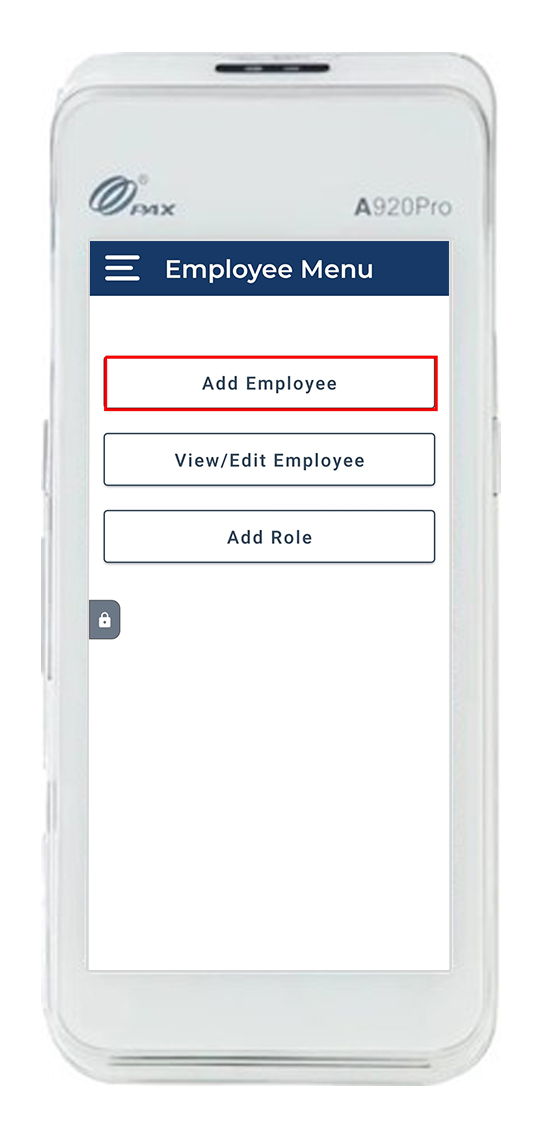
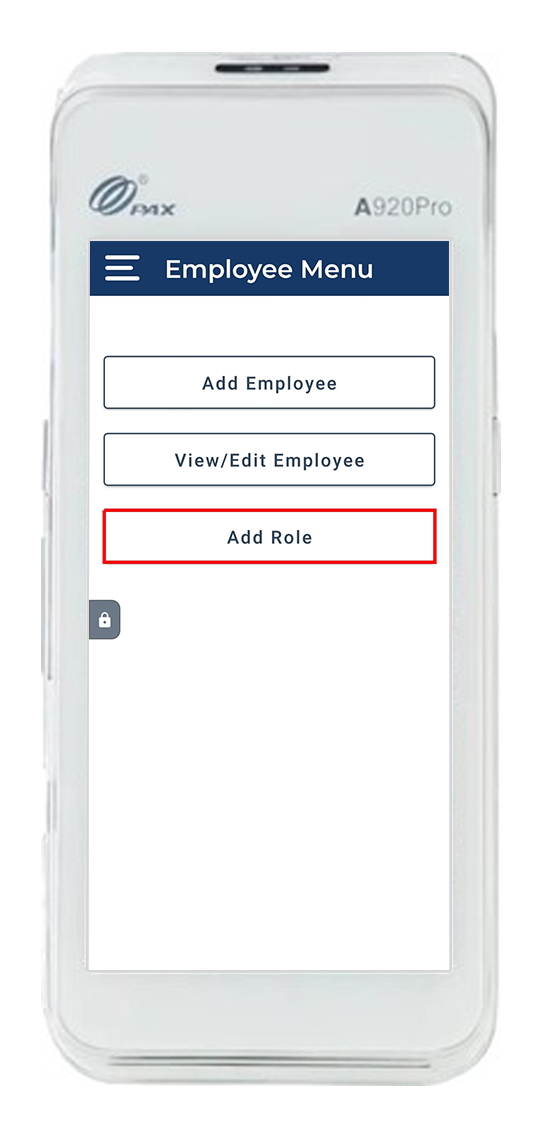
- On the Employee Menu screen, click the Add Employee button.
- Moving forward, you will land on the Add Employee screen, here you should fill in the employee’s information.
- Enter the following details and make sure they are correct.
- First name.
- Last name.
- Hit the ? button to select the
role of a particular employee. (You can add roles from the Employee Menu screen) - Choose a security pin.
- Finally, click Save.
How to view/edit an employee?
- Once you log in to your Quantic Smart Terminal portal, go to the top left corner and click the Navigation
tab.
- On the list, click over the Employees tab.
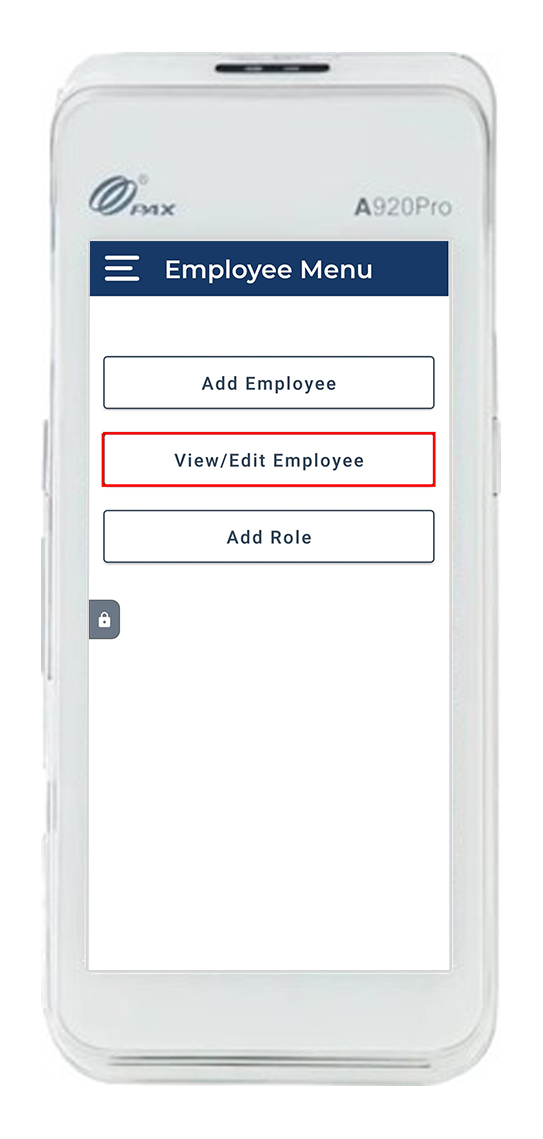
- On the Employee Menu screen, click the View/Edit Employee button.
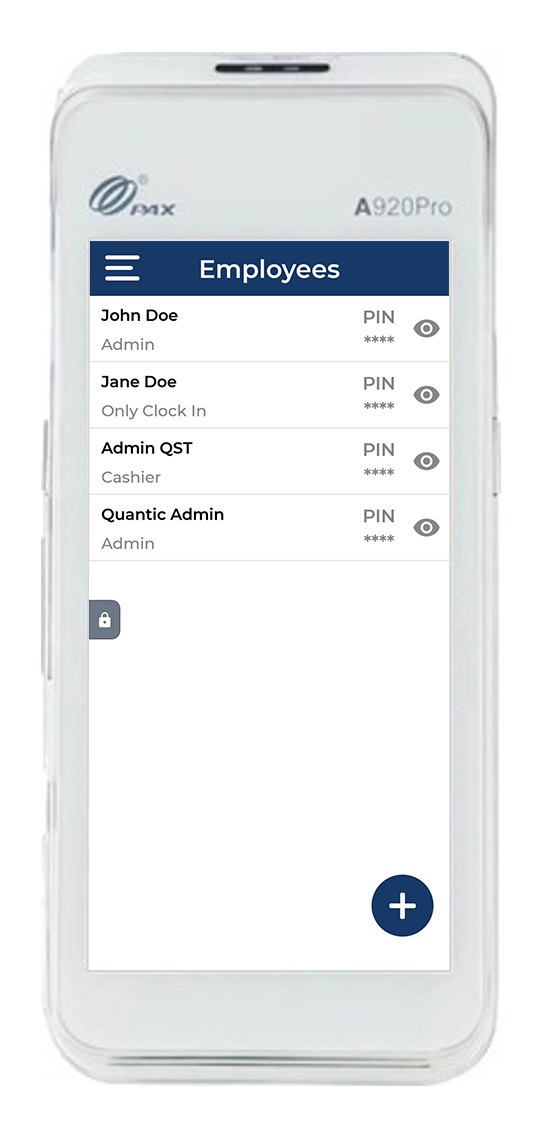
- A new screen will pop up displaying the list of employees with roles mentioned underneath the employee.
- Here you can tap on any employee to modify his/her details such as - name, role, and pin.
- To view the employee pin, click the button next to the employee.
- You can also add a new employee from this screen by clicking the
button at the bottom right corner
How to delete an employee?
- Once you log in to your Quantic Smart Terminal portal, go to the top left corner and click the Navigation
tab.
- On the list, click over the Employees tab
- On the Employee Menu screen, click the View/Edit Employee button.
- The list of employees will appear.
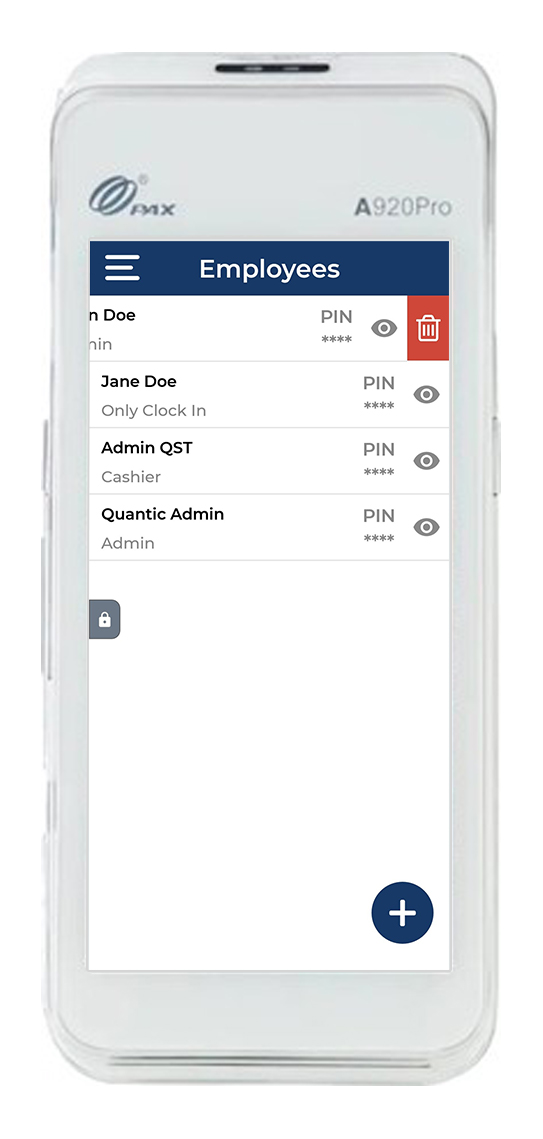
- Drag the employee (that you want to delete) to the left, the
button will appear as shown in the screenshot, click over it to delete an employee. Similarly, you can delete other employees as well.
How to add roles?
- Once you log in to your Quantic Smart Terminal portal, go to the top left corner and click the Navigation
tab.
- On the list, click over the Employees tab.
- On the Employee Menu screen, click the Add Role button.
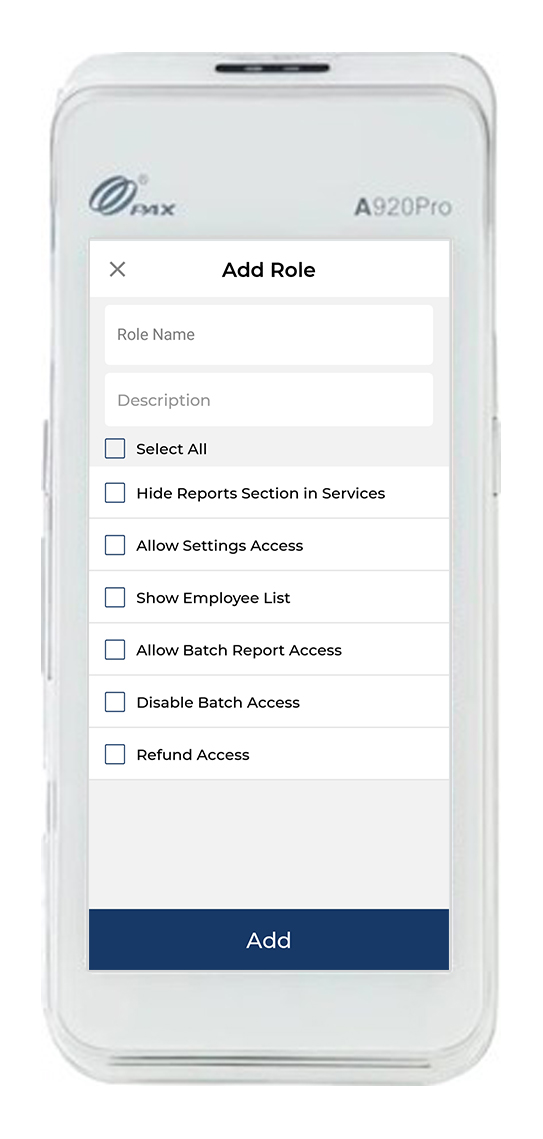
- A new screen will open where you can add a new role and assign the privileges to that role.
- Role name: Enter the role name that you want to create, for eg. Manager, Cashier, Bartender, etc.
- Description: Here you can describe the role.
- Select the privileges that you want to assign to this role and click Add.
How to change the settings?
- Login to Quantic Smart Terminal, click the Navigation
button.
- Now choose Settings from the bottom.
- From the Settings screen, you can customize the Quantic Smart Terminal as per your needs. For that, you just have to toggle the switch to On or Off.
- Here are the different options that you will get on the Settings screen.
- Terminal - From here you can switch the terminals.
- Likewise, you can also Enable List View for Catalog, Show Transaction Details in Batch, etc. by toggling the switches to On or Off.
How to reprint a ticket?
You can reprint a ticket from the Transactions section. Follow the below steps to get the tickets reprinted.
- Once you log in to your Quantic Smart Terminal portal, go to the top left corner and click the Navigation
tab.
- On the list, click over the Transactions tab.
- Click the Paid tab and select the order you want to reprint.
- You can print the Customer Copy or Merchant Copy by clicking over the appropriate option. Click Print Both Copy to print copies for merchant and customer together.
- Click
, if you don’t want to print a receipt copy.
- You can also send a soft copy of the payment receipt to the customer. To do that, enter the customer’s email address in the Email Address field and hit
to send.
Gift Card Management
Besides cash or card, QST allows you to accept payments via Gift Card. You can issue a new gift card, top up the balance or deactivate the gift card from the QST app.
- Log in to your QST app.
- Tap Sale on the left navigation.
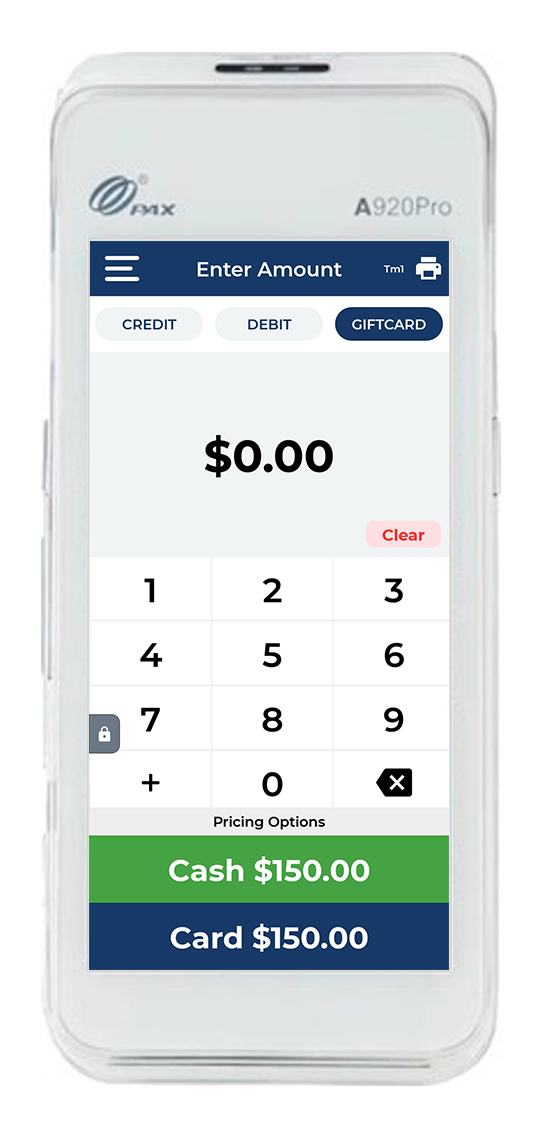
- Select the Gift Card tab as shown in the image.Refund tab and enter the amount to be refunded.
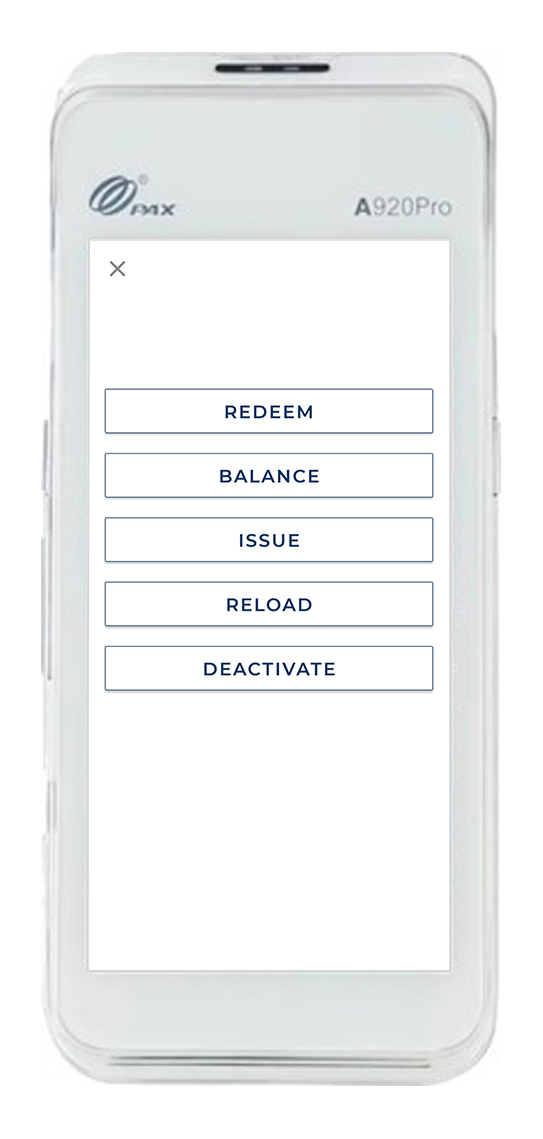
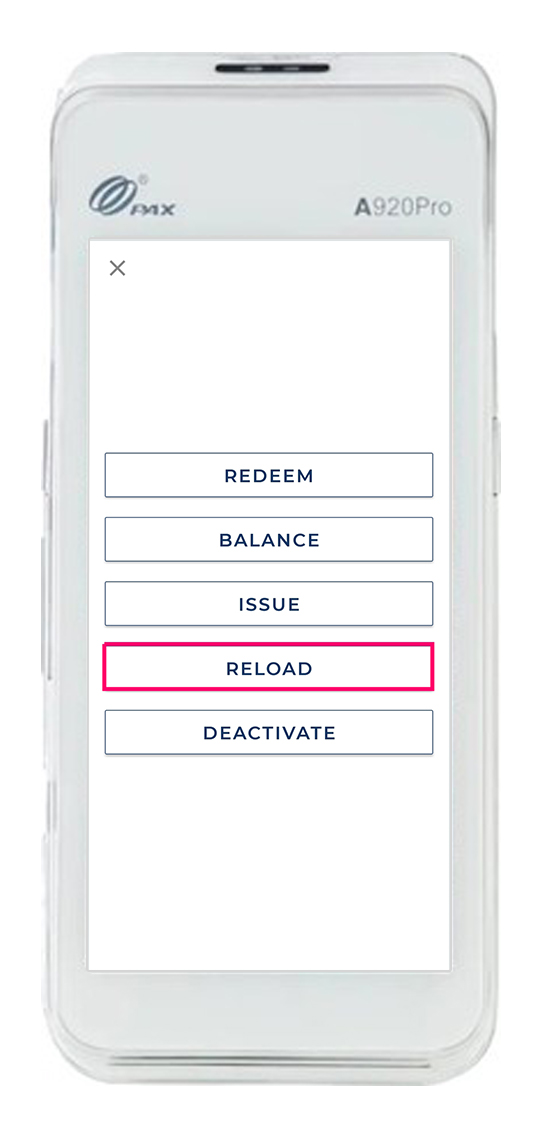
- Now you can select the operation from the available option based on the user’s request.
- Redeem - Redeem a gift card to accept the payment.
- Balance - Check the gift card balance.
- Issue - Issue a new gift card to the customers.
- Reload - Reload the amount in a gift card.
- Deactivate - To deactivate a gift card.Refund tab and enter the amount to be refunded.
Redeeming a gift card
Besides cash or card, QST allows you to accept payments via Gift Card. You can issue a new gift card, top up the balance or deactivate the gift card from the QST app.
- Tap the Gift Card button on the top.
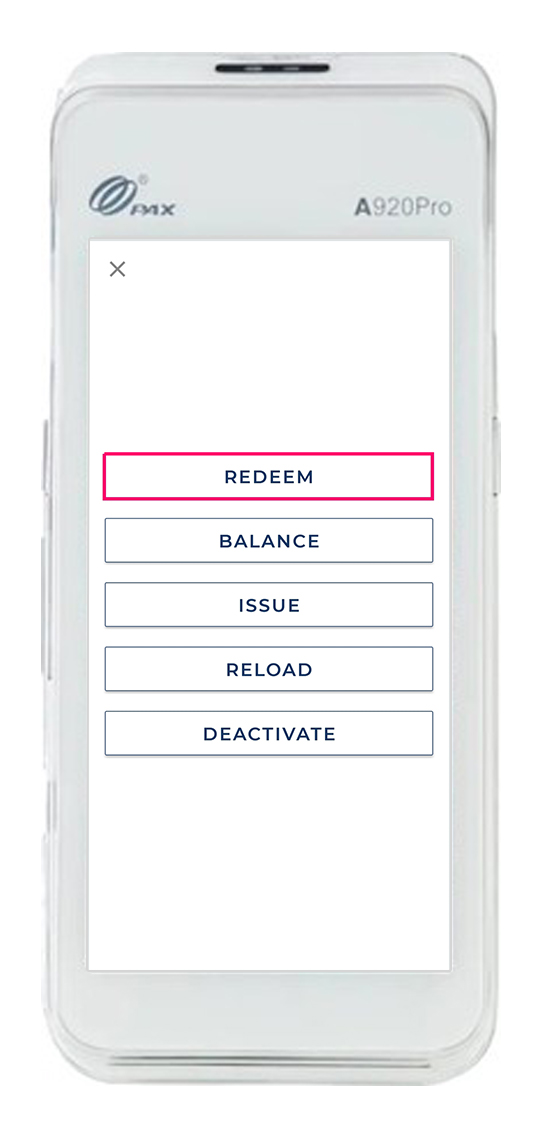
- Select Redeem from the available options.
- Enter the amount using the pin pad and click Redeem at the bottom.
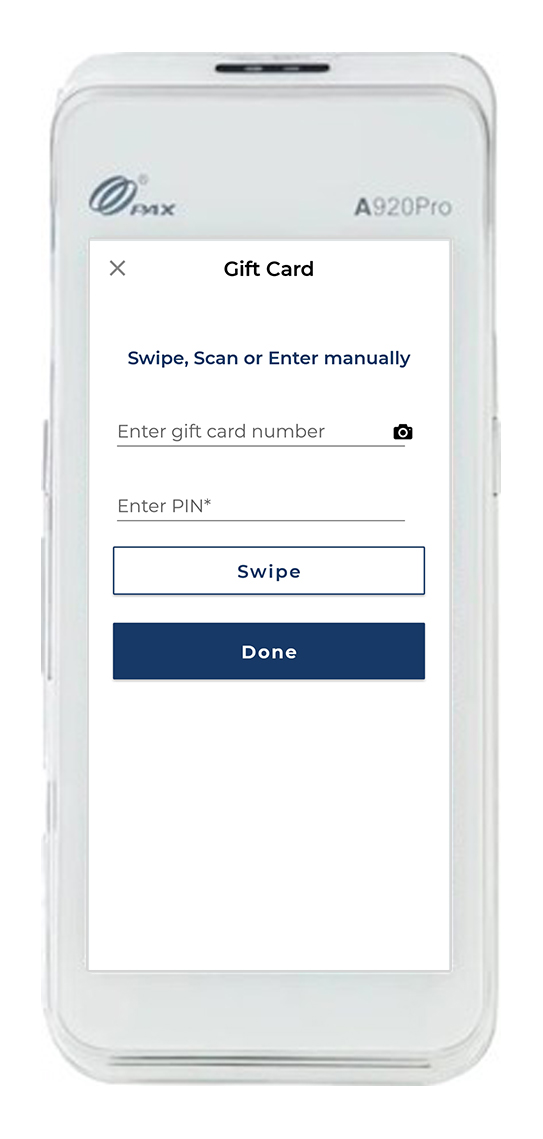
- Enter the gift card number, enter the gift card pin and click Done to redeem a gift card.
- Alternatively, you can click Swipe and swipe the gift card to redeem the said amount or you can also scan the bar code on the gift card by tapping the
icon.
- Once done, the gift card will be redeemed for the order.
Checking the gift card balance
Servers can also check the gift card balance using some simple steps.
- Tap the Gift Card button on the top.
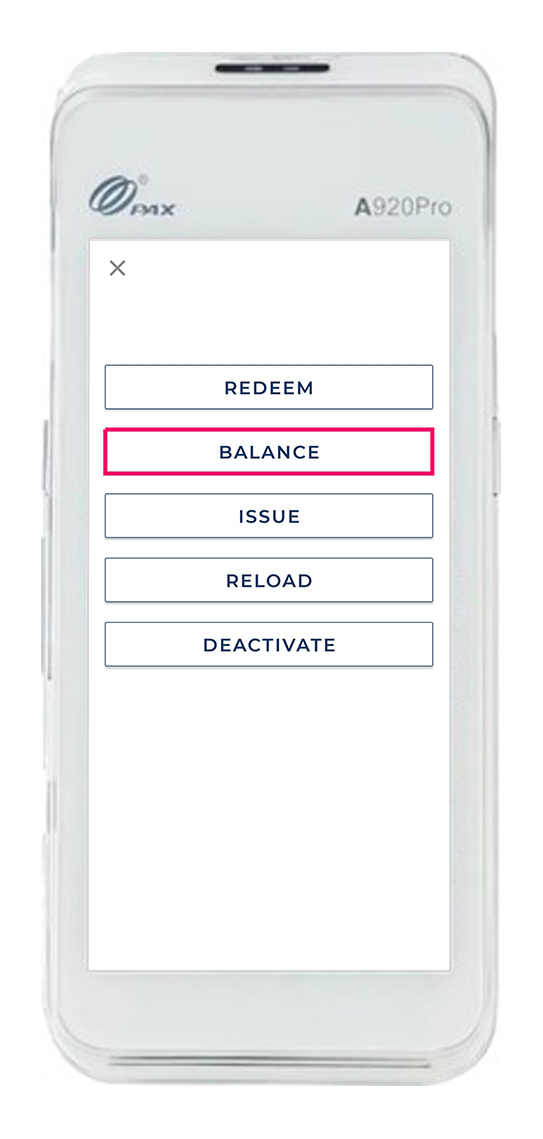
- Select Balance from the available options.
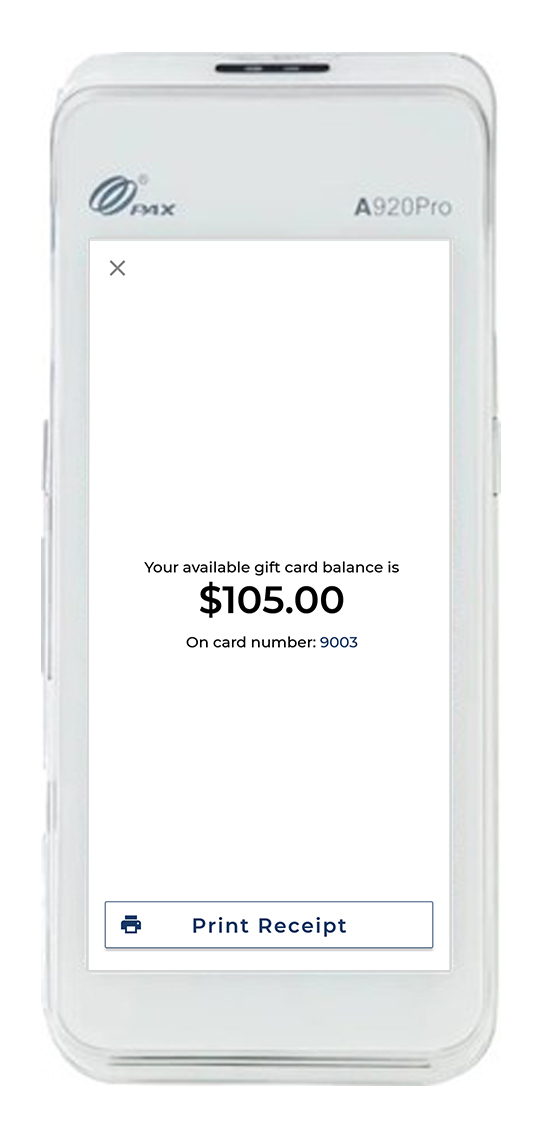
- Enter the gift card number, enter the gift card pin and click Done to know the balance on a gift card.
- The available balance will be displayed on the screen.
- If you do not want to enter the gift card details manually, you can simply scan the card or swipe it on the terminal.
Issuing a new gift card
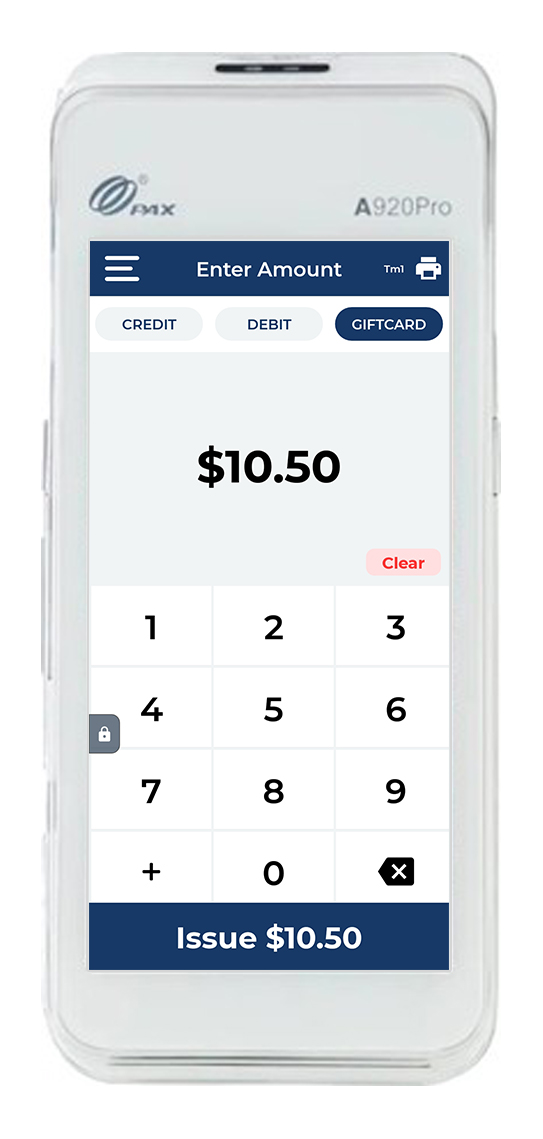
QST also allows you to issue a new gift card to the guests. Here’s how you can do it.
- Tap the Gift Card button on the top.
-
- Select Issue from the available options.
-
-
- Enter the amount using the pin pad and click Issue at the bottom.
- Take out a fresh gift card, enter the gift card number, enter the gift card pin and click Done. Alternatively, you can simply scan the card or swipe it on the terminal. Now you can hand over the gift card to the guest who has paid for it.
-
Reloading a gift card
-
-
- Tap the Gift Card button on the top.
-
-
-
- Select Reload from the available options
-
-
-
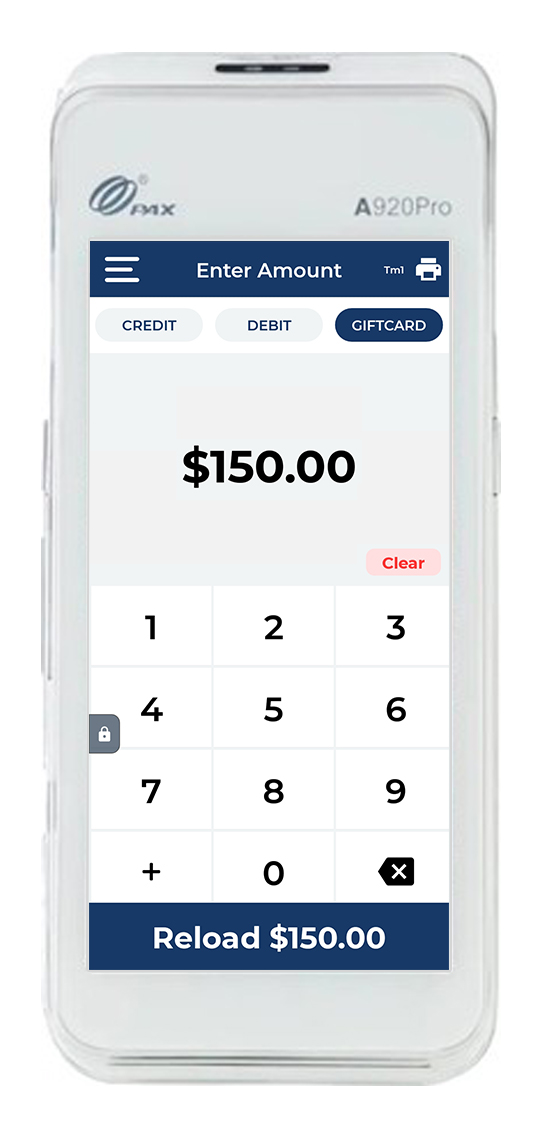
- Enter the amount using the pin pad and click Reload at the bottom.
-
-
-
- Enter the gift card number, enter the gift card pin and click Done.
-
-
-
- Now choose the payment method - cash or card to reload the gift card.
- You can print the receipt for the merchant, customer, or both if needed.
-
Deactivating the gift card
Gift cards can be deactivated at any time from the QST terminal. Below are the steps are deactivate a gift card.
-
-
- Tap the Gift Card button on the top.
- Select Deactivate from the available options.Refund tab and enter the amount to be refunded.
-
-
-
- Enter the gift card number, enter the gift card pin and click Done.
- That’s all! The gift card is successfully deactivated.
-
How to Show Dual Pricing for Cash and Card?
Now you can set up dual pricing (Consumer Choice) for cash and card on the Quantic Smart Terminal. The dual pricing feature allows the stores to show different pricing for cash and card to the customers. The server can display the device to the customer and let them choose the appropriate payment option. The dual pricing value can be set at the time of store setup or after the store has been set up. Below is a high-level overview of how you can put this feature to work on your QST terminal.
-
-
- Please ensure you have selected the Consumer Choice in the Program option during store creation. The "Show Cashier Popup" will be enabled by default for all the Smart Terminal accounts having Consumer Choice as the payment program.
- The value applicable for the card payments can also be altered from the Value (in %) field.
- Please don't forget to click the Save button to save the changes.
-
-
-
- Now you can log in to the Smart Terminal using the location’s login credentials.
- Tap Sale on the left navigation.
-
-
-
- Enter the amount to be charged and click the Pay button at the bottom.
-
-
-
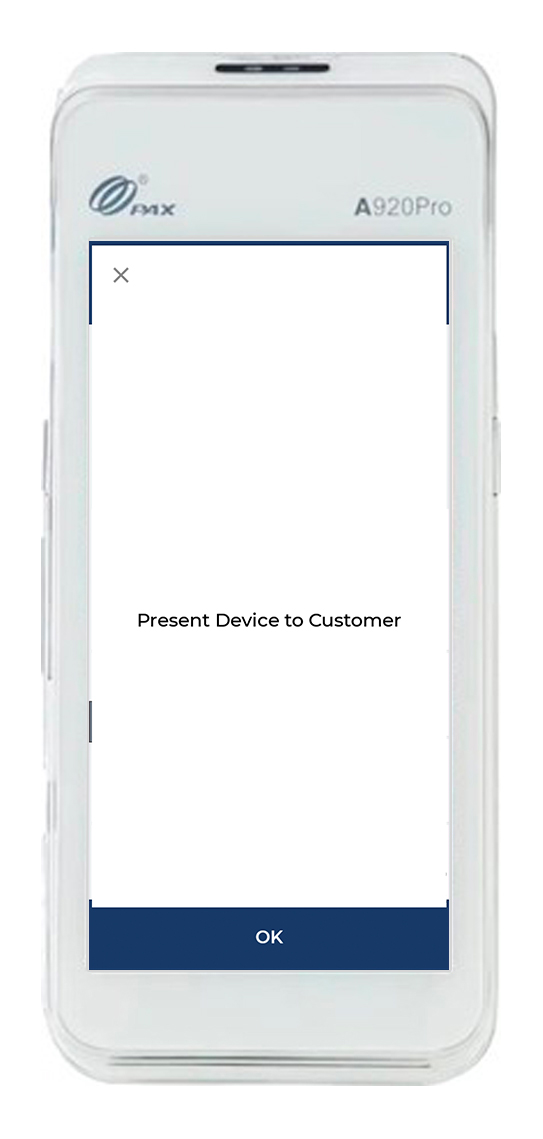
- Click Ok and present the device to the customer.
-
-
-
- The customer will be seeing the different pricing for cash and card based on the (Consumer Choice) value set at the partner portal.
- They can choose the suitable payment option to pay for the order.
-
How to Show the Feedback Prompt on QST Screen?
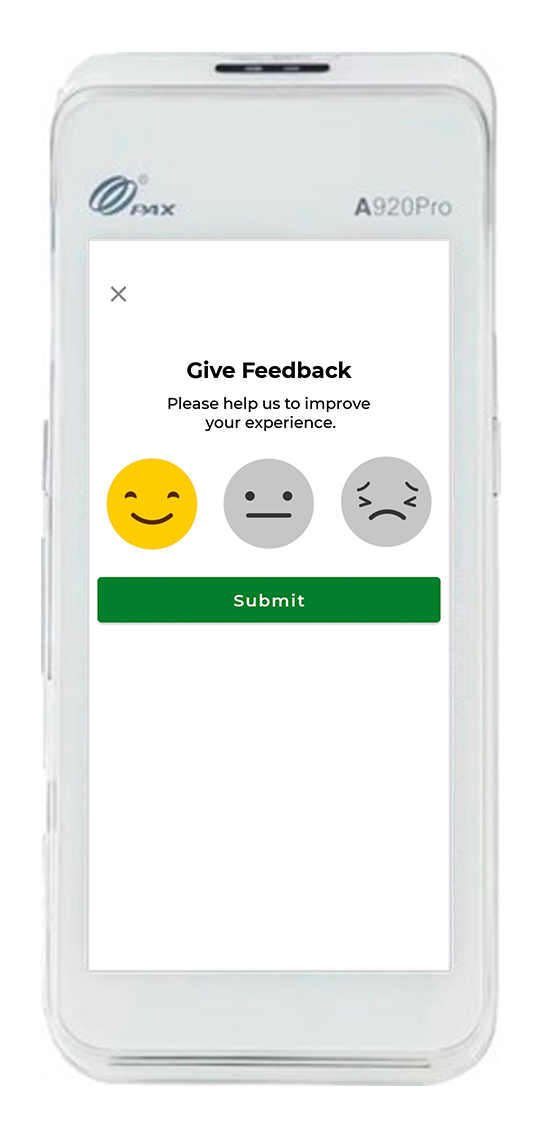
The feedback screen allows your customers to leave feedback on the Smart Terminal screen once the payment has been made. They can choose from the three different emotions reflecting their feedback on the Smart Terminal screen.
-
-
- Login to your location’s backend portal.
- Tap Configurations on the left navigation panel.
- Search Show Feedback Popup as shown in the above screenshot.
- Turn on the toggle button next to the Show Feedback Popup configuration.
-
-
-
- Now you can access your Smart Terminal and start taking the payments.
-
-
-
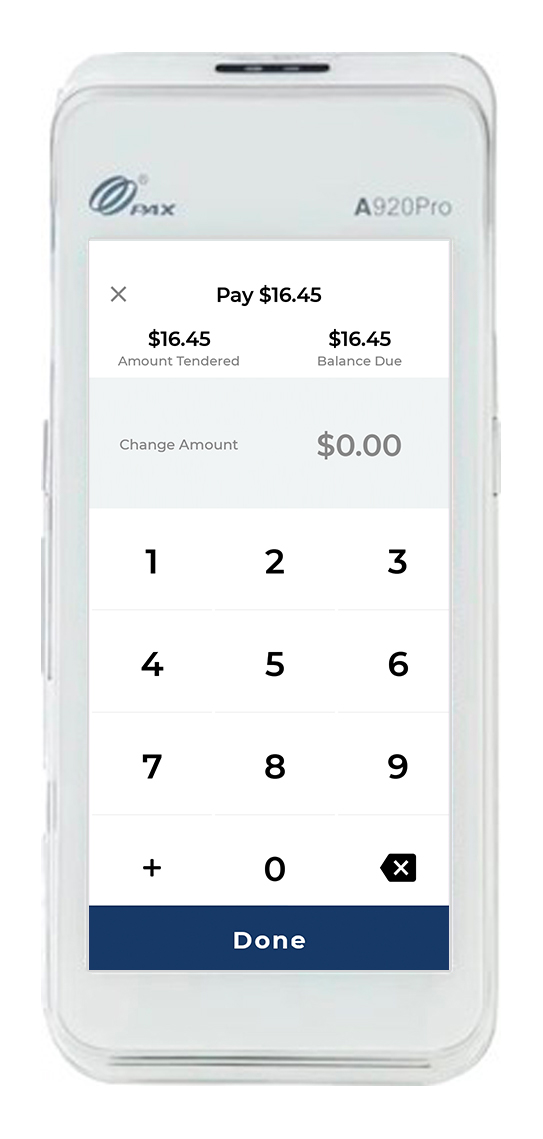
- Enter the tendered amount and click the Done button at the bottom.
-
-
-
- The Payment Success screen will appear.
- Now print the receipt or click No Thanks if you don’t want to print it.
-
-
-
- Present the device to the customer and let them choose the emotions based on their experience.
-
-
-
- The feedback emotions will also show up in the Smart Terminal portal under Transaction Report section in the left navigation.
-
How To Redirect To The Pin Pad After Full Order Payment?
The Smart Terminal now supports redirection to the pin pad screen after the order has been fully paid. To enable this feature, users can navigate to the backend portal and enable the configuration “Redirection after Full Order Payment”. Below are the steps:
-
-
- Log in to your location’s backend portal, and go to the Configuration on the left panel.
- Search the configuration - Redirection after Full Order Payment and tap on it.
-
-
-
- Turn on the toggle switch next to the “Redirection after Full Order Payment” configuration.
-
-
-
- Now you will be forwarded to the drop-down where you can select the screen to which you want to redirect after the full order amount has been paid.
- Here you can choose Pin Pad if you want to be redirected to the pin pad screen after full order payment.
-


