Quantic Point-of-Sale (POS)
Quantic POS is a fully loaded Point of Sale built specifically for busy restaurants and retail.
It’s so easy to use that your employees will fall in love with running their hands on it.
Clients can take orders on it, add customers, check reports, check open/closed orders, transfer sales, apply comp, void and tips, select hardware (printer, card reader, CDS, etc), and much more.
Check out this user manual to learn the features of the Quantic POS.
Logging In to the POS
Any user account associated with the location can sign into the Quantic POS Application.
Simply enter your Username and Password and click on ‘Sign In’. You can use the ‘Remember Me’ option to remember your login on the device.
If there is no user assigned to your location, please contact [email protected].
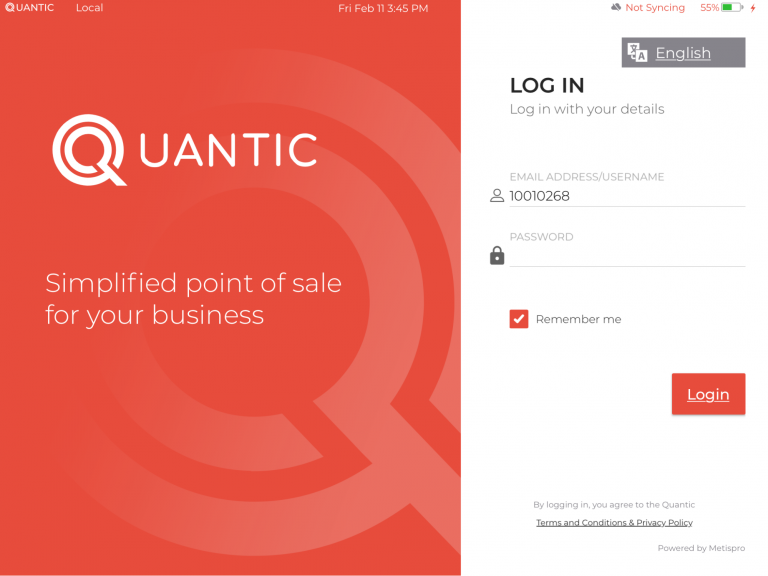
- This is an image of the actual log-in screen of the Quantic POS. It is available in two languages - English and Spanish. At any time you can switch to another available language by clicking
 on the top.
 - Once you enter the correct login credentials, click the Login button and you are good to go.
Once the user has logged in, the credentials are authenticated and the data is synced from the database to your device.
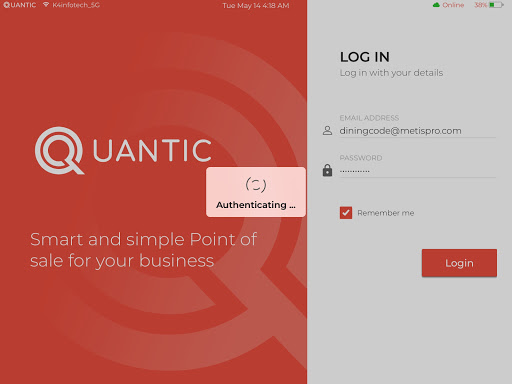
- The authenticating symbol signifies that the login credentials are being checked for validity.

- Once the credentials are verified, all the data is synced to the device. Quantic POS can be used when it is offline or not connected to the internet, though the data will only be synced when it gets reconnected to the internet.
Selecting the Location
Note: Applies only if the client has more than one location.

- Quantic provides you the ability to manage multiple locations with a single login. Once you are logged in to the software, you will be prompted to select the location, you can use the drop-down to choose from the saved locations as shown in the illustration.
- Just tap on any location from the drop-down and tap
 to proceed.
Terminal Selection
Quantic allows you to have multiple terminals for your business.
You can now easily set up any of the payment gateways with any terminal.
Each terminal can have only 1 payment gateway and vice versa.
Also, you can track sales and tips records on each of the terminals.
Here is how you can select the preferred terminal on the Quantic POS.
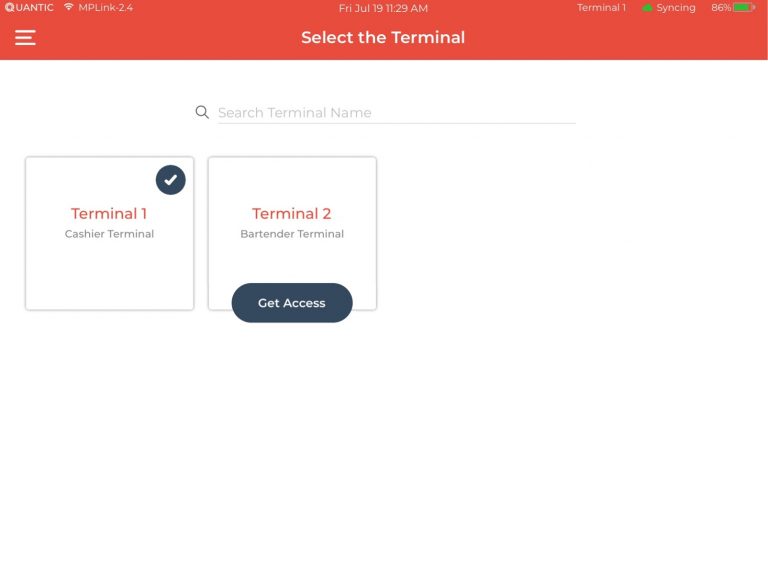
- The
 field allows you to search a particular terminal from all the present terminals.
 - The
 symbol indicates that the terminal is currently selected on the device.
- The
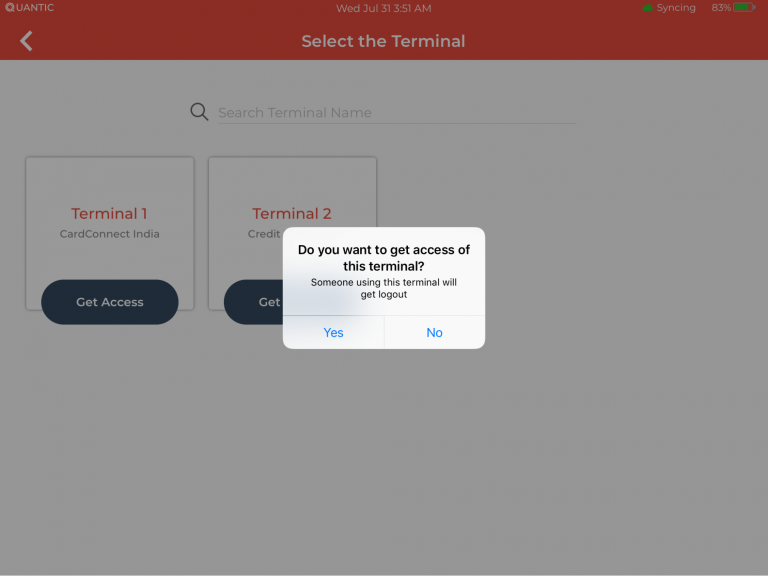
 button allows you to select that particular terminal. Once you request access for any terminal, other devices using that terminal will be logged out.
 - Each terminal block shows information about the terminal. The above example shows two terminals, Terminal 1 as Cashier and Terminal 2 as Bartender.
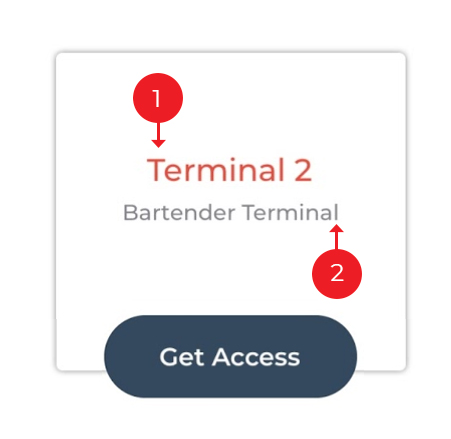
 This shows the terminal name and can be customized from the backend portal.
 This shows the terminal description and can be customized as well from the Quantic backend portal.
Employee Login Using Pin
Quantic POS allows each employee to have their own PIN to maintain confidentiality.
The pin length is customizable as per convenience, and it can be changed from the backend portal.
Specific privileges can be provided to every employee role.
You can hide other employees’ tables/tabs/orders from other employees.
You can only show the reporting to employees having specific roles.
The employees can also be restricted from using special privileges like Discounts, Voids, Comps, and Refunds.
To use them, the manager PIN needs to be entered into the system.
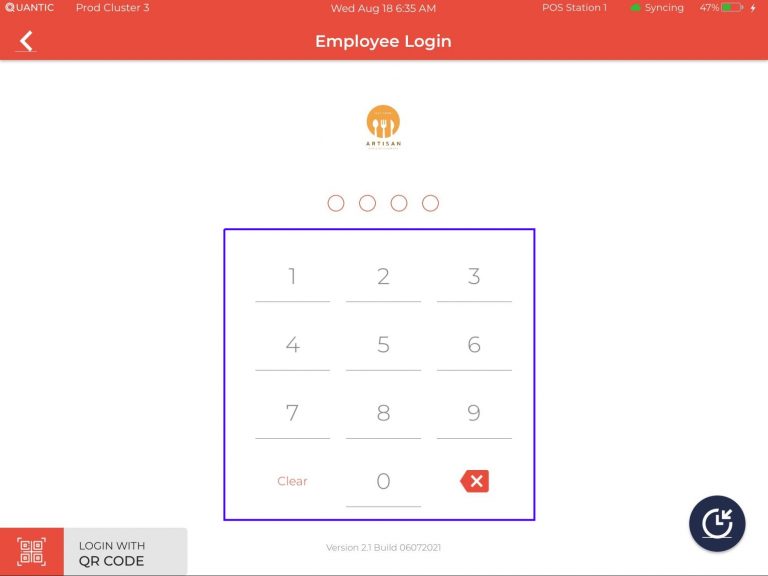
- This is a pinpad screen that is configured to accept four digit security pin. You just need to enter the correct pin and on successful validation you will be forwarded to the next screen.
- After the employee is logged in, the POS displays the landing page - either Order Screen or Service Area, depending on what’ve you set in the configurations.
Employee Login Using QR Code
Quantic POS has an added security feature that lets an employee log in after successfully scanning the QR Code (Quick-Response code).
The QR code can be generated from the backend portal.
To see how to generate a unique QR code for an employee, click here.
Once the QR code is generated, you can download it on your device, take a printout, or get the QR code printed on the plastic cards.
It is situated at the bottom left corner of the screen as seen in the screenshot.
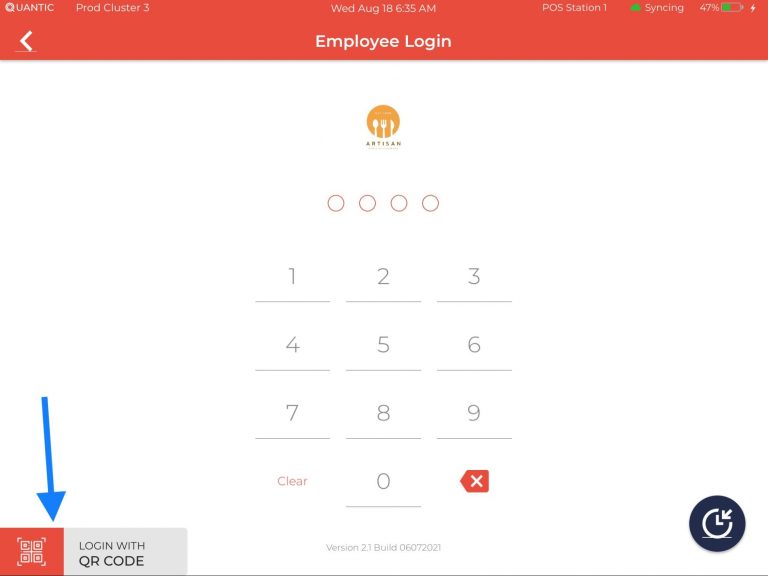
- Once you have the QR code, click the QR code button on the POS screen and bring the QR code in front of the POS’s camera. It will be scanned and on successful validation, you will be able to access the POS
