Customer Management
Manage your customers from the backend portal or from Quantic POS. Leverage the VIP pricing feature to apply discounted prices to specific customers and much more. Have a look at the screenshots below to learn how to manage customers for your business.
Adding a customer from the backend portal
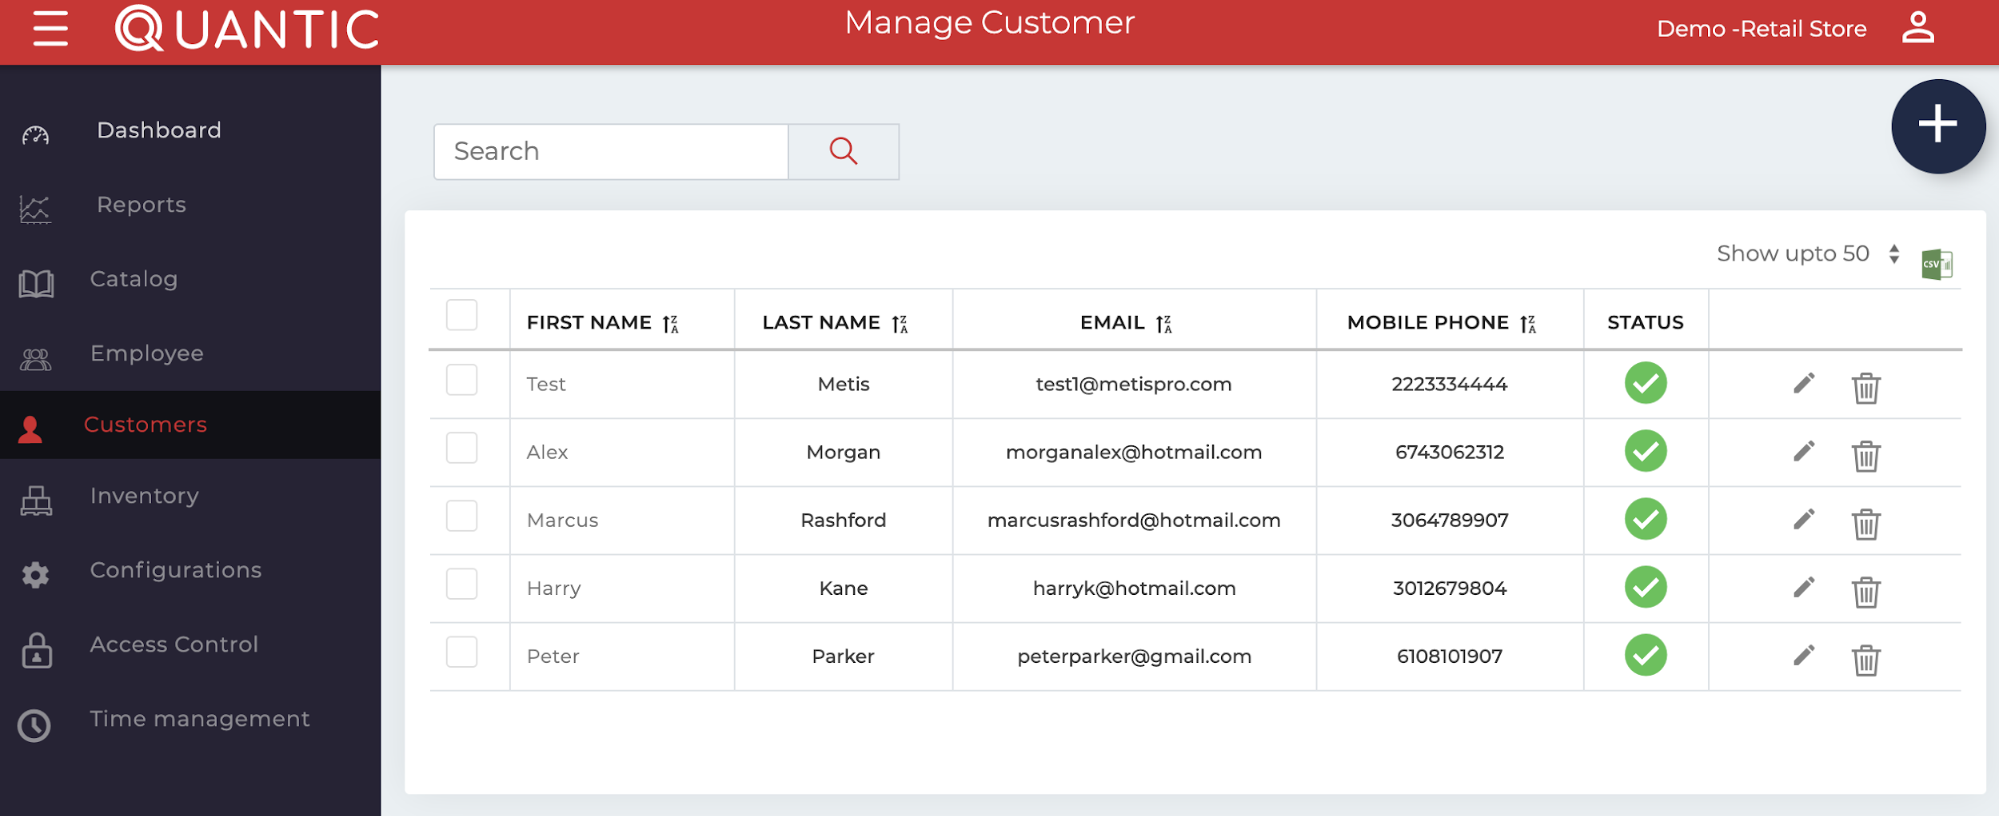
Open any browser, visit the Quantic backend portal, and log in with user ID and password. Click on Submit to proceed to the portal.Once you are logged in, click the left navigation bar ![]() and click Customers.To add a new customer click
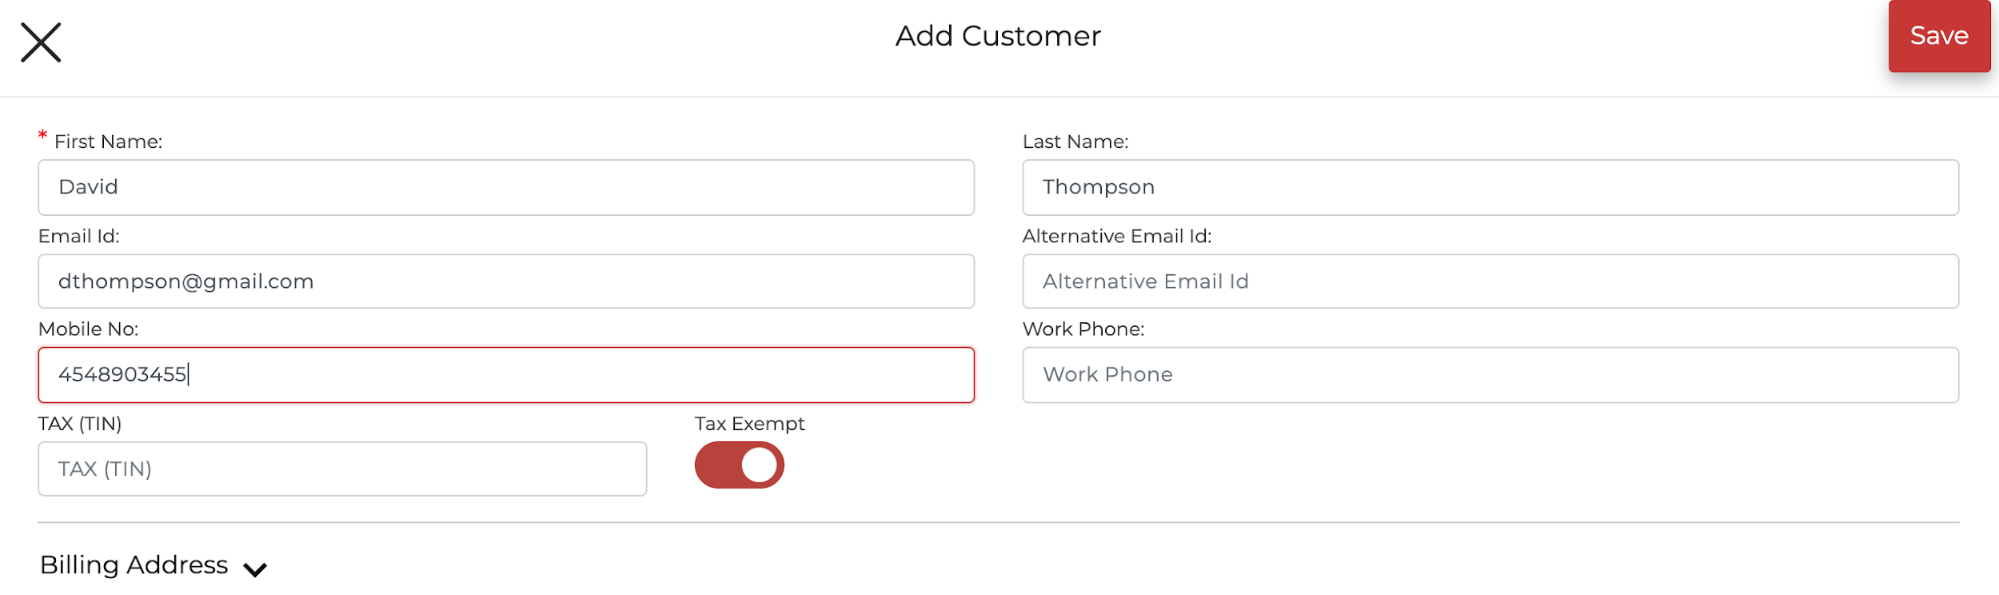
and click Customers.To add a new customer click  . A new window will pop up, enter the required details like name, email address, phone number, etc. If you wish to mark the customer as Tax Exempt, use the toggle to enable it as seen in the screenshot. Click Save to proceed.
Adding a customer from the POS
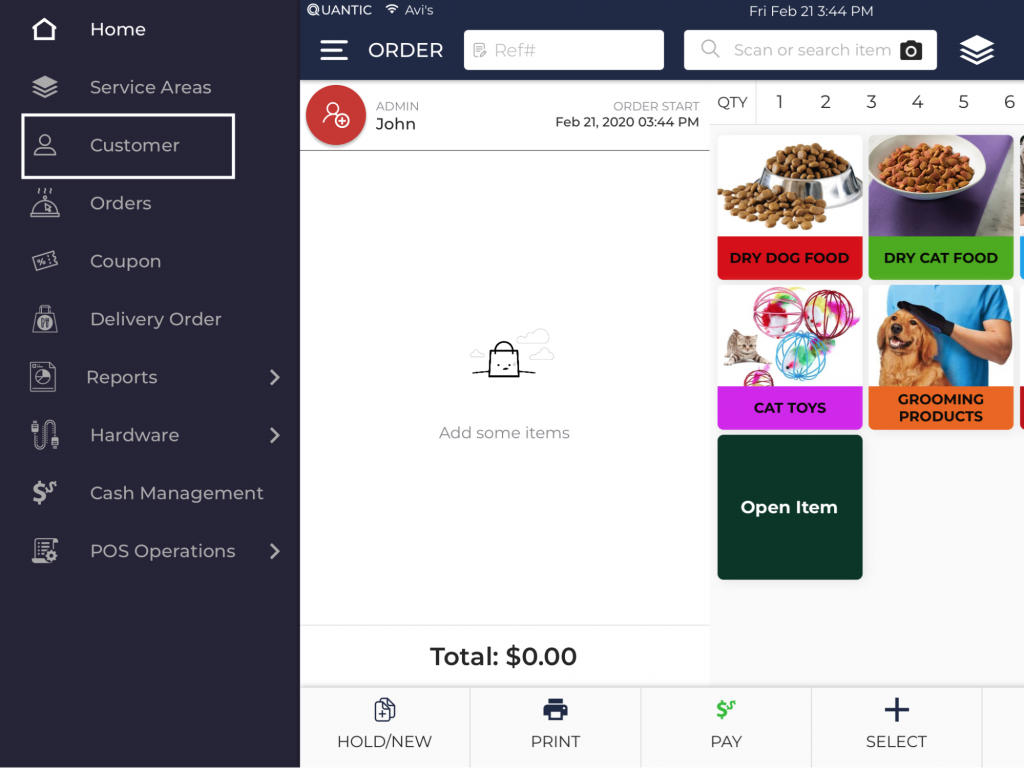
Login to the Quantic POS using the registered email ID and password. Tap
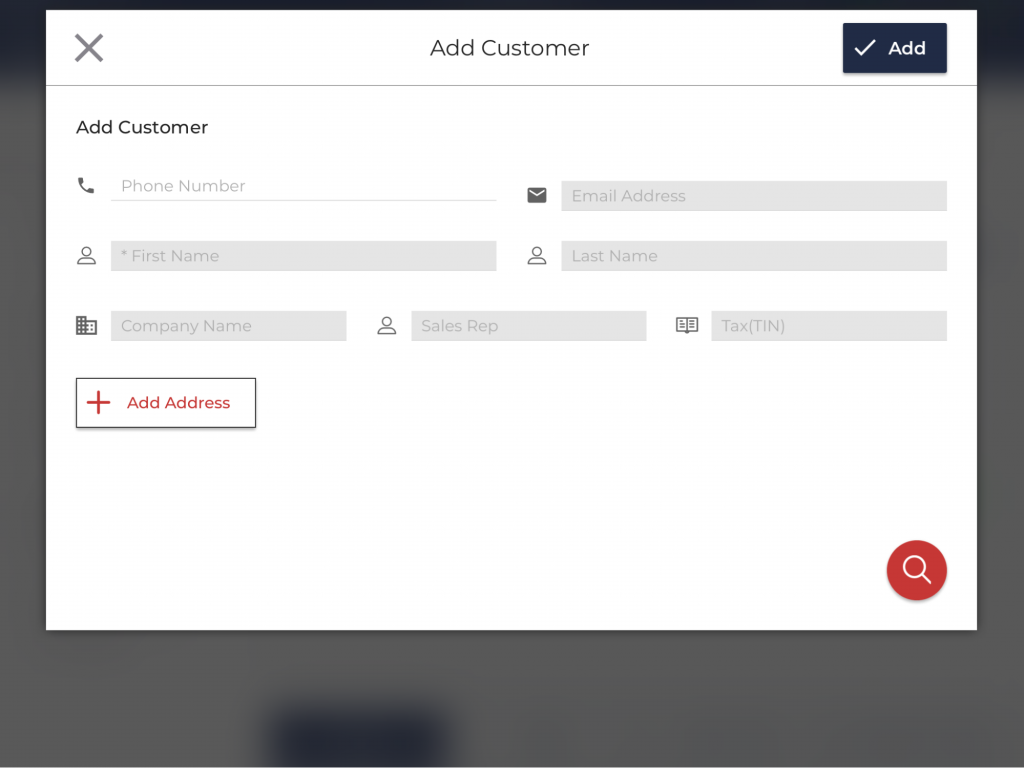
![]() left navigation bar. Click Customer to add a new customer as seen in the screenshot. A new window will appear as Customer Management. To add a new customer tap on on the top left of the screen. Enter the customer details like name, phone number, email address, and tap Add to save the details.
left navigation bar. Click Customer to add a new customer as seen in the screenshot. A new window will appear as Customer Management. To add a new customer tap on on the top left of the screen. Enter the customer details like name, phone number, email address, and tap Add to save the details.
Adding and enabling price lists from the portal
With VIP pricing, you can apply discounted prices to specific customers. You can set specific products to have different prices for these designated customers.To begin with, you need to login to the Quantic POS backend portal using any
web browser like Google Chrome or Safari. Enter your login credentials – User Id and password. Click on Submit to proceed to the portal.Once you are logged in, click on the left navigation bar  . SelectConfigurations under the left navigation bar.
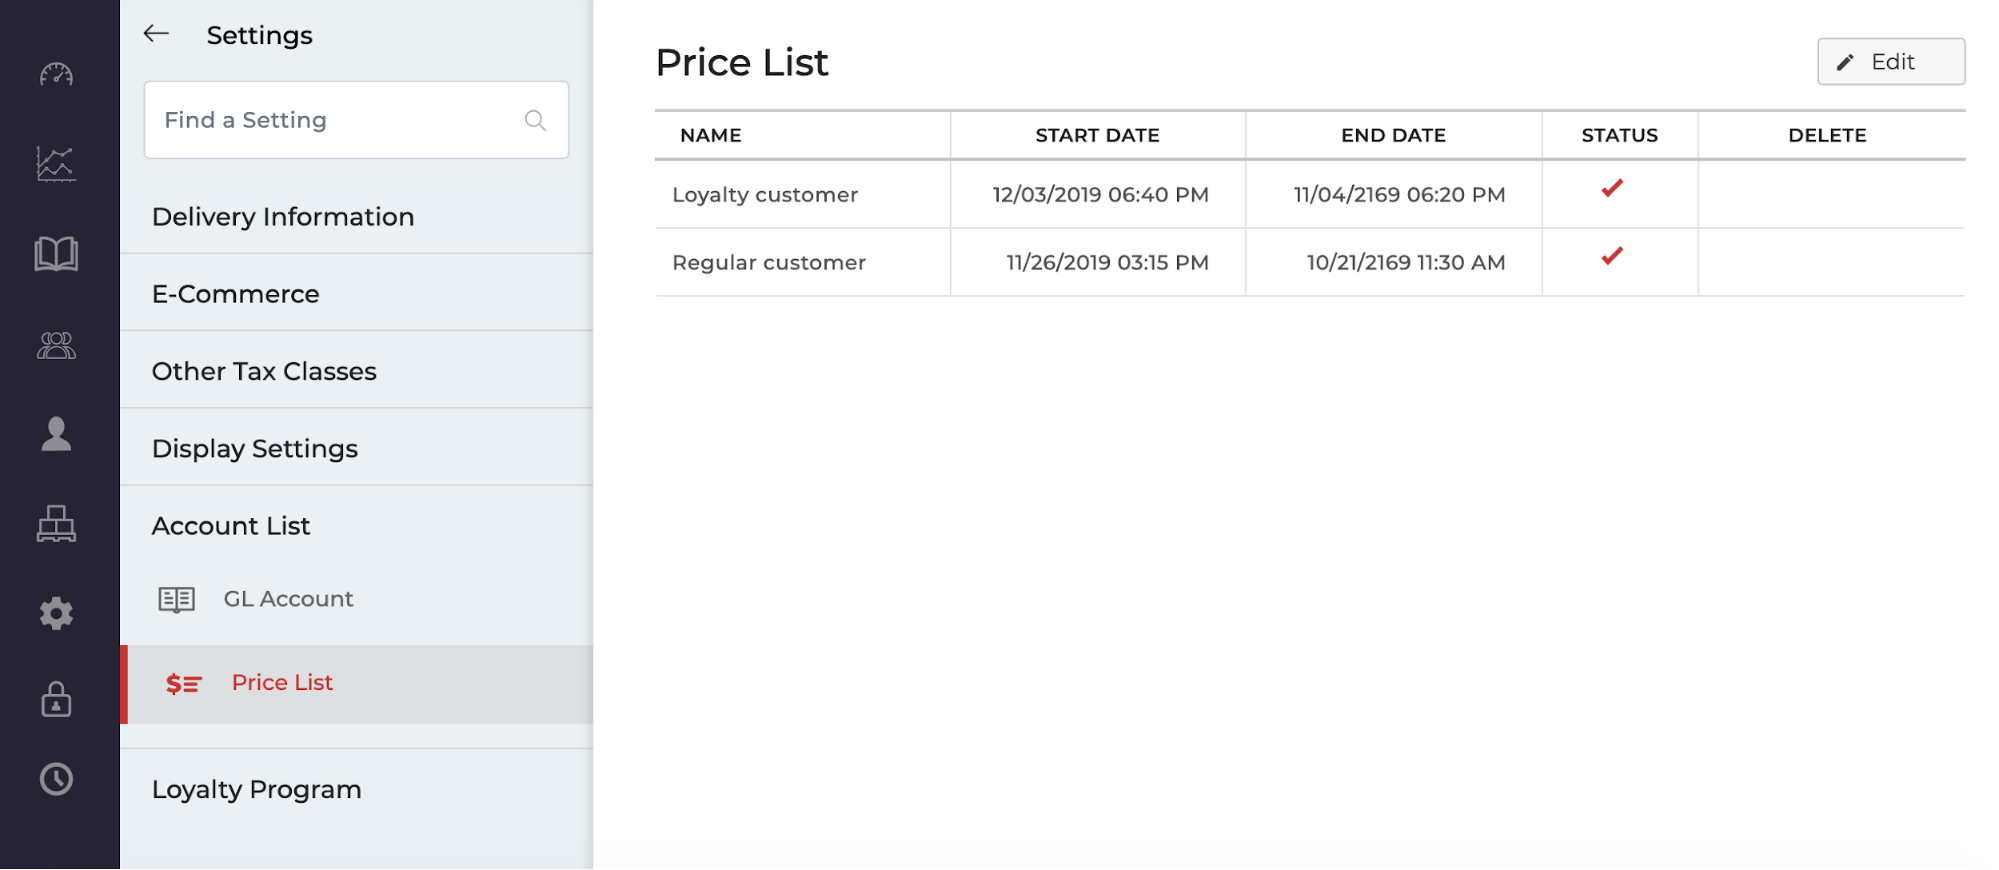
Select Basic Configurations and a new left navigation bar will appear. Scroll down and select Account List and under Account List select the Price
List as shown in the screenshot. You can add a new price list by clicking the  Edit icon on the top right.
Select your Start and End dates. Make sure the Status box is selected. Once
done, click Save Changes. Now go back to the Basic Configuration on the left navigation bar and click
Miscellaneous. Click the Edit icon in the top right corner. Check the box
next to Enable Customer Tier. Click on Save Changes.
Assigning a price list to the products from the portal
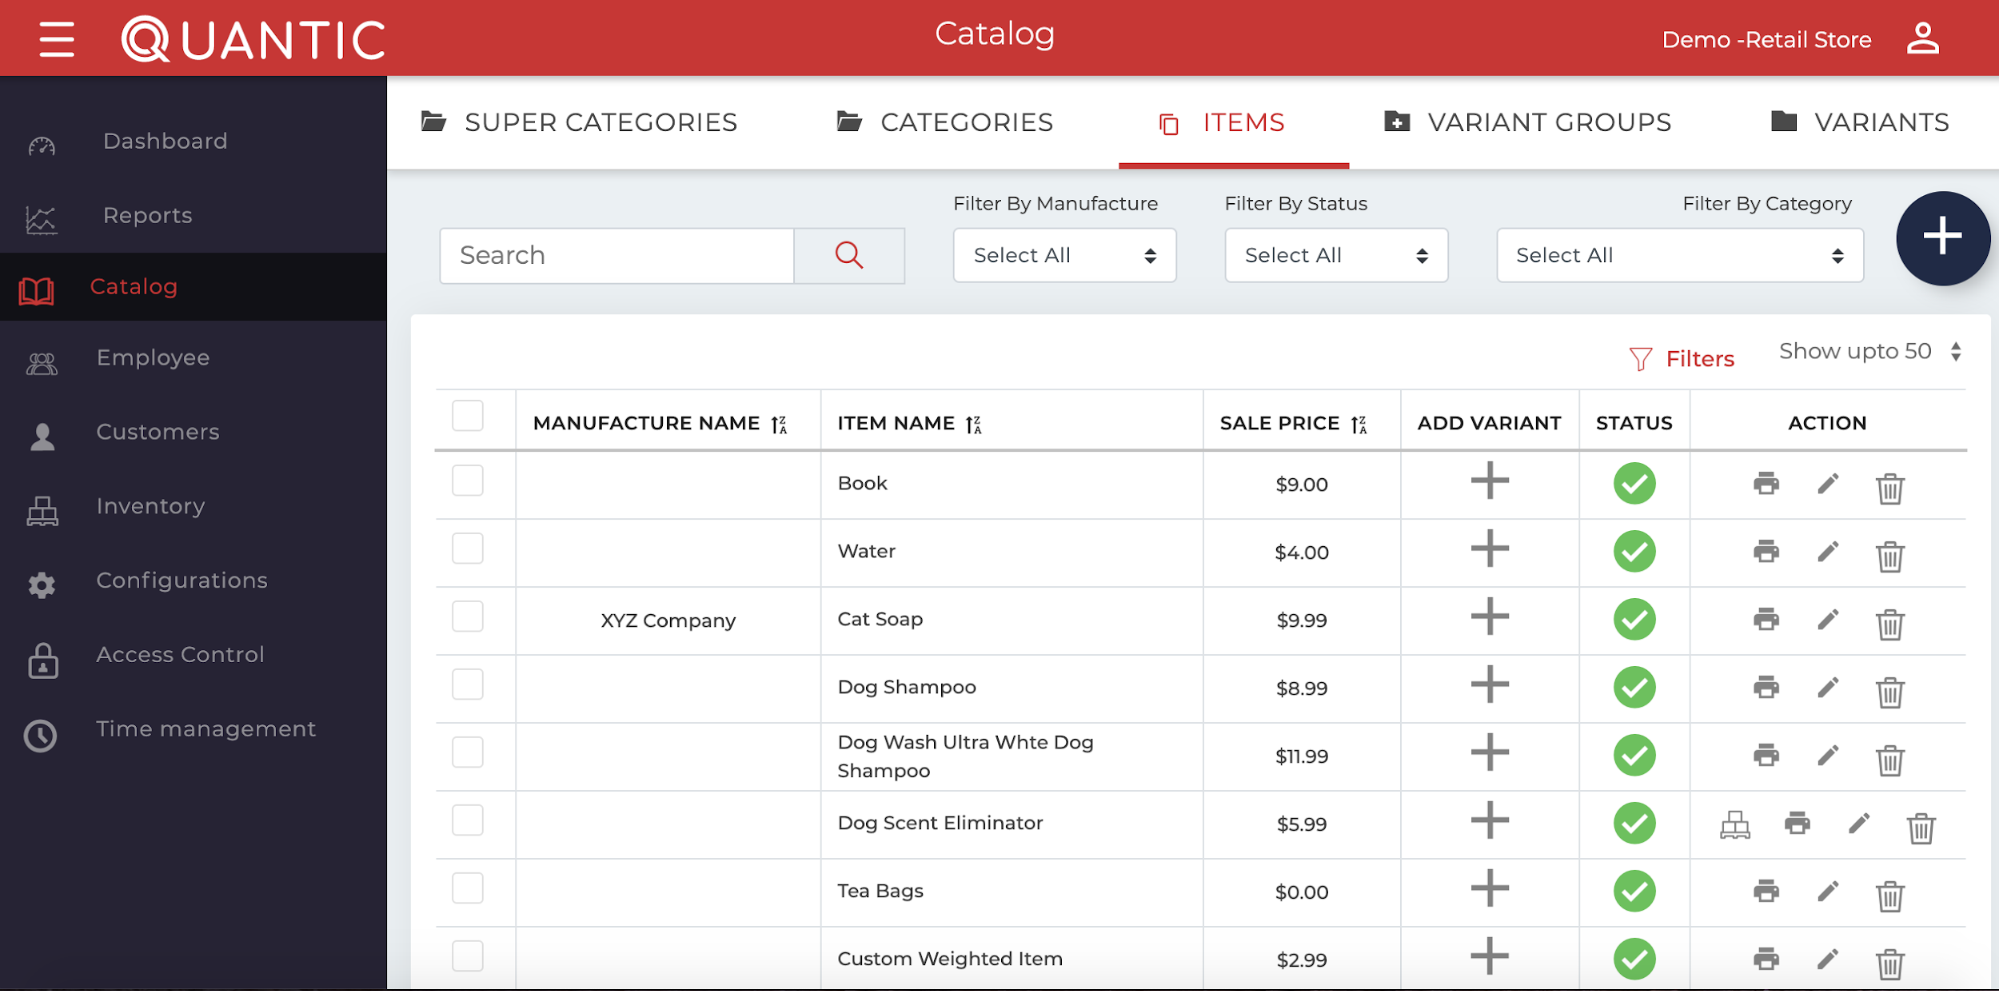
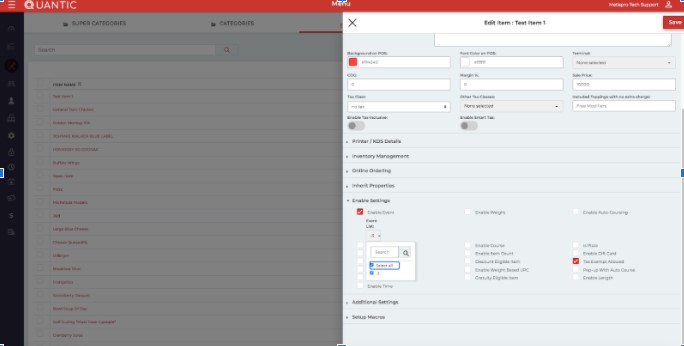
Login to the Quantic backend portal using the registered email ID and password. Tap ![]() left navigation bar. Click Catalog as seen in the screenshot.Now click the Items tab on top of the screen. It will open a list of items, along with their price and status.Click the icon to edit the specific item you want to have VIP pricing on.
left navigation bar. Click Catalog as seen in the screenshot.Now click the Items tab on top of the screen. It will open a list of items, along with their price and status.Click the icon to edit the specific item you want to have VIP pricing on.
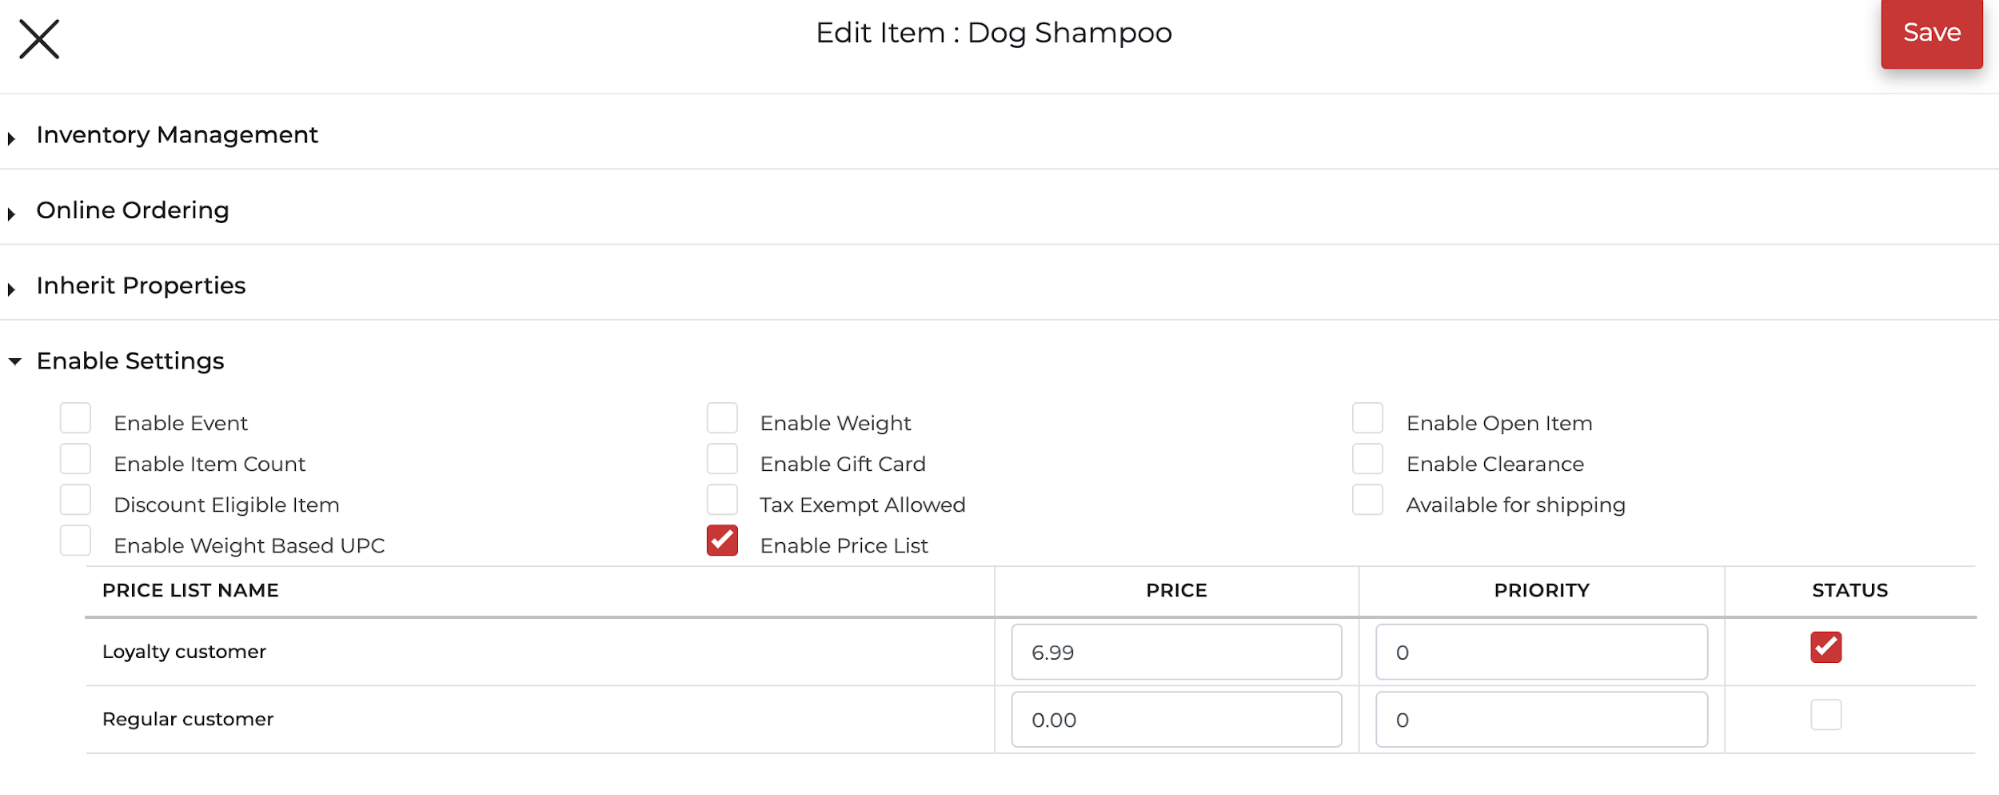
Under Enable Settings, check the Enable Price List. Enter the price you would like to charge your key customers and ensure the Status box is checked. Click on Save to proceed as seen in the screenshot.
Tagging a customer as a key/VIP customer from the portal
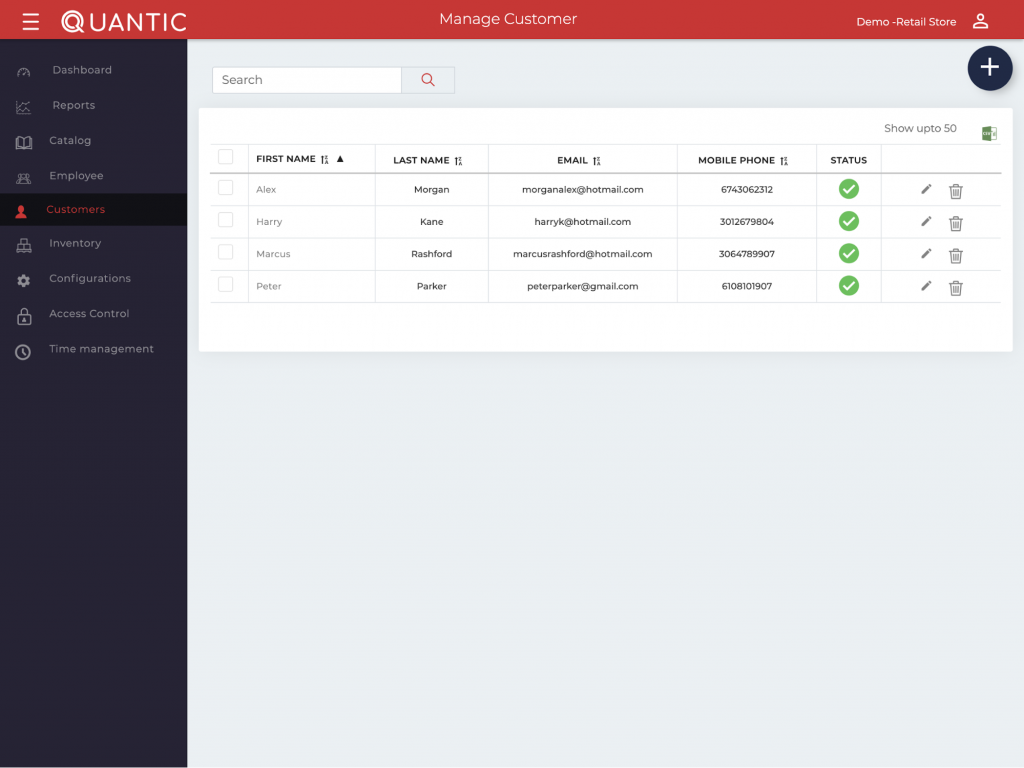
Login to the Quantic backend portal, click the left navigation ![]() bar , and select Customers as seen in the screenshot below.Click the icon next to the customer you wish to make a VIP/ Key Customer.Under the Price List, check the required box. If you wish to include or exclude certain items you can do so under the Included Items and Excluded Items drop-down menus. You can choose to include or exclude entire categories or specific items. Click Save to proceed.Once an order is started for a VIP/key customer, the prices of applicable products will adjust to reflect the VIP discount.
bar , and select Customers as seen in the screenshot below.Click the icon next to the customer you wish to make a VIP/ Key Customer.Under the Price List, check the required box. If you wish to include or exclude certain items you can do so under the Included Items and Excluded Items drop-down menus. You can choose to include or exclude entire categories or specific items. Click Save to proceed.Once an order is started for a VIP/key customer, the prices of applicable products will adjust to reflect the VIP discount.
Generating coupons from the backend portal
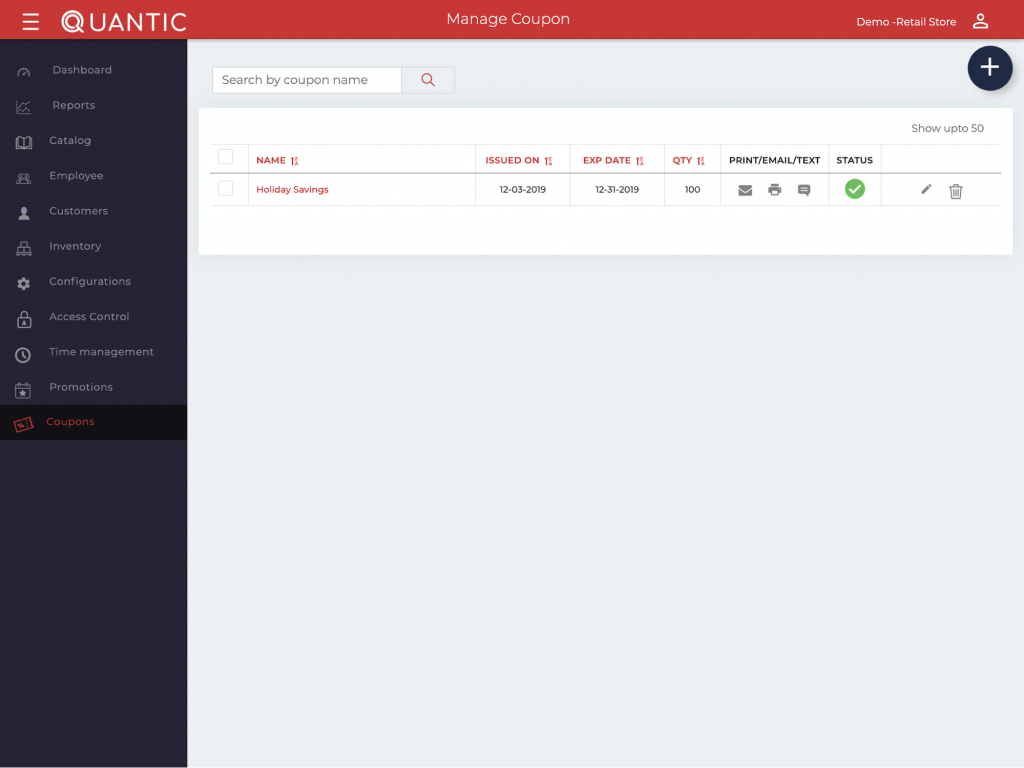
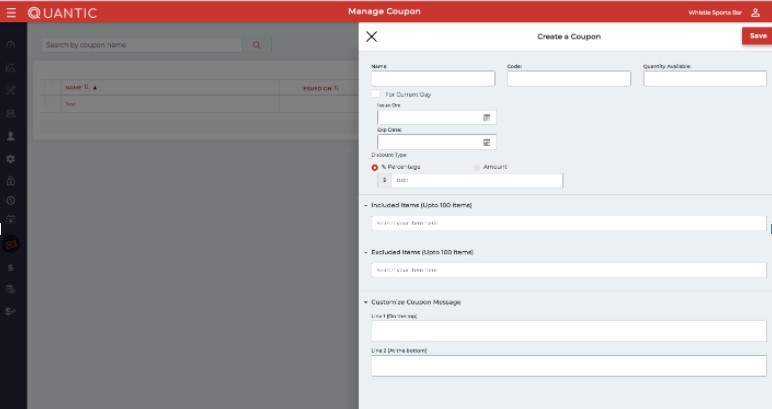
Login to the Quantic backend portal, click the left navigation bar , and select Coupons as seen in the screenshot.To create a new coupon click on ![]() .A new window will pop up, enter the required fields like name, issue, and expiry date for the coupon.The discount can be set as a percentage or entered as the amount for the coupon. Include and exclude items for the coupon from the drop-down menus. You also have the option to customize coupon messages on the receipt.Finally, click Save to create a new coupon. Once the coupon is created, you can print and hand it over to the customer. When the customer brings back the coupon, you can redeem the coupon by scanning the coupon.
.A new window will pop up, enter the required fields like name, issue, and expiry date for the coupon.The discount can be set as a percentage or entered as the amount for the coupon. Include and exclude items for the coupon from the drop-down menus. You also have the option to customize coupon messages on the receipt.Finally, click Save to create a new coupon. Once the coupon is created, you can print and hand it over to the customer. When the customer brings back the coupon, you can redeem the coupon by scanning the coupon.
Adding events/promotions from the backend portal?
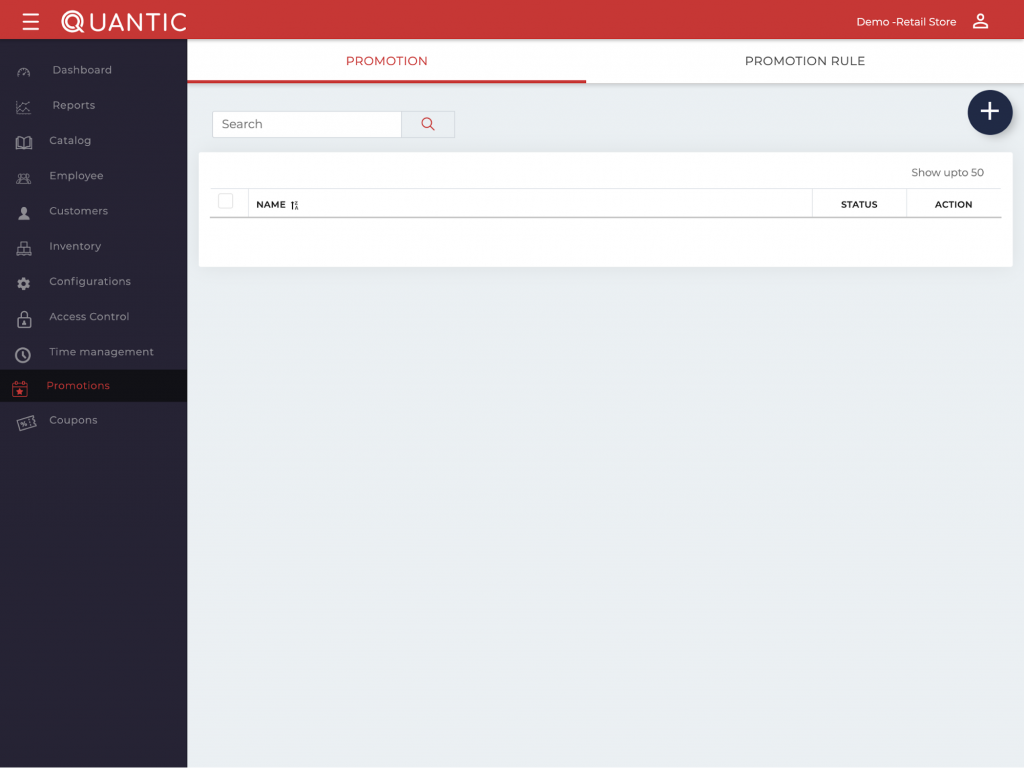
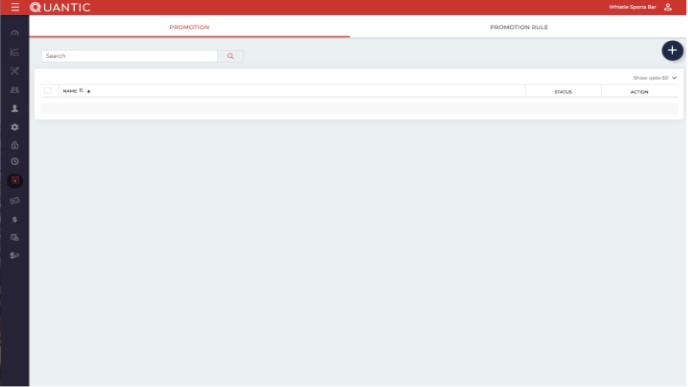
Login to the Quantic backend portal, click the left navigation bar![]() , and select Promotions as seen in the screenshot above.On the top bar, you will see the Promotion and Promotion Rule tabs. First of all, you should click the Promotion Rule and then click the
, and select Promotions as seen in the screenshot above.On the top bar, you will see the Promotion and Promotion Rule tabs. First of all, you should click the Promotion Rule and then click the ![]() button and save the rule as seen in the screenshot. Fill in the details and click Save.
button and save the rule as seen in the screenshot. Fill in the details and click Save.
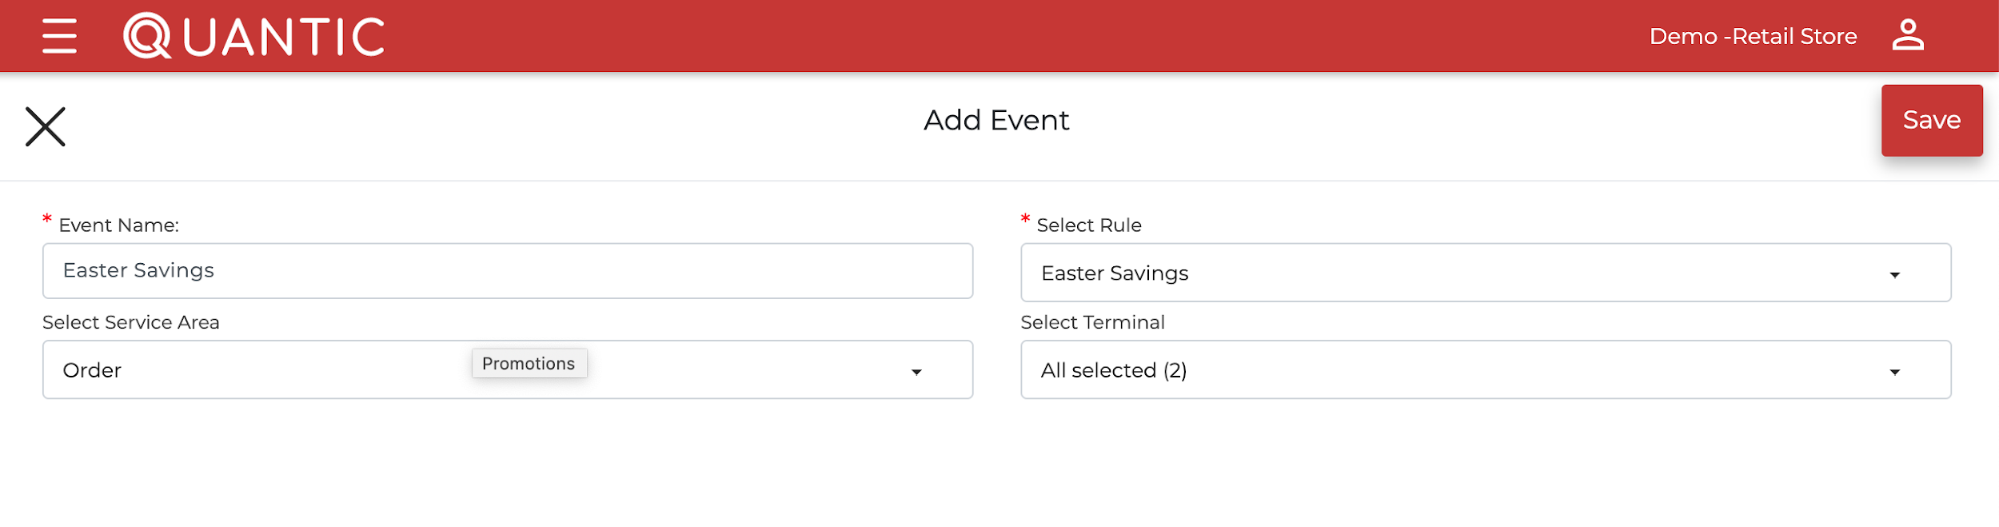
Secondly, click on the Promotions tab. Then click on the button to add an event. Next, enter the name for the event and select the rule from the drop-down menu. End this step by clicking on the Save button to proceed. Finally, to add the effect of the promotion to an Item, click on the Menu tab from the left navigation bar. Next, select the item that will be affected by the promotion. Click on the icon to edit the item.Then, scroll down to Enable Settings and mark Enable Event. You will then be able to select which promotion is affecting this item.