Inventory Management
With Quantic POS you can now track your inventory in real time so you know what to reorder and when. Easily find thousands of items by organizing them in their respective categories.This is how the inventory page looks in the Quantic Retail backend portal.
Here, Quantic can update inventory count for you, send automatic stock alerts and generate purchase orders so you’re always stocked. On the portal
you will see:
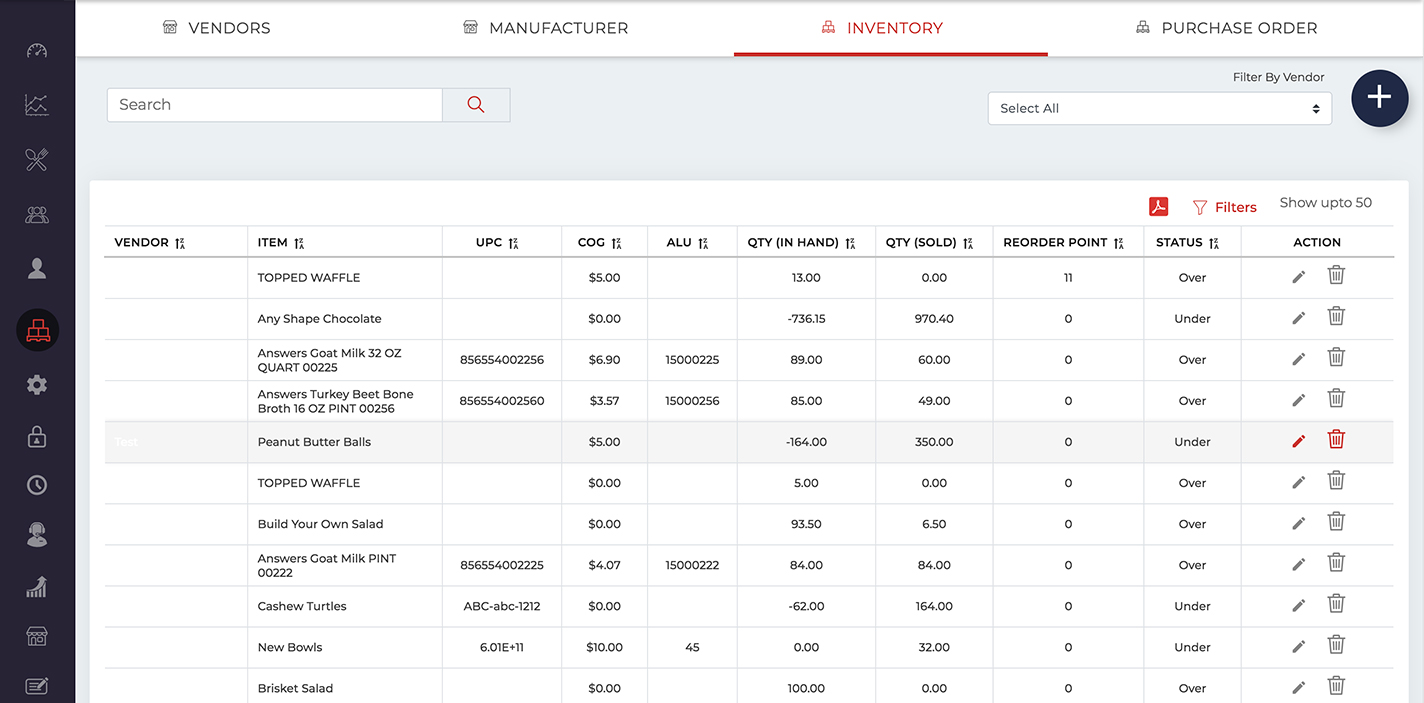
- The item name and vendor name.
- Cost of Goods (COG).
- In hand quantity of stocks.
- Items sold.
- Reordering point of an item.
- Item status.
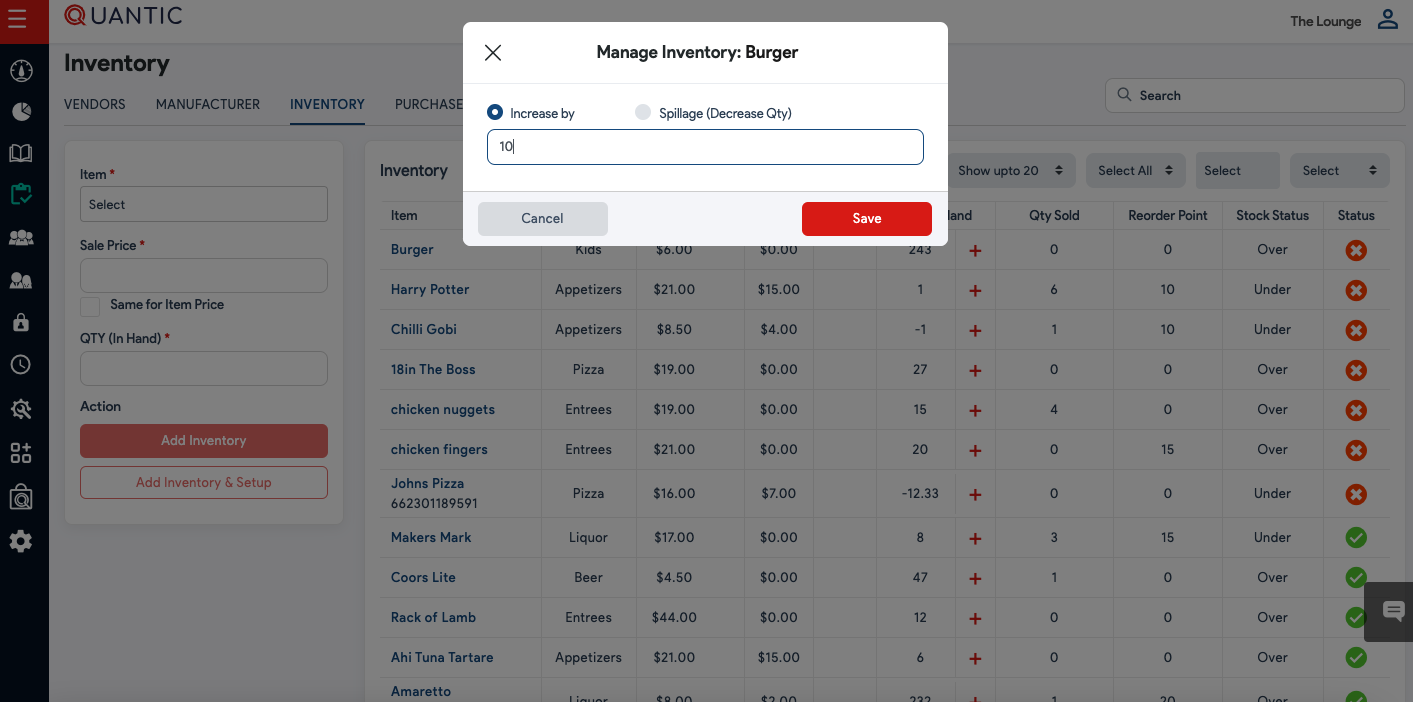
Updating existing stock and adding a new stock
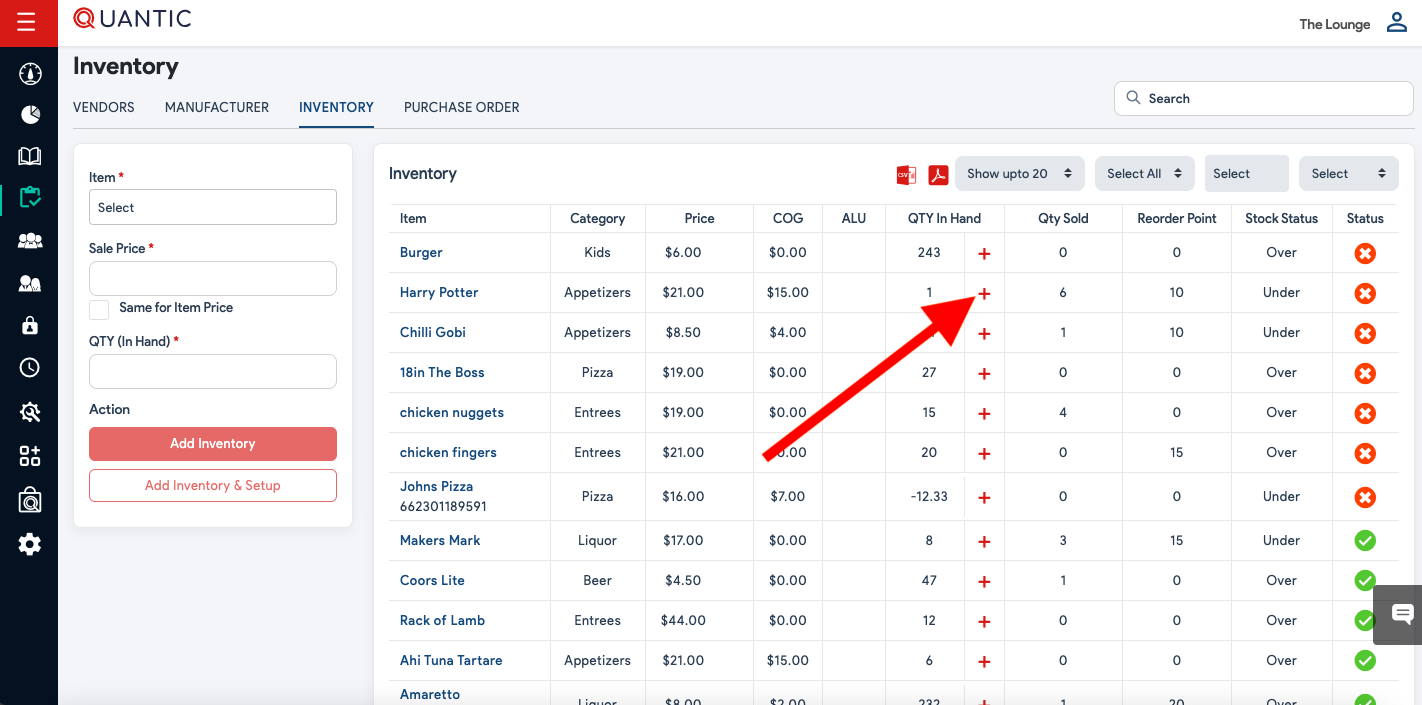
Login to the Quantic backend portal. Click on the left navigation bar 


Creating Purchase Orders (PO)
Login to the Quantic backend portal. Click on the left navigation bar 
.Click the


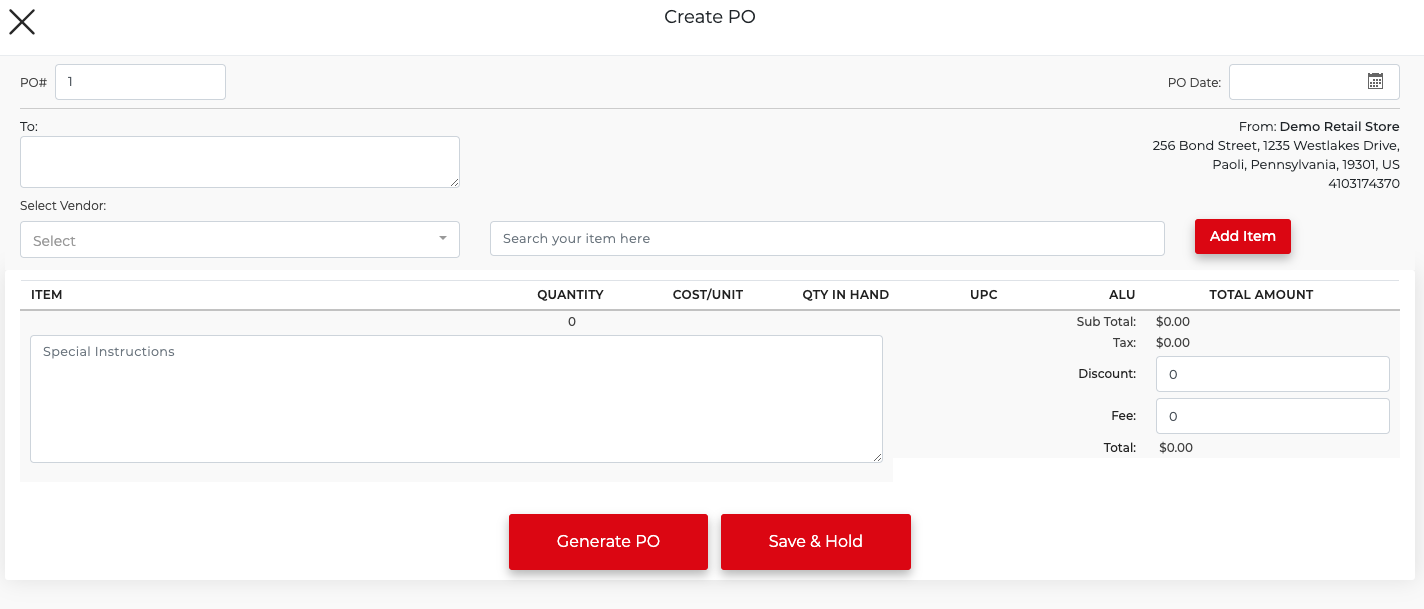
Change the QTY you want to order and add the cost if it doesn’t auto-fill. Do the same thing for any additional items you want to add to the PO.Once done, click 

The PO generated can be downloaded as a pdf and you can email it directly to the vendor.Now you can check the PO status on the main PO screen as shown in the above screenshot. A newly generated PO will be marked as Pending under the Status column. Once the shipment is received, click the icon corresponding to a particular item to receive the PO.You can also edit the PO at any time by clicking

Once the order is received you can update the PO generated as seen in the screenshot.For partial shipment, you can change the QTY Received. After final confirmation on the QTY received, click 
If it was only partially received, it will show Partially Received (in red) under status.