Pizza Shop
Enabling Pizza Builder
You can enable the Pizza Builder from the Quantic backend portal.
To begin, you should create an item named Pizza under the Catalog section, create a Modifier Group, and go on.
Follow the steps below to enable the Pizza Builder.
Create a New Item – Pizza

- Login to the Quantic backend portal using Username and Password.
Click the left navigation button and tap Catalog on the list.
Check the screenshot.
This is how the screen will appear; here, a new item can be added.
Now click the Items tab and fill in the following details to add Pizza to the Catalog list.

- Item Name
Write Pizza or you can put any name as per your choice. - Sale Price
Enter the price at which you want to sell the pizza. - Category
Select Entrees from the list. - Tax Class
Select Default tax or No tax from the list.
Once you are done with these details, click ➕ Add.

- After adding a pizza item to the catalog, it will appear below in the list. You will see the item name, the category it falls in, tax class, and status (active/inactive).Tap on the Pizza under Item Name, it will redirect you to the settings page.
Check out the screenshot.
Check the Settings
Once you have created a new item, it’s time to check some settings.
The above screen displays the settings that you need to do to get the optimum results from the Pizza Builder module.

On the Detail page, most of the information comes prefilled. You can just add a few more info – the COG (cost of goods), Margin%, Background color, and Font color. Click Save after adding these details.
Additionally, click the checkboxes beneath the Item name, if you want to keep the same name for Kitchen, Receipt, and Web.

Under the Assignment tab, you may assign specific or multiple printers for this item or keep the inheritance from the associated category/subcategory.
The above screen displays that you may create a Kitchen Name and/or Receipt Name, which will appear on kitchen tickets and receipts, respectively.

To enable the pizza builder, go to Additional Settings and check the box 
as seen in the screenshot. If you check the box 
it will combine the same Left half and Right half
toppings as the Whole Topping.
Edit the Configurations

Tap Configurations on the left side panel. Go to the Search bar on the top and type Enable Prefix on Modifiers and click the first option on the drop-down list.

The screen will scroll down automatically and will stop at the configuration that you have searched for.
Check out the screenshot. Now turn on the toggle switch adjacent to Enable Prefix on Modifiers and it will turn red.

Similarly, search for Enable Modifier on Product List Screen and click the checkbox adjacent to it.
Create a Modifier Group

Go to the Catalog under left navigation.Now to create a Modifier Group for the pizza, click the  icon located on top of the Catalog screen.Click the
 ![]() icon on the top right side of the screen.
icon on the top right side of the screen.

Fill in all required fields as indicated in the screenshot.Firstly, click the Detail tab and select the Background and Font color from the color grid.

Under Settings, check the box 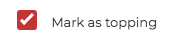 and
and  as seen in the screenshot.

Go to the Pre/Post Modifier tab. From here you can customize the settings for modifiers for the first half, second half, or a whole pizza.
- Pricing
You can set the fixed pricing or set a mult. factor for either part of the pizza or whole pizza.
Whole Toppings can have a fixed price or the price can be a multiplier. In this
example, the price for whole toppings has a multiplier factor of “1” and the
Right half toppings has a multiplier factor of “0.5”. You also have the option to
enter a different name for the POS and the Kitchen. Abbreviations can be
used for the Kitchen if required. It will print the kitchen ticket with the
abbreviations.
- Display Mode
This is where you can choose the modifier name as the Prefix or Suffix. For example, the Condiment option is a modifier group and
mustard and ranch are the modifiers under that group. With the help of
pre/post modifiers, you can now associate the modifiers with prefixes such as
“No Mustard” or “Light Ranch”. In this scenario, No and Light are the prefixes
for the modifiers. Another option will be to add the modifier with the suffix
“Ranch On the side” or “Mustard Extra”. In this case On the side and Extra are
acting as a suffix for the modifier. Click on to proceed. Once saved, you will see a notification message
saying Modifier Group Created Successfully.
Create a Modifier

Once the Modifier group is created, you need to create a Modifier.
Go to the
Catalog menu: Click the  icon located on the right of
the screen, as seen in the screenshot.
Now click the field below Modifier Group and type Pizza Toppings (or any
modifier group that you have created). Click the  button on the top right
of the screen.
On the Modifier screen, you will see different tabs – Detail, Assignment,
Online Ordering, Other Settings, Setup Macros.
Go through each one of them and fill in the desired information.
If there is a fixed cost associated with the modifier being created, you may add the price in the Price field.

Under the Assignment tab, you may create a POS Name, Kitchen Name, and Receipt Name, which will appear on kitchen tickets and receipt,s respectively.
Under the Online Ordering section, you can enable the modifier for the website by clicking the checkbox adjacent to Enable for Website. Also, you can choose any name under the Web Name field box. Once done, click  to proceed.
Create Item

Go back to the Catalog menu, and click the Items tab on the top. Now fill in the item details as shown in the above screenshot.
We want to create a BBQ Chicken (12 inches) item for the Pizza category
with a sale price of $9.50. The same we have filled in the above illustration.

After filling in the apt details, click the ➕ Add button.
This is how the BBQ Chicken (12 inches) shows up in the item list. Click the ➕ icon in the Associate Modifier column.

If this Modifier Group is a required selection, please enable MOD Forced and add the minimum MOD Forced Count.
Free Mod Count means the number of free modifiers that you are offering with a particular pizza. In the above example, it’s 2.
You may also enable Multi Select, if multiple modifiers can be selected at a time from the same group.To enable all modifiers in a group click the  underneath the
  icon.
icon.
Once you are done with settings, click the Save button.
