Full Service Restaurants
How to Create a New Order?

- To begin, you need to sign in to the Quantic POS, enter the PIN, and you are all set to start a new order.
- Click the Navigation menu and click the Services Areas button.
- Select any of the service areas as per the order. In this screenshot, we have chosen the Dining Room, selected the table where a customer wants to place the order, and added the number of guests.
- Similarly, to create an order for Bar, Take Out, and Delivery, just click the respective service tab, hit the ➕ button, and choose the items to be added.

- A new screen will open, here you can choose new items, add the number of items and choose the payment method as well.
- Once the desired items are selected, click the Done button.
How to Fire a Course or Send an Order to the Kitchen?

- Finally, click the Send/Stay button at the bottom navigation to send an order to the kitchen. Once done, the items will turn gray.
How to Reorder Items from Past Orders?

- Click the left navigation button and select Orders from the list.

- Tap on the order number.

- Now press the ➕ Select button on the bottom right of the screen.
- Select the item that you want to reorder (see the screenshot).
- Once you have selected the item, click Reorder.
How to do Quick Reorders?
")
- Quantic provides the ability to quickly reorder items. Ordering another round of drinks could never be so simpler!
- Simply double-click on the Quantity of the item to reorder.
- In the example shown, double-clicking on the 2 would increase the quantity to 3.
How to Process Transactions When Offline?
What do you do when the power goes out? The good news is that Quantic POS allows you to continue with cash transactions.
However, until the network is back online, please be advised that you will not be able to process credit card transactions or see past transactions.
Once the POS terminals are back online, they will resume syncing with one another and the cloud as well.

- If you’re unsure if your terminal is offline, just look at the top of your screen.
- If you see a black banner notifying you – The POS Station is offline and unable to sync, then you must check your internet connection. If you continue to have issues please contact [email protected]
How to Split the Checks?

- Splitting checks is simple. On any check, begin by selecting the
 Split button.
 - The next screen gives you the option to Split the check evenly, Split by position, Merge the check, and Print all.

- Clicking on Split Evenly will ask how many ways you wish to split the check. In this example, we have chosen to split in 3 evenly.
- Split by position is typically applicable for Fine Dining restaurants. Anytime you can Merge the check back into one check by clicking on Merge.

- If you proceed with Split Evenly, on the order screen you will be able to see the checks divided equally as
 Select the check which you wish to pay and click on
  on the bottom left-hand side.
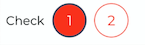
 - Once a check is paid it shows as
 . The green circle on check 1 indicates it is paid.
 - The red circle on check no. 2 means it is yet to be paid and it is still an open check. The customer can add further items to his order and pay the check later. This example shows a check divided into 3 equal parts.
How to Set Count for Items?

- You can set a count for any item on your menu. It will be helpful if there are limitations to the count for an item to be sold. Example: Basket Fries.
- To set the count for any item, long press on the item. Tap on
 as shown in the screenshot.
 - By setting a count for an item, you will not be able to sell that item more than the Set Count. Once the item is sold out, the item will appear as grayed out, preventing the server from taking further orders for that item.
