Quick Charge

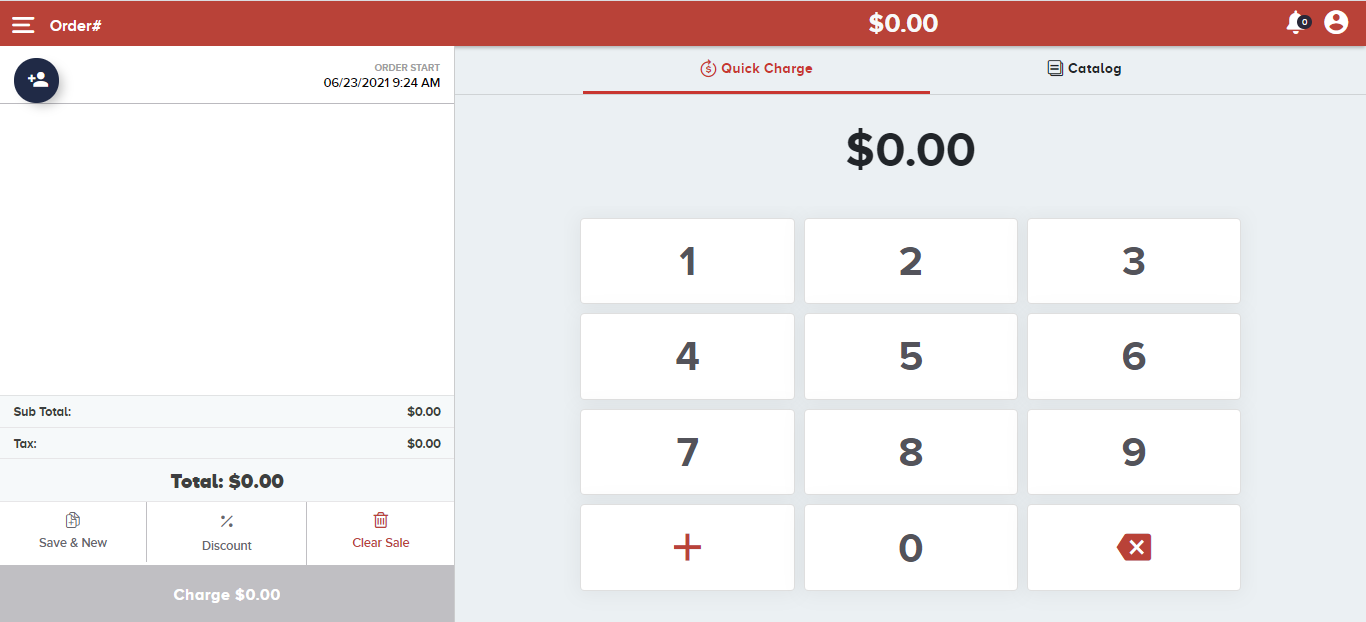
Quick charge is the screen where you can access your catalog items, add a
quick item, and charge your customers for the services you offered to them.

Quick Charge

Quick charge is the screen where you can access your catalog items, add a
quick item, and charge your customers for the services you offered to them.

Adding an item from the catalog and creating a quick item

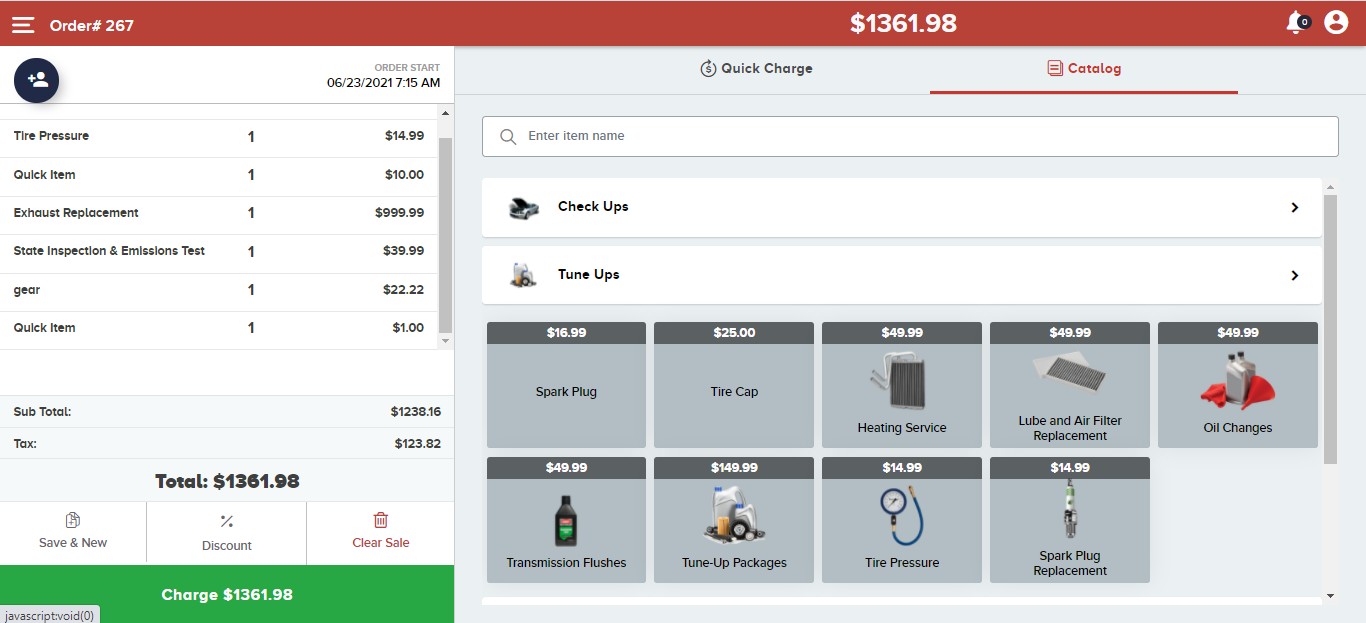
It displays two major tabs on the screen – Quick Charge and Catalog. The Catalog is organized by category and item. From Catalog, you can directly
charge the customers for the services you have offered by using the preset
items.If your prices change based on the needs of the clients, you can use the Quick
Charge option to manually enter the amount.To begin, select the items from the Catalog that your customer needs to be
charged for. If any item is not there in the catalog, click Quick Charge on the
top of the screen as seen in the screenshot.
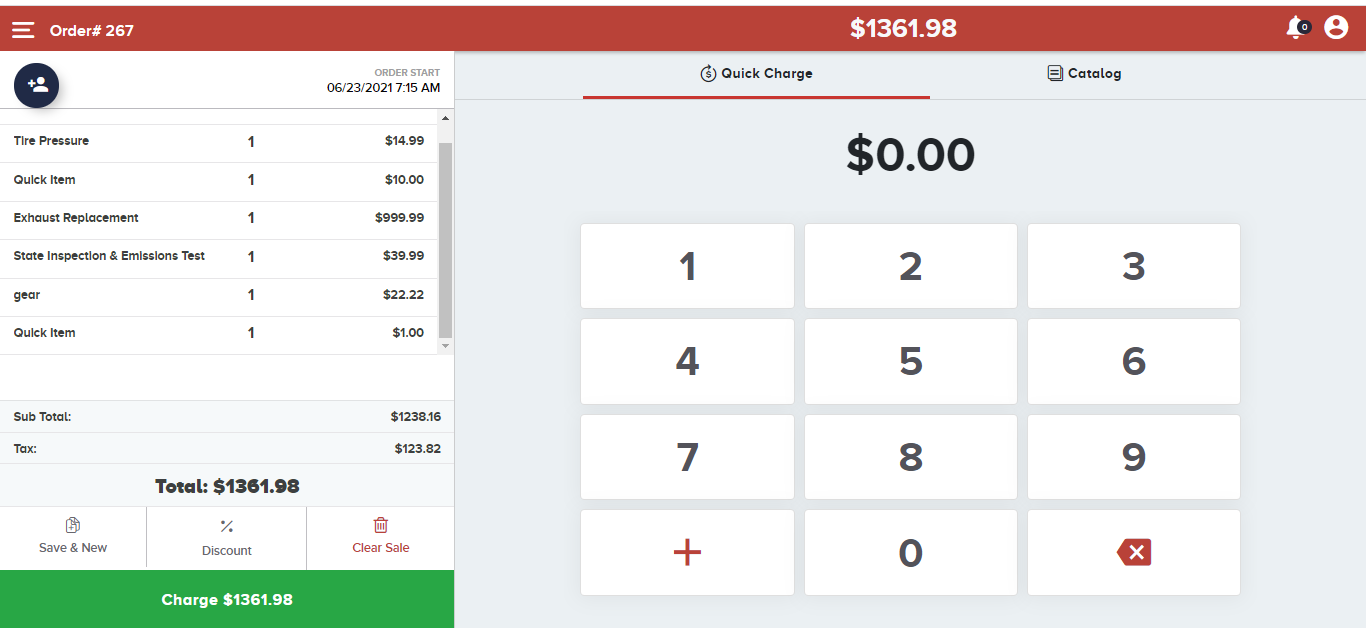
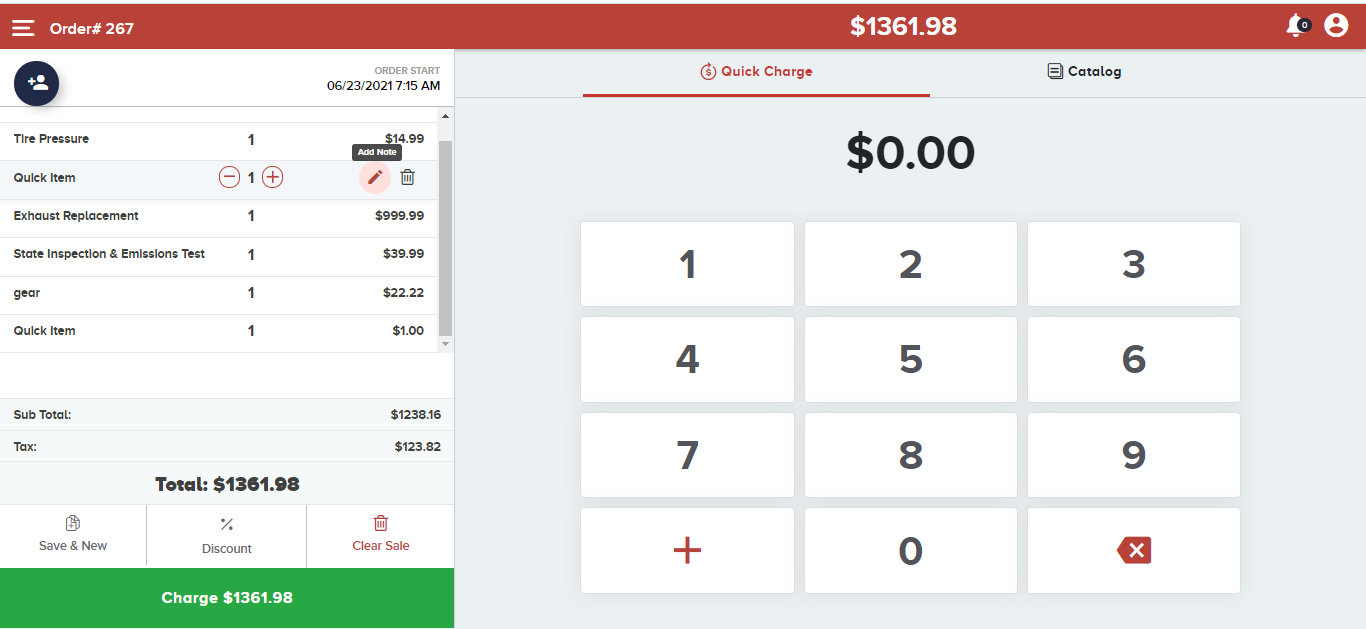
Enter the amount using the virtual keypad and click ➕ to add the charge to
the ledger. You can see the amount as the Quick Item on the left.You can also edit or customize the Quick Item. Simply hover the cursor over
the Quick Item on the ledger to reveal the ? icon, click over it.A new pop-up screen will appear, enter the item name and click Ok.Now that name will be reflected on the ledger and the invoice as well.
Once you have added the stuff that your customer wants to buy, just click on the Charge button (green color button at the bottom left corner). Doing this will open a new screen as seen in the below screenshot.

Accepting payments via cash or card

Accepting payments with Quantic Service is a cakewalk and you can do it via cash or credit card. The following example will explain the method in just a few minutes.
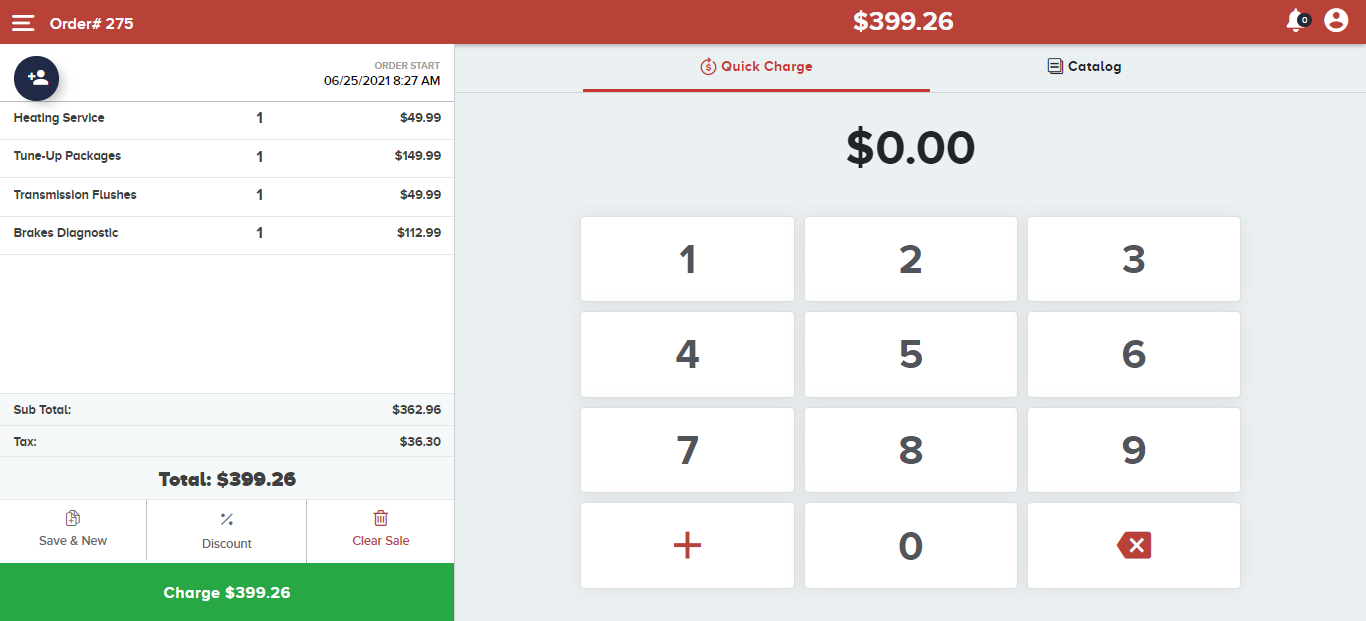
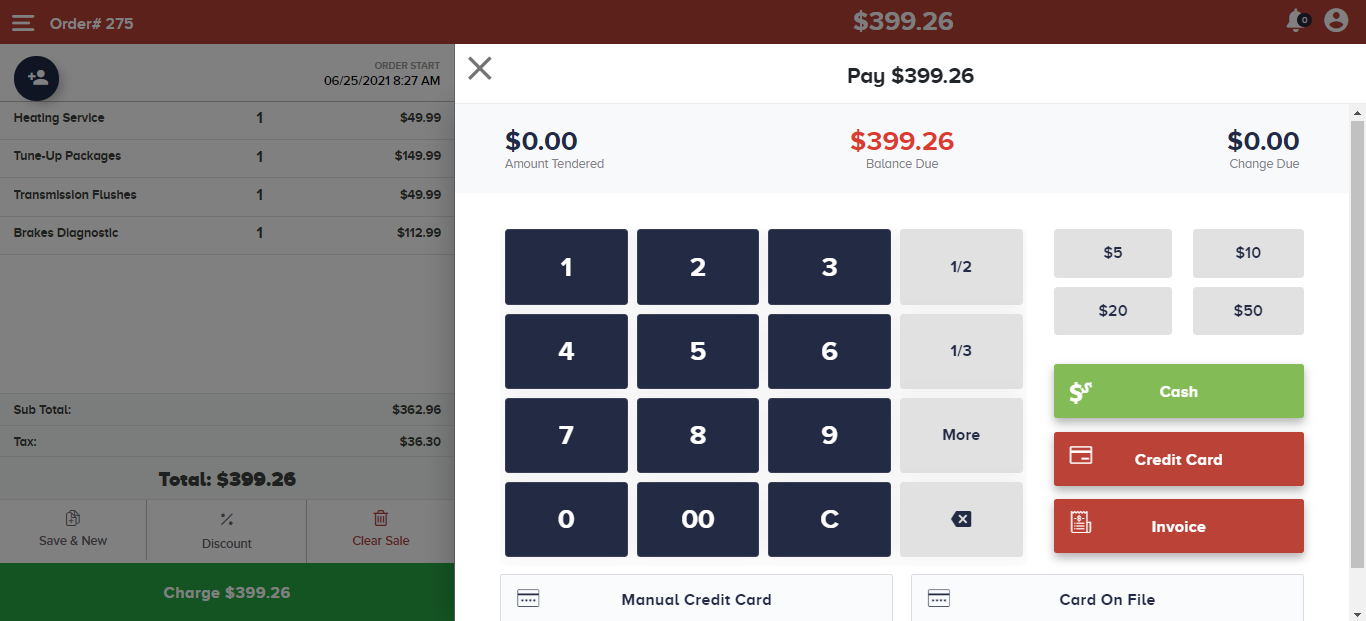
Once you have added the stuff that your customer wants to buy, just click on the Charge button (green color button at the bottom left corner). Doing this will open a new screen as seen in the below screenshot.
This screen will display a couple of payment options.
  • CashUse this option if your customer wants to pay via cash.
  •  

  • Credit cardUse this option if the customer has a credit card.
  •  

  • InvoiceUse this option if a customer wants to pay at a later date.

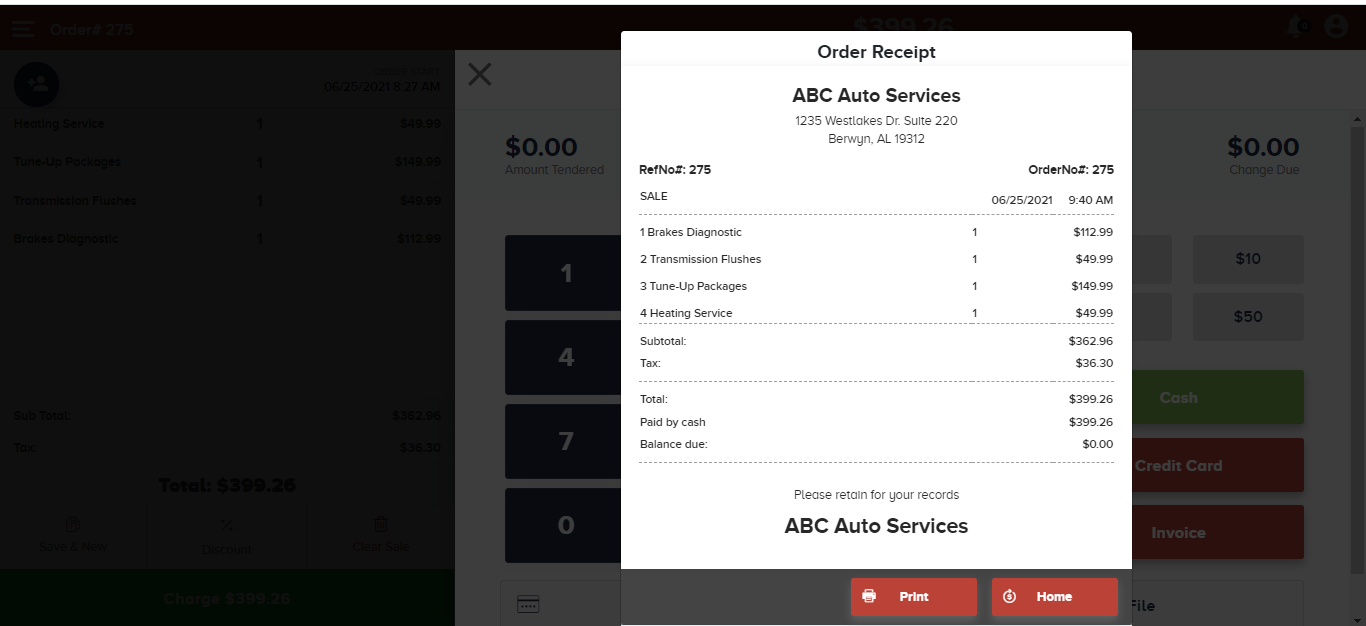
So, this is how the Order Receipt pops up when you click . If the customer is going to tender with cash larger than the total amount, a display will appear with the change due to the customer.
On the contrary, if a customer pays via credit card, you have to click .
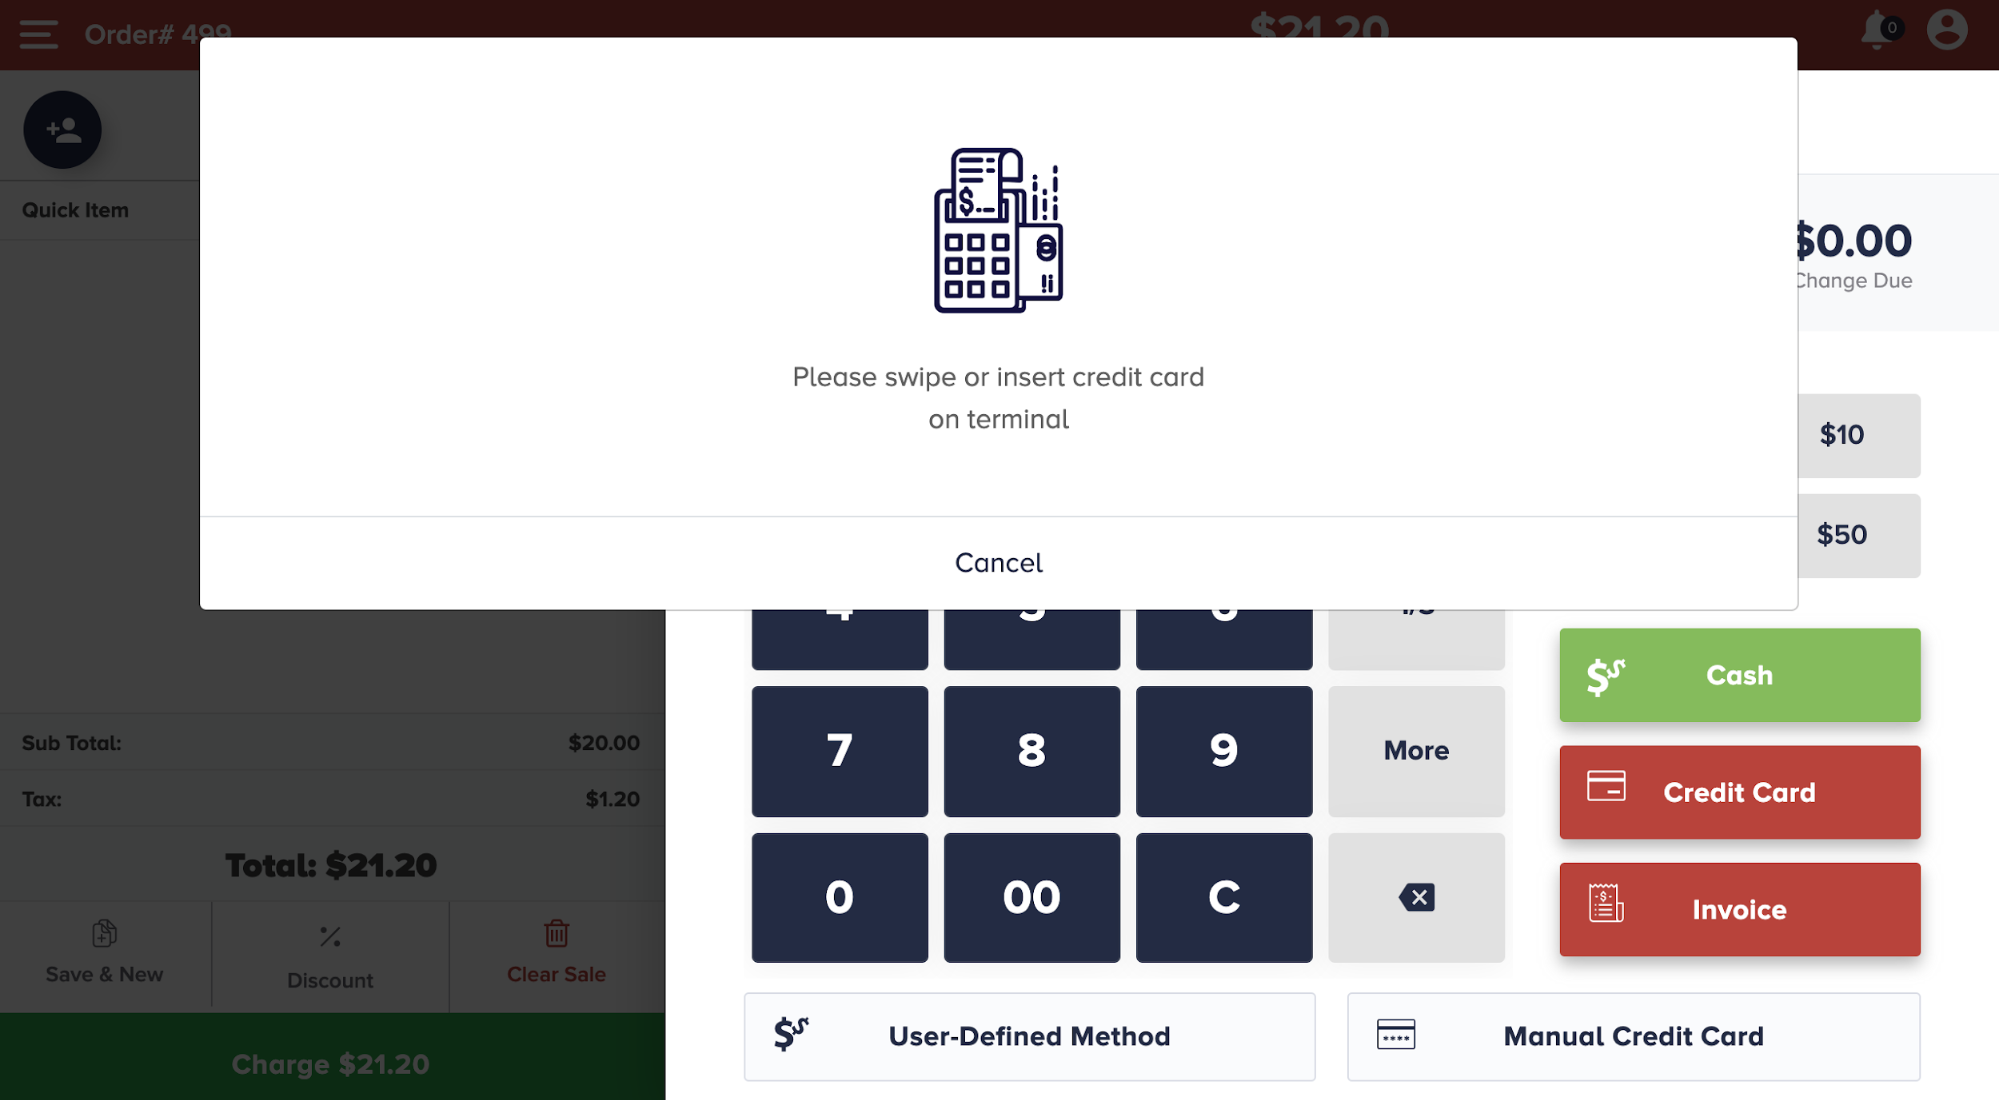
A pop window will appear asking the customer to swipe/insert the credit card into the credit card terminal as seen in the screenshot. Swap the card, whoosh… the payment is done.
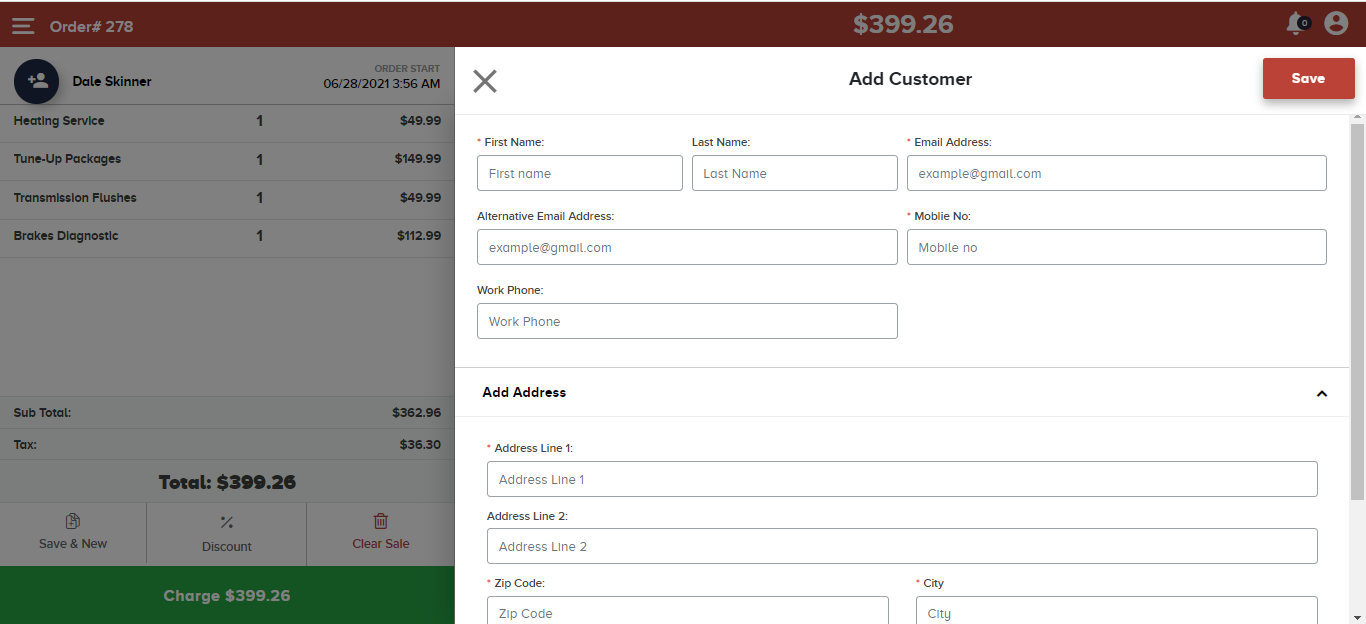
click, if a customer wants to pay for the order at a later date. A new popup will appear, asking to enter the customer details as seen above.
The invoice will be sent to the customer via email or you can also print a copy of the invoice for the customer. Check out the invoicing section for more insights.

Splitting the bill

With the Quantic Services portal, you can split the bill into as many parts as you want. The following sections will illustrate the process in easy steps.
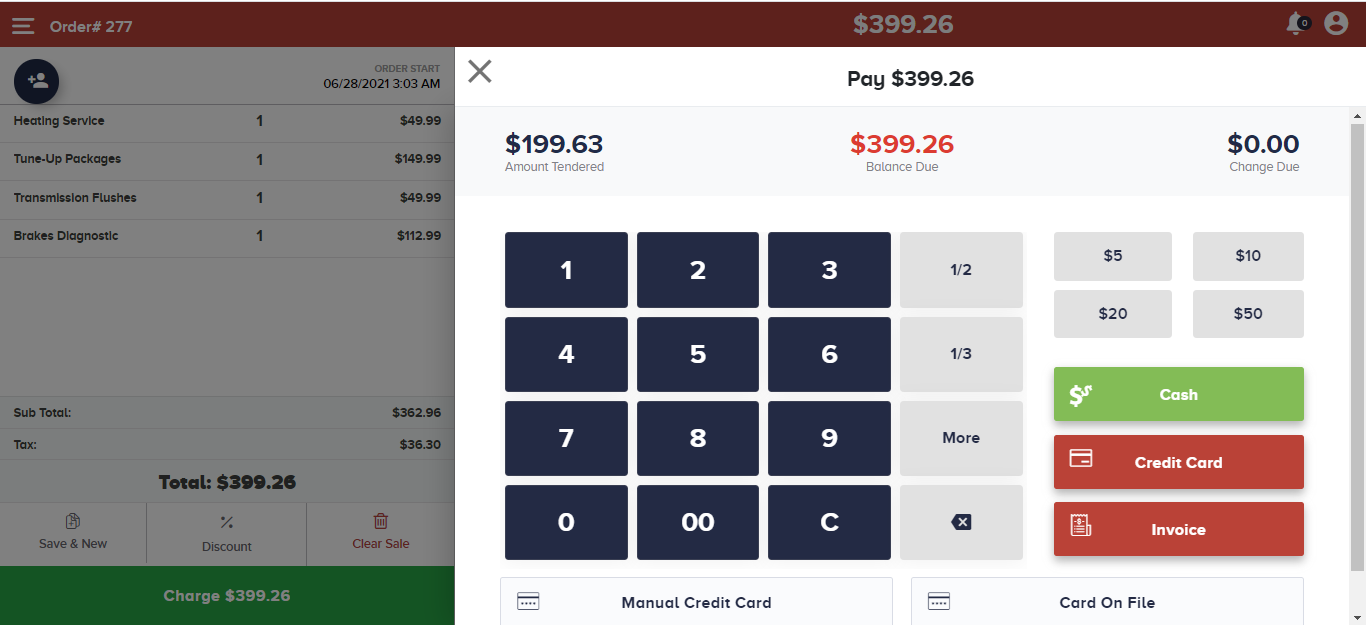
Once you reach the payment screen, just click  to split the bill into two halves. As you can see in the screenshot, the balance due is $399.26 and after clicking, the Amount Tendered displays half of the due amount i.e., $199.63. Now you can choose the appropriate payment options to pay for these two different bills.
Similarly, you can click the ⅓ and More buttons to create three halves or as many halves of the bills respectively.

Applying discounts

Offering attractive discounts to your customers? Here is how you can add new discounts or offer pre-defined discounts to your customers.
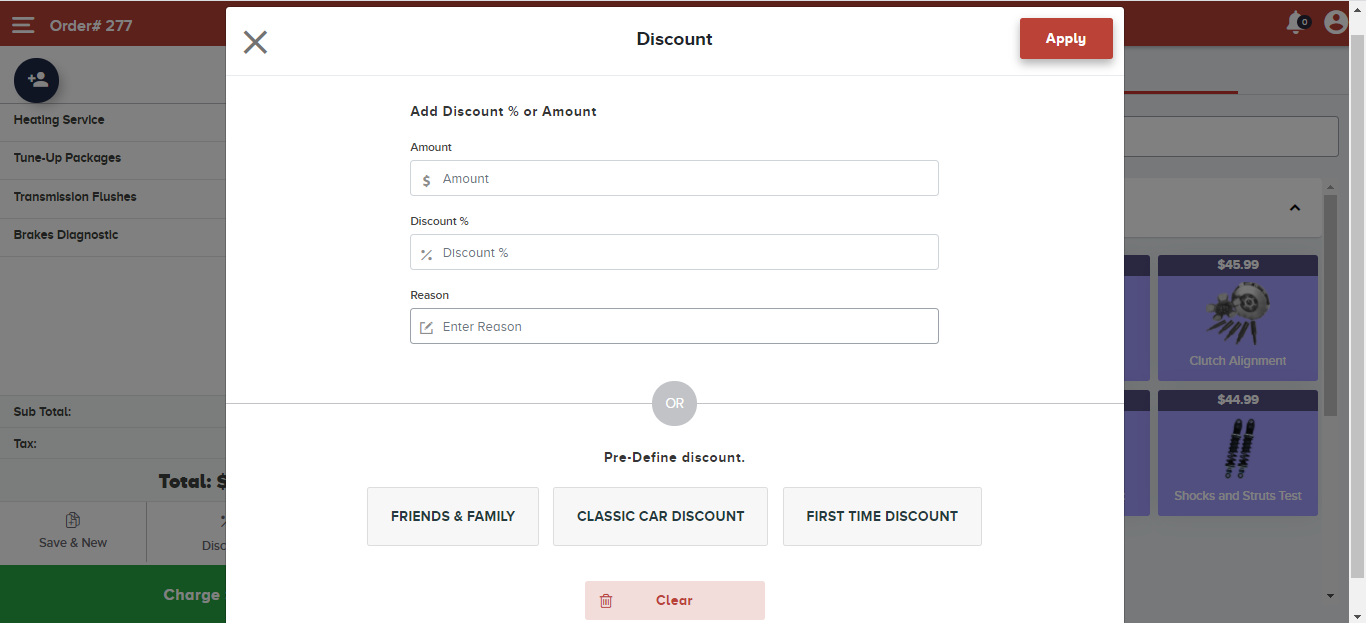
On the main payment screen, click % Discount placed above Charge on the left-hand side. Check the screenshot.
The above screen pops up. Here you will need to enter the discount either in $ or %. Thereafter you should enter the Reason for the discount.
Alternatively, you can choose Predefined discounts at the bottom of the pop-up screen. Once done, click Apply on the top right corner of the screen.

Selecting a customer and processing a payment

Quantic Services allows you to save customer information and make checkout easy in the future. Here is how you can use this feature.
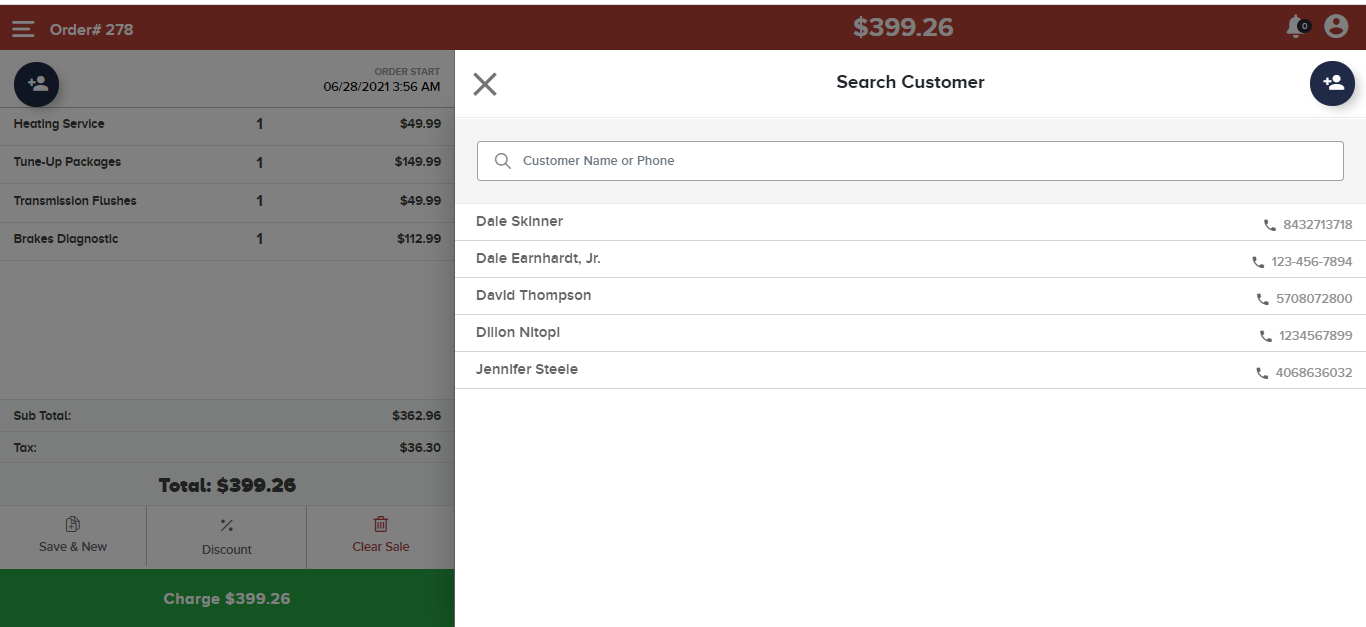
After selecting the items, click  on the top left corner of the screen. A new screen will slide to the left. If this is a repeat sale, you can choose the customer from the list.
If the customer is new, you can add him by clicking thebutton on the top right corner of the Search Customer screen. It will open a new screen as seen in the below screenshot.
Here you can enter the customer information – name, email address, mobile number, and address. Once done, click the Save button.
Once you have added a new customer or chosen the already saved customer, you can select the payment method to charge the amount. Click Charge at the bottom left corner, click or  to proceed with the payment.