Self Ordering Kiosk
Is your restaurant missing out on orders due to large queues?
Get Quantic Self Ordering Kiosk installed and automate the ordering process.
It lets your customers place and pay for their orders, making the overall process fast and reliable.
Creating a new Self Ordering Terminal
If you have just bought the Quantic Self Ordering Kiosk, you will need to do a few quick setups.
Adding a new terminal at the backend is the first step towards installing the Self Ordering Kiosk.
- Login to the backend portal.
- Click the Left Navigation button.
- Click the Configuration button on the left panel.
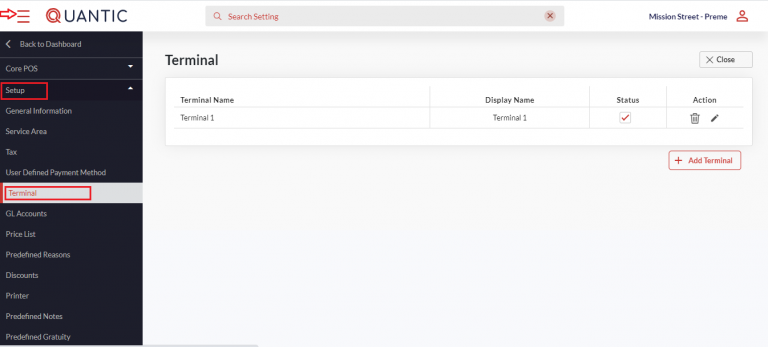
- Tap on the Setup and click Terminal from the dropdown menu.
- The above screen appears, click the Edit button on the top right.
- Click the + Add Terminal button.
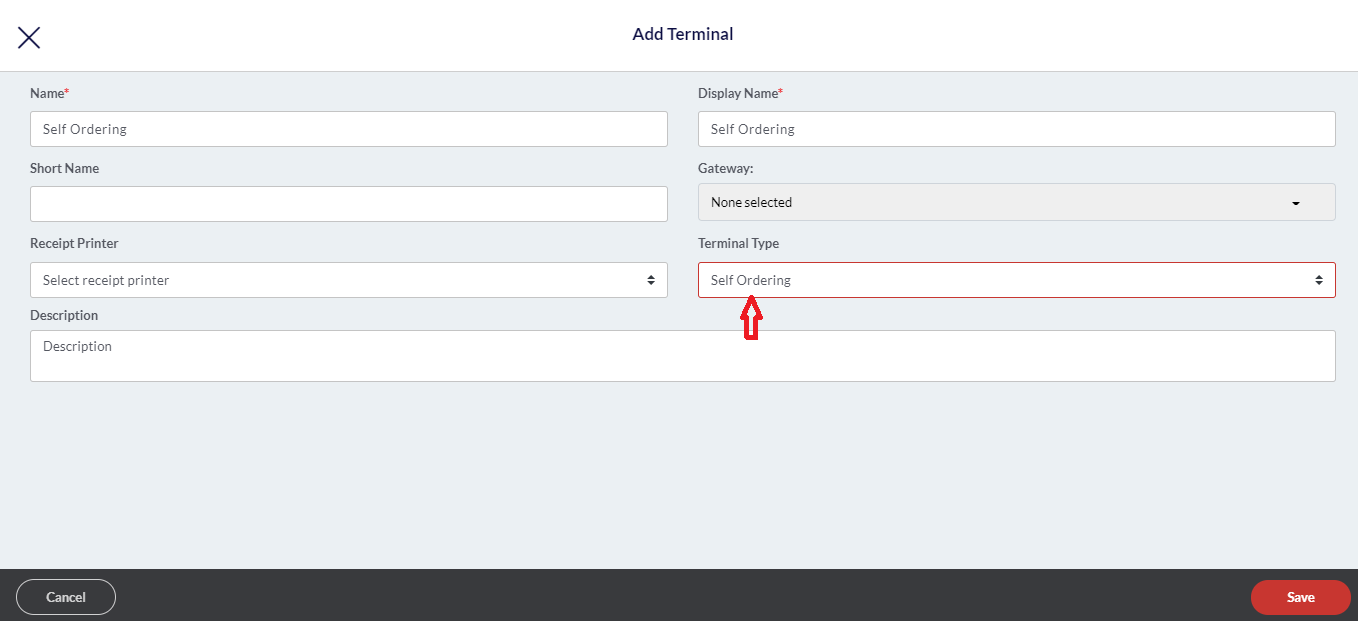
- Fill in the information.
- Select the Terminal Type as Self Ordering.
- And click the Save button.
Adding items to the Self Ordering Kiosk
Once you have created the Self Ordering terminal, it’s time to add items to it.
Your customers will select these items as per their needs and pay for them on the terminal.
Here is what you need to do.
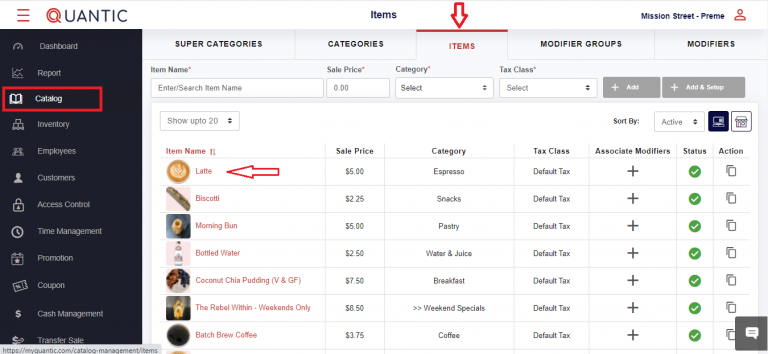
- On the backend terminal, click the Left Navigation button.
- Tap the Catalog icon on the left.
- Click the Items tab on top of the screen.
- Now click the Item on the list which you want to add to theself-ordering kiosk.

- Click the Additional Settings tab.
- Mark the Enable for Self Ordering checkbox.
- Finally, click the Save button at the bottom right.
- Go to the Detail tab to add or change an item image
- Fill in the information.
- Select the Terminal Type as Self Ordering.
- And click the Save button.
Activating the Self Ordering Kiosk
- Login to your device.
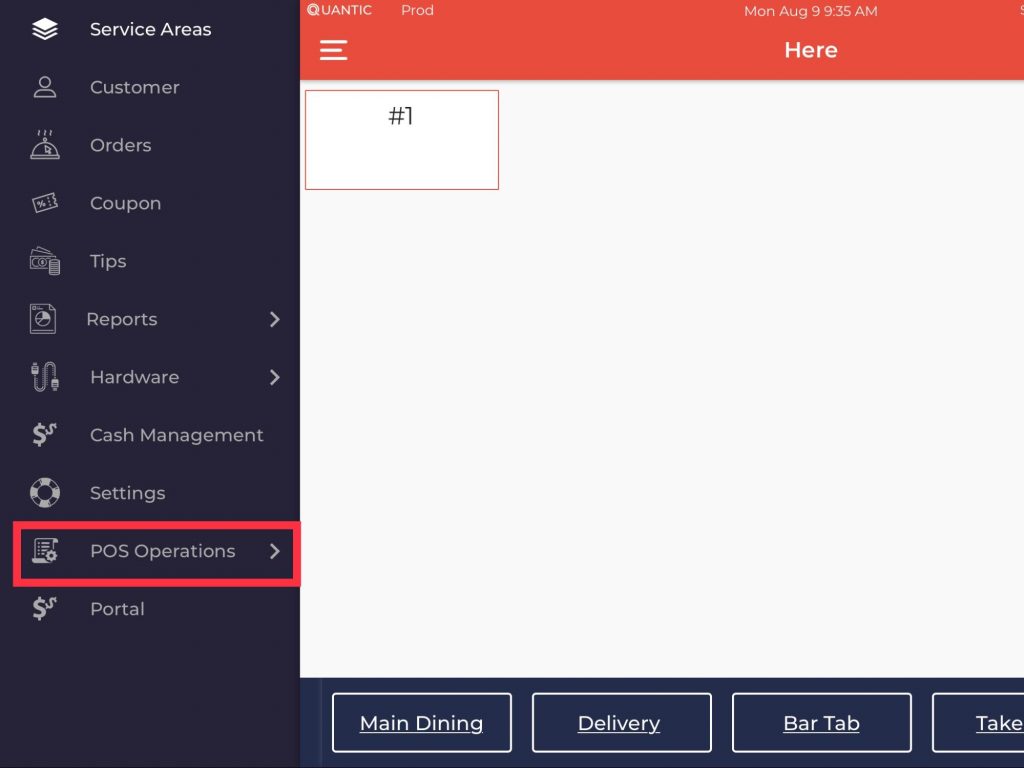
- Click the Left Navigation button.
- Tap POS Operations.
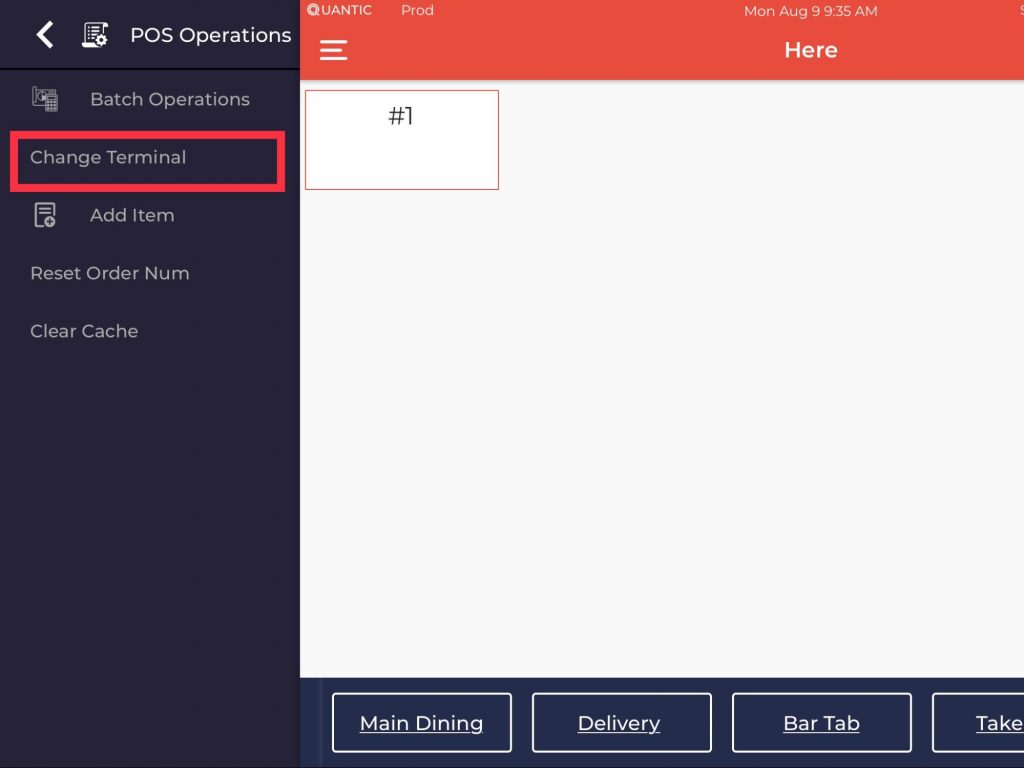
- Click Change Terminal.

- Click the Self Ordering button as seen in the screenshot.
Welcome Screen
This is how the Welcome screen will appear.
Here you can choose the apt option to access your self ordering kiosk.
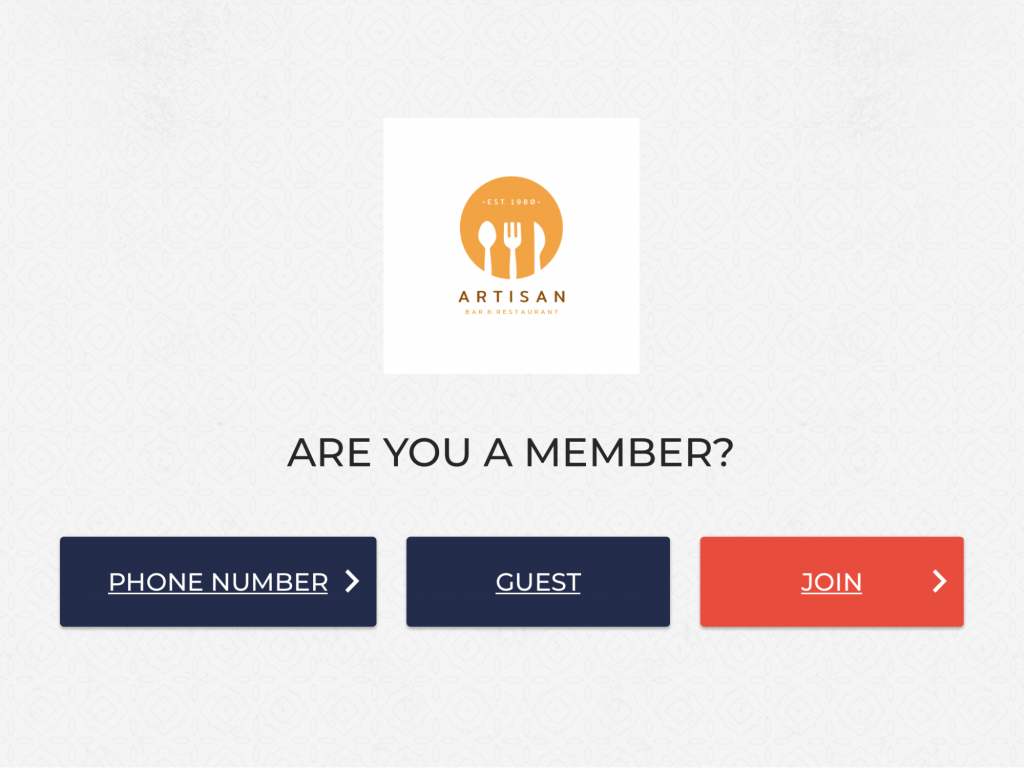
- If you are new, click Join and put your details such as Name, email, and phone number.
- You can also access the terminal as a guest.
- If you are already a member, click the Phone Number tab and access the terminal by providing the registered contact number.
Placing an order

- This is the menu screen, which displays the item category. This makes it easy for your customers to choose items. They can tap on any category, and it
Further displays the items it consists of.
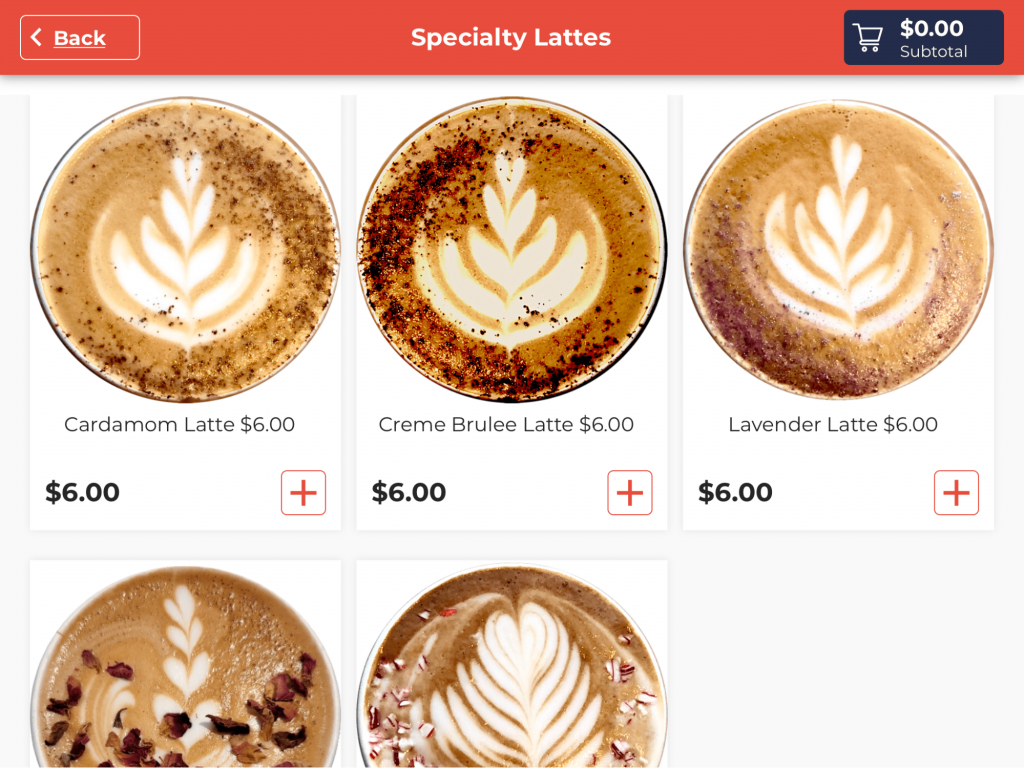
- Here is an example of the Special Lattes category. Customers can select an item by simply tapping on it.
Here we have chosen Peppermint Mocha latte from the items list. Customers can customize the latte as per their preference. They can:
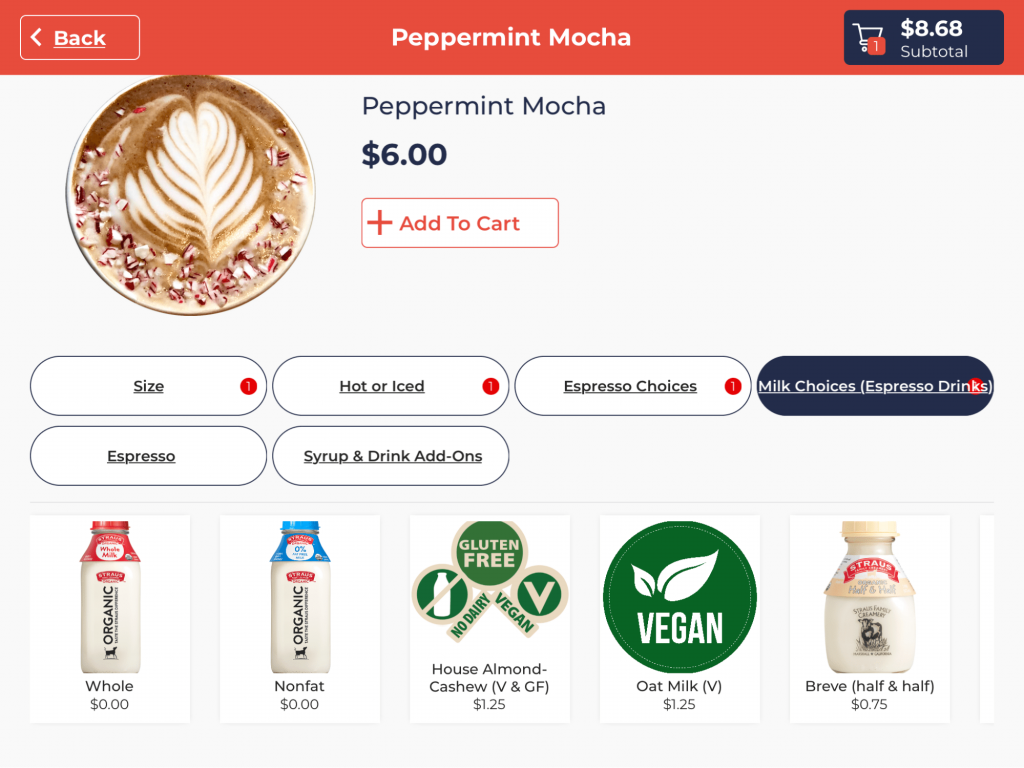
- Choose the size of the Latte.
- Choose the Latte to be served hot or cold.
- Choose the Espresso Choice.
- Select from multiple Milk choices.
- Choose other add-ons to make their drink special.
- Once you have selected the modifiers, click the
 button. The final checkout price will be added to the cart in the top right corner. Tap on the cart to proceed to the final checkout page.
 button. The final checkout price will be added to the cart
  in the top right corner. Tap on the cart to proceed to the final checkout page.
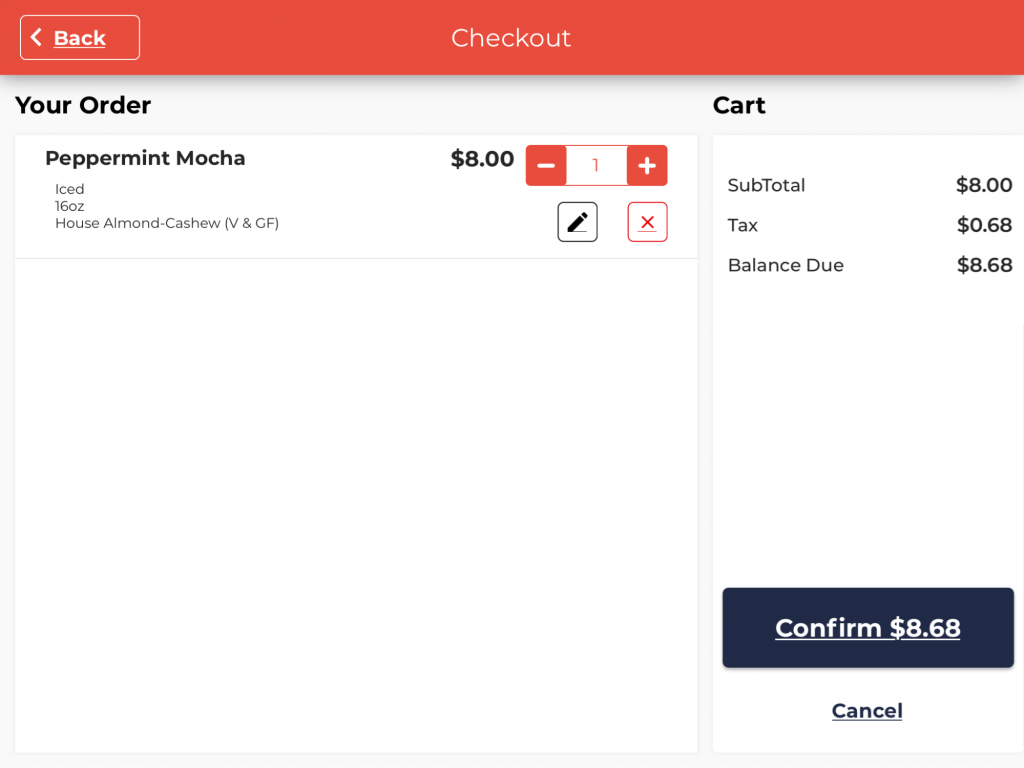
- To edit an order, click the button.
- You can also increase or decrease the quantity by clicking on ➕ or ➖
button. - Here you can check the order and click the Confirm button.
- Put the customer’s name when prompted on the next screen.
 button.
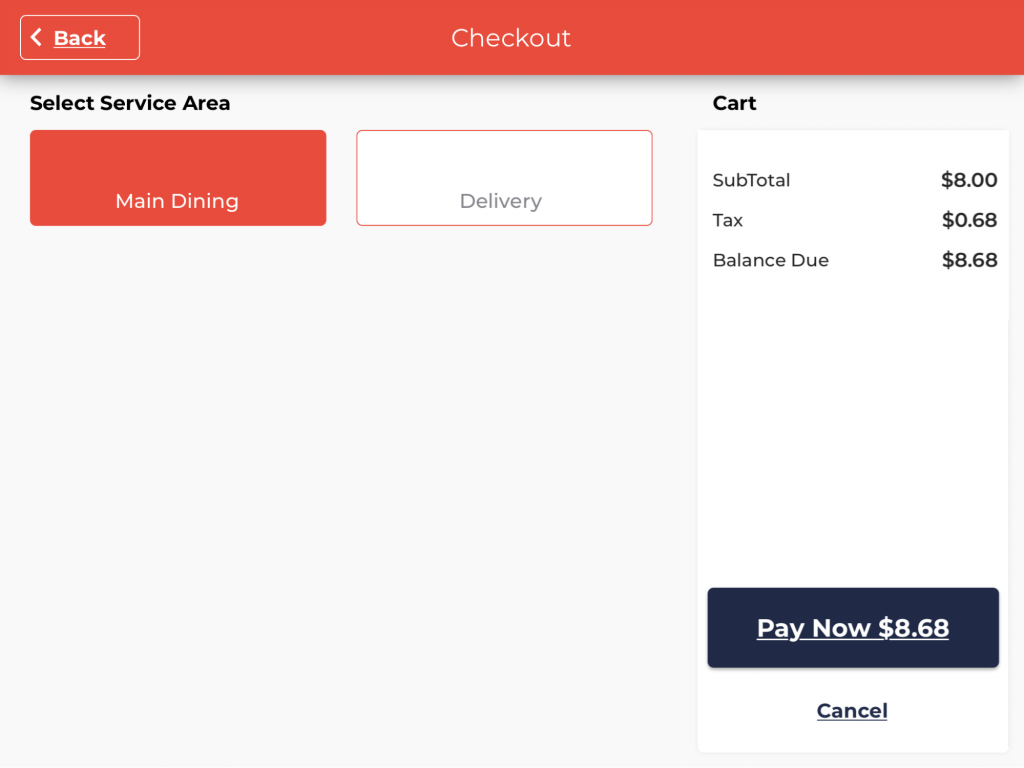
- Choose the appropriate option - Main Dining or Delivery.
- Click the Pay Now button at the bottom right corner to pay for an order.
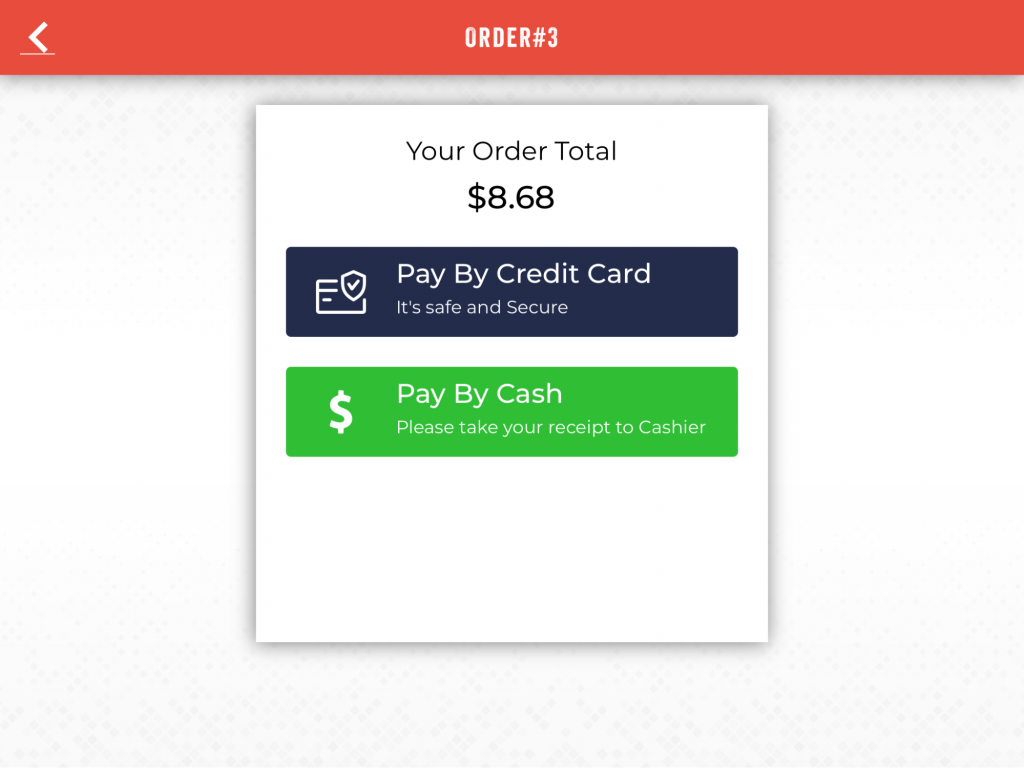
- You can choose to pay by Credit Card or Cash.
- The receipt will be generated after receiving the payment.
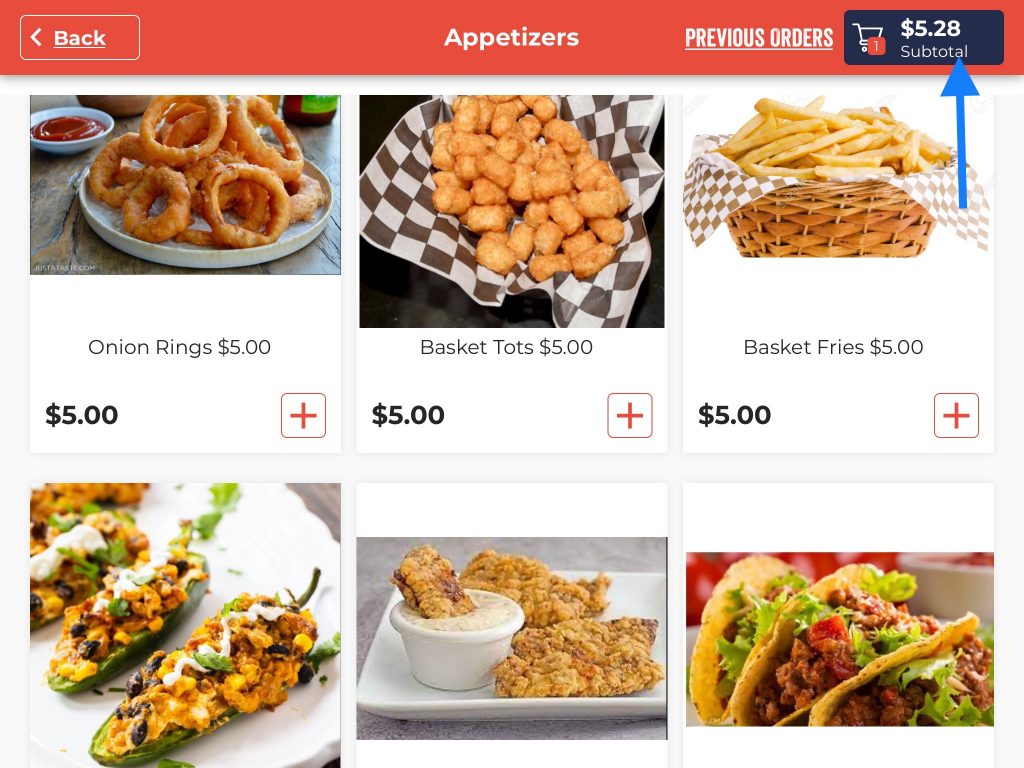
- Add items to the order.
- Proceed to the checkout screen by clicking the Cart icon on the top-right.
How to add an order note on the self-ordering screen?
Customers can put the special request in the form of order notes on the orders in the self-ordering screen for the servers or kitchen staff to act upon.
An Order Note could be anything like making a dish hot and spicy, making it less salty, allergic to nuts, etc.
Below are the steps to add an Order Note to the order in the self-ordering screen.
- Add items to the order.
- Proceed to the checkout screen by clicking the Cart icon on the top-right.

- Click the
 icon to add the Order Note.

- Enter the order note on the pop-up. In the above illustration, if a guest is allergic to nuts, he can write no nuts, please.
- Click Done to save the settings.
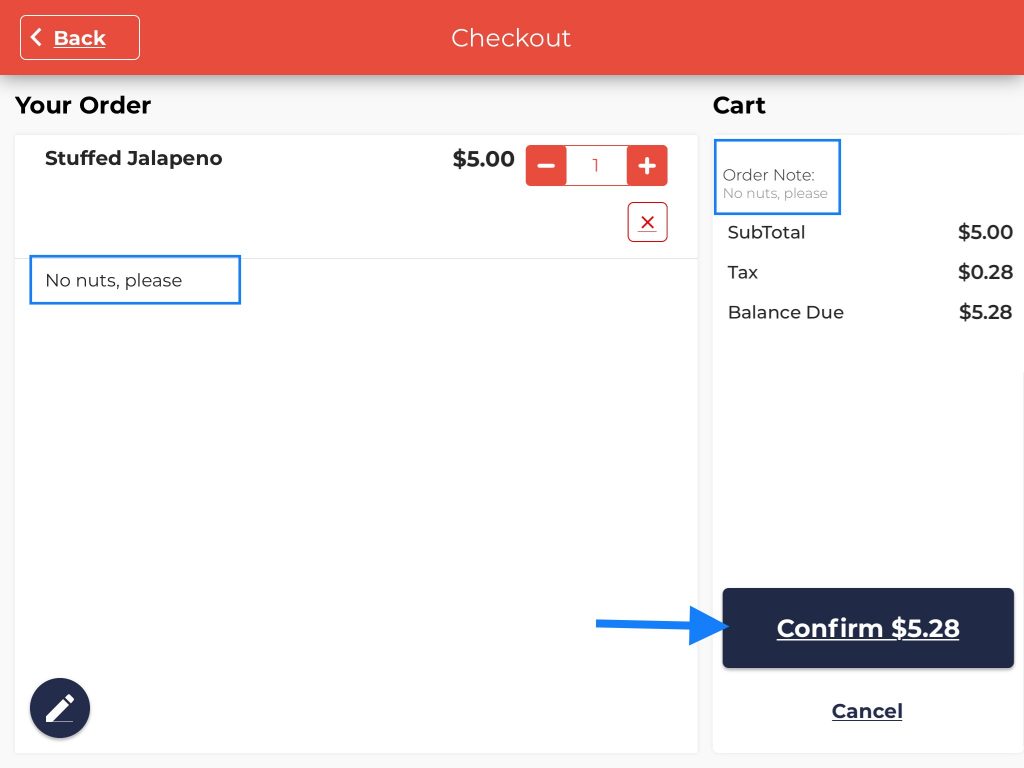
- The order note appears on the screen in two different places as shown in the screenshot. Once the order note is added, the guest can click the Confirm button.
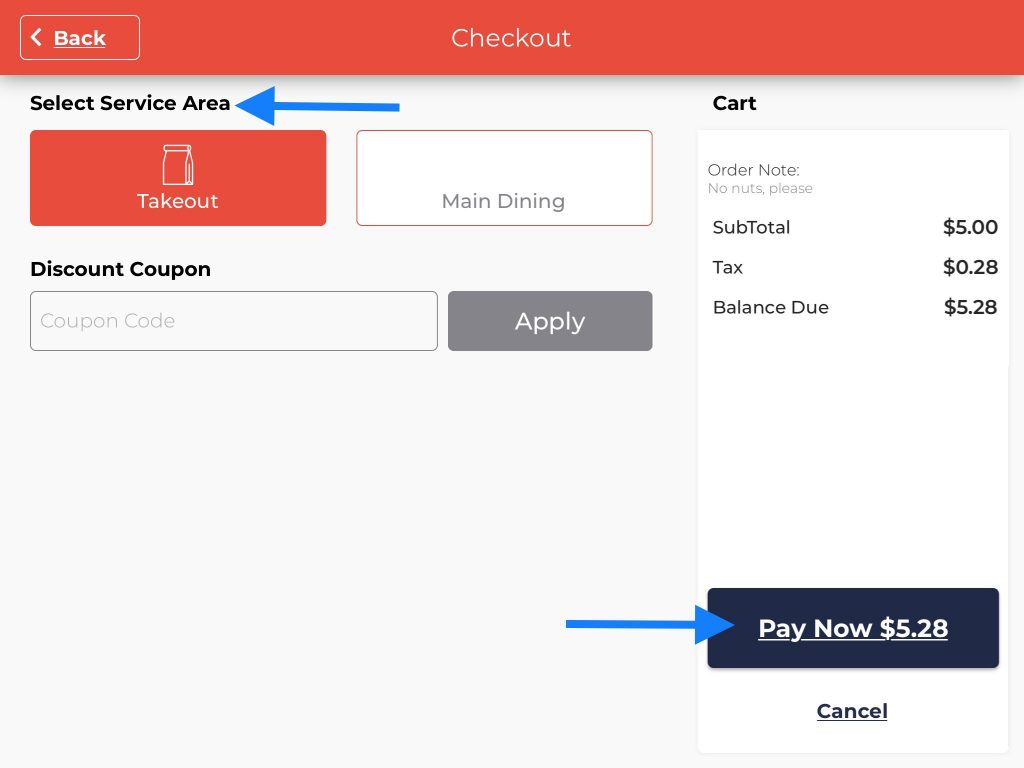
- After selecting the service area, click the Pay Now button. The order note can be seen on the final checkout page as well.
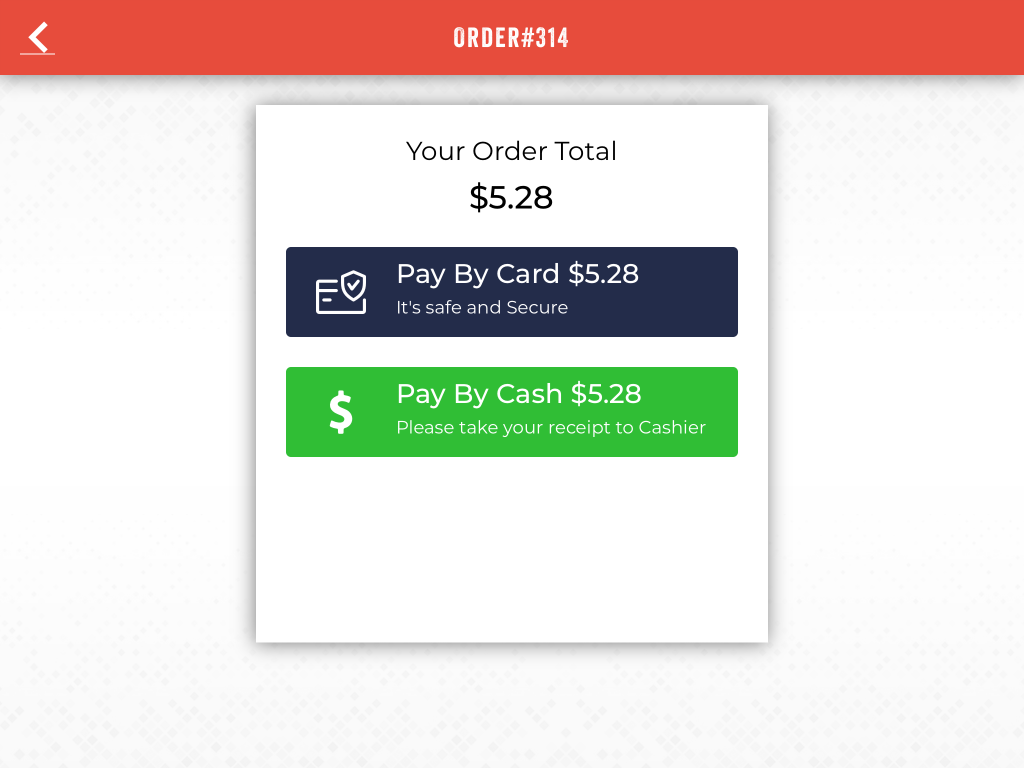
- Choose the mode of payment - cash or credit, click Yes on the payment confirmation screen and the order number will be flashed on the screen.
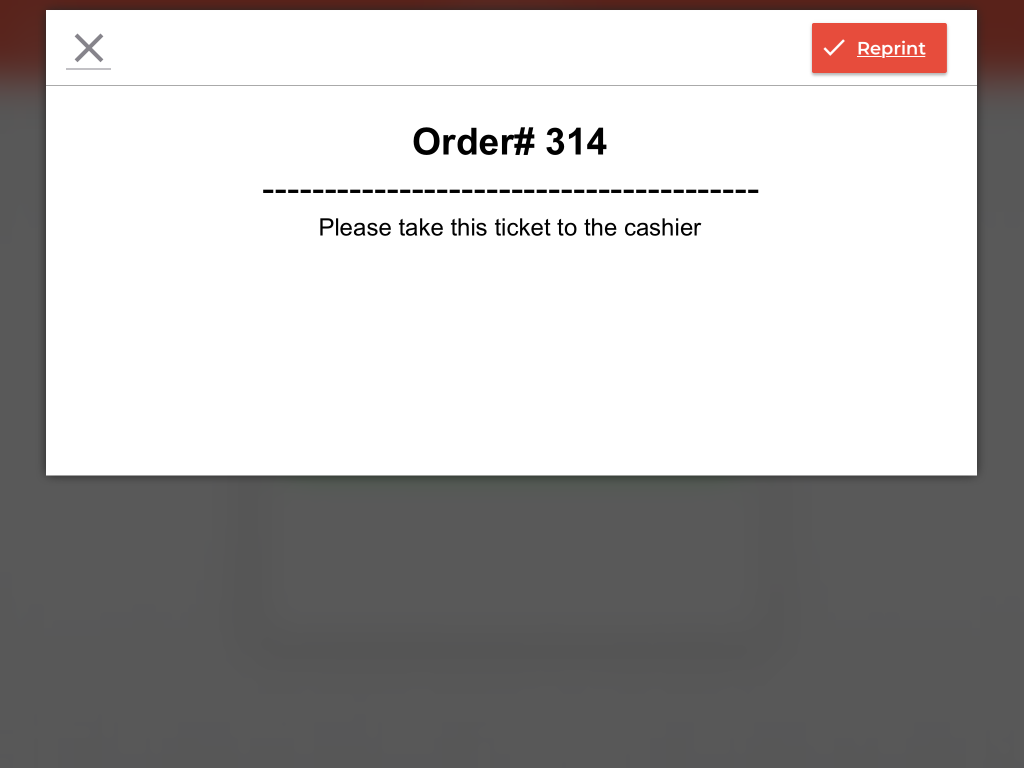
- In this illustration, the order number is 314. Click the
 button to exit the screen. Now the order (mentioning the order note) will be forwarded to the kitchen staff and the servers can also see the order note on their POS screen for this order number.
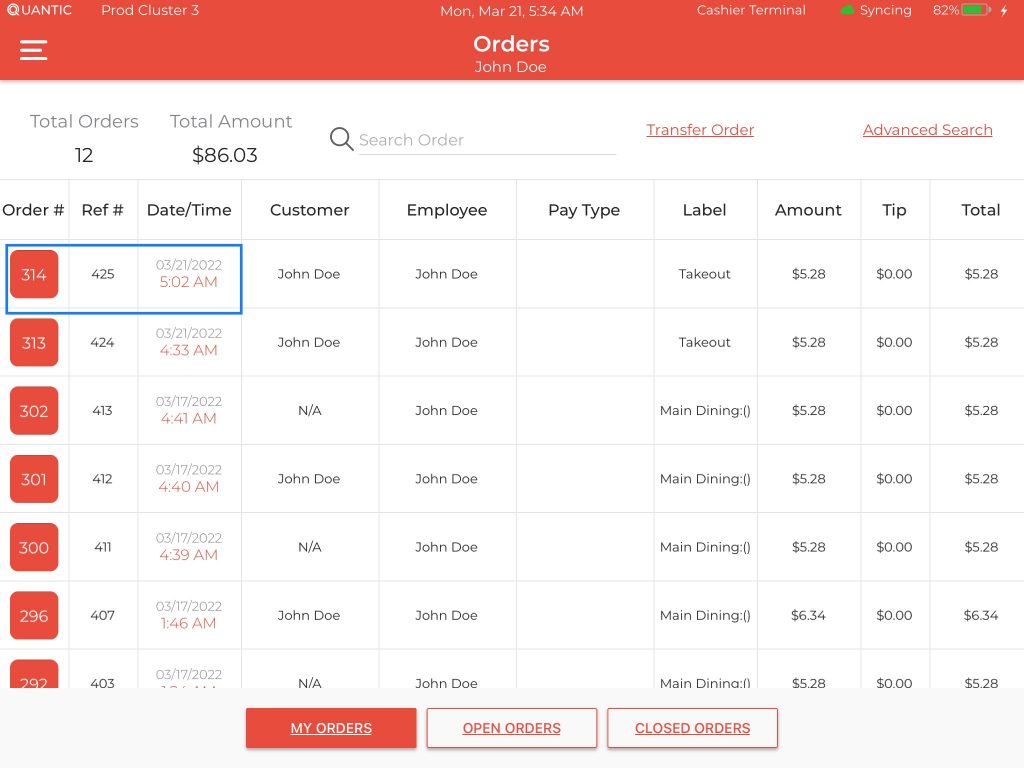
- Let’s see how the order note appears on the POS screen. To do that, go to the Orders tab in the left navigation.
- Go to the My Orders tab and select the desired order number, in our case the order number is 314
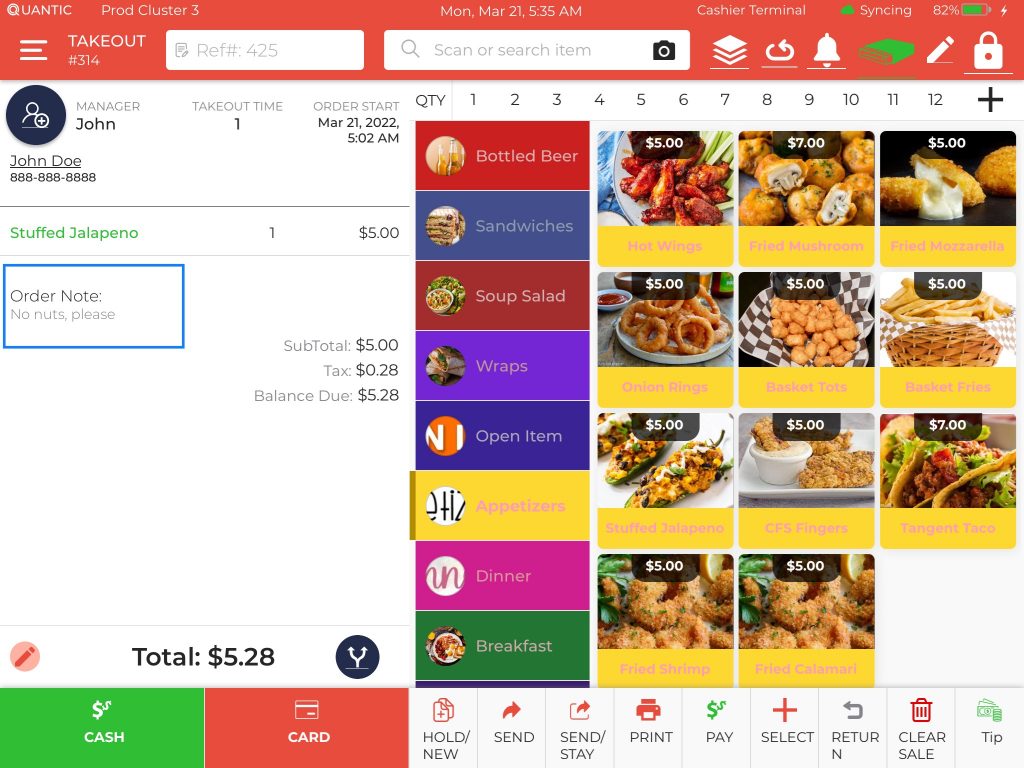
- The order note will appear on the order screen as shown in the screenshot.
