Employee Management in Quantic Portal
Quantic allows you to perform the labor management from the backend portal. It runs in sync with the Quantic POS. You can add new employees, assign privileges to them or generate the unique QR code for them.
How to Add an Employee?
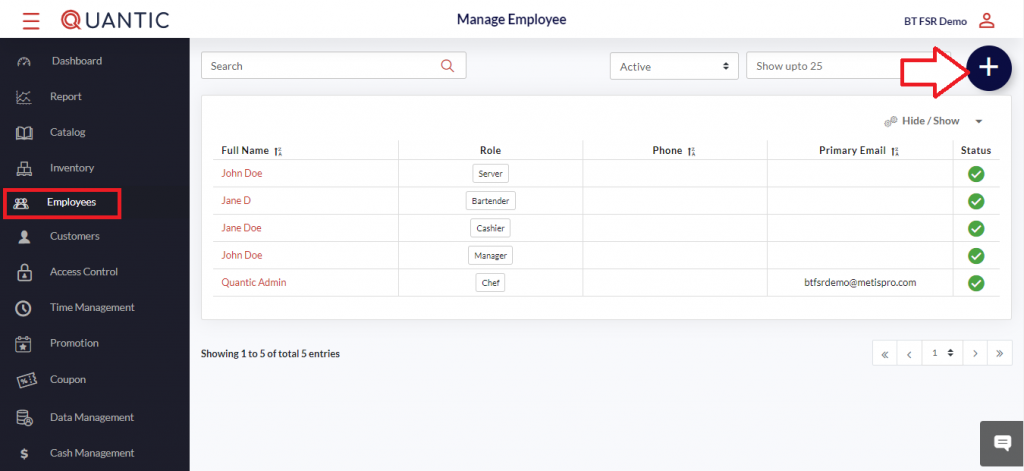
- Login to the Quantic backend portal, click Employees on the list. It will open a new screen as shown in the above screenshot.
- Click ➕ icon on the top right corner.
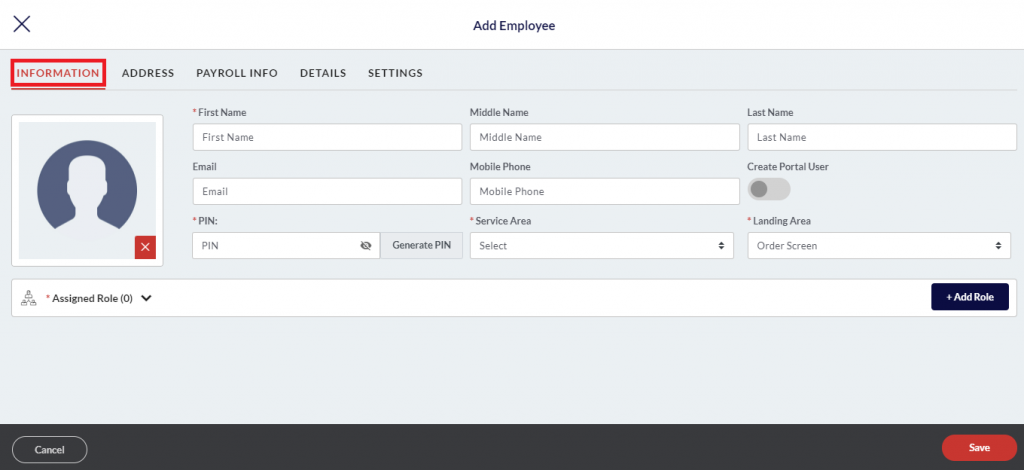
- Click the Information tab.
- Fill in the employee details – name, email address, phone number, select the assigned service area, landing area.
- Click Add Role to select the multiple roles for the employee under the Assigned role tab. Also, fill in the details under Address, Payroll info, Details, and Settings. Once done click the Save button to create a new employee on the portal.
How to Give Portal Access to Existing Employees?
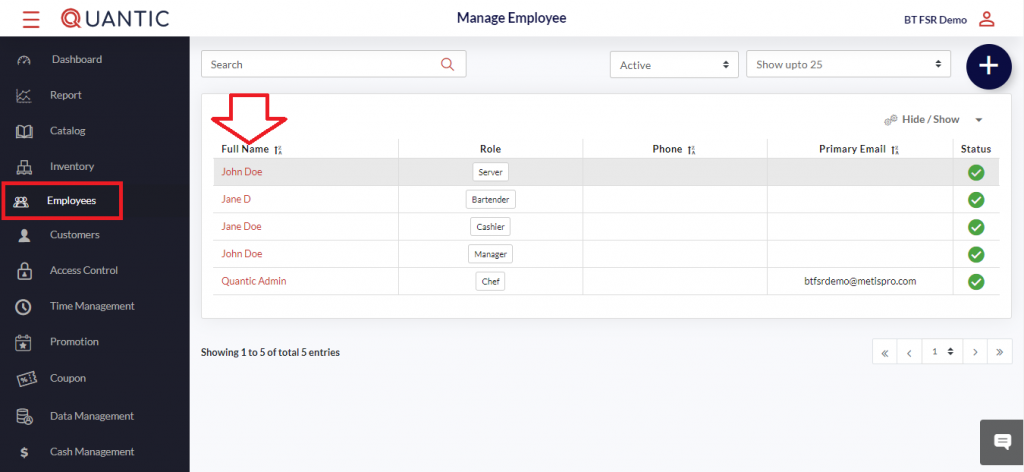
- Select the employee name to whom you want to give the portal access.
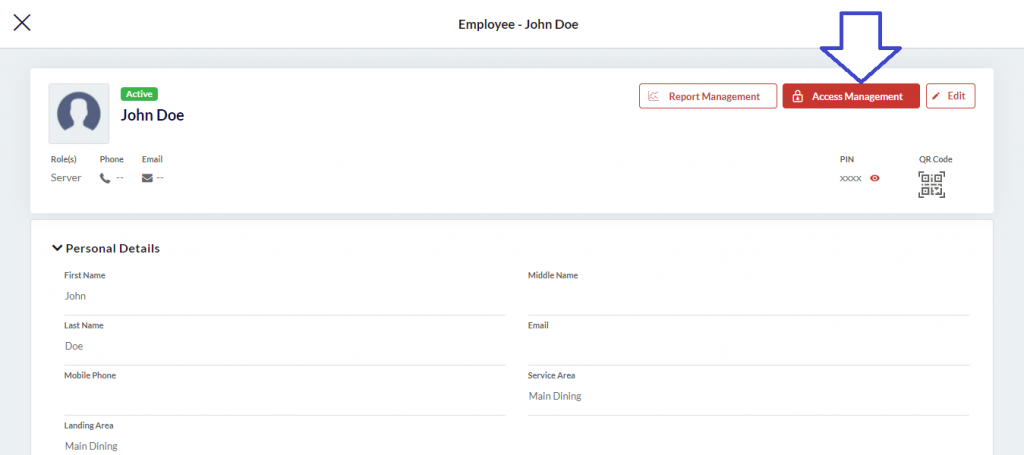
- Now click the Access Management button on the top right-hand corner.
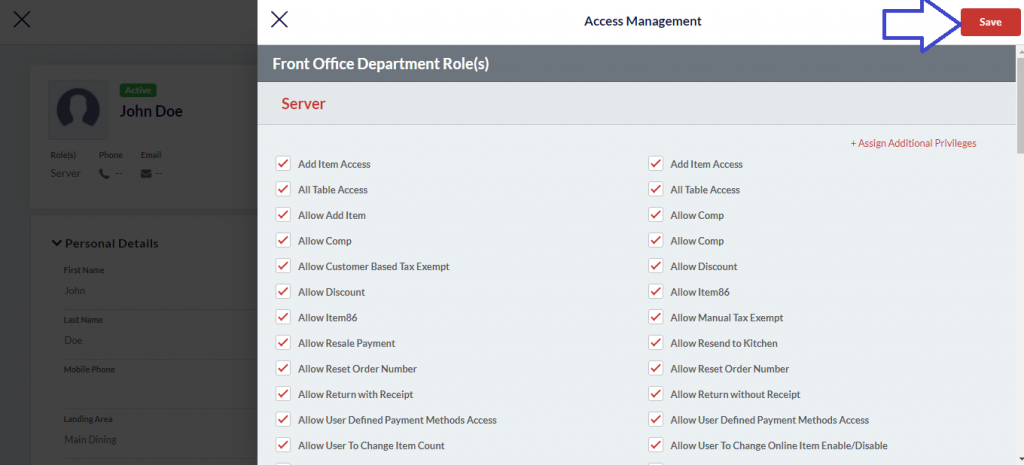
- A new screen will appear, here you can choose the type of portal access that you wish to assign to your employee.
- Once you are done with the selection, click Save.
How to Generate QR Code from the Backend Portal?
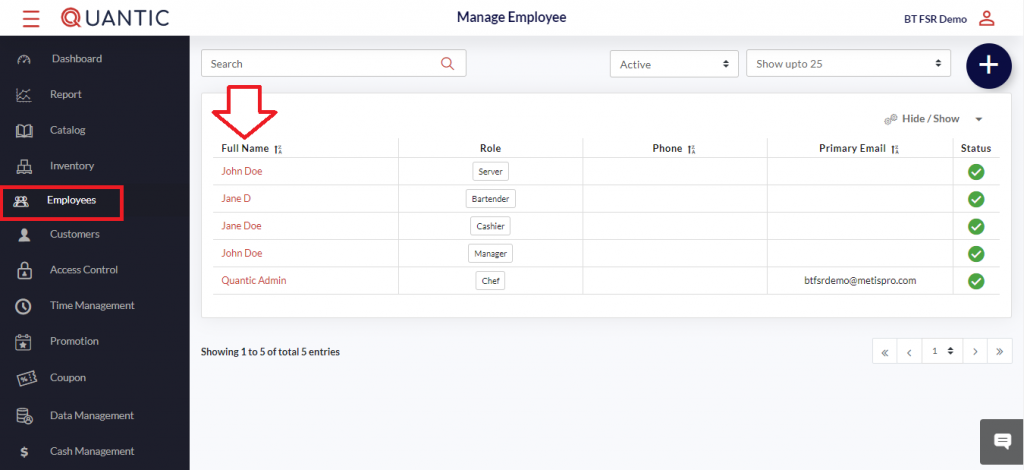
- Login to the Quantic backend portal.
- Click the Left navigation button.
- Click Employee as seen in the screenshot.
- Click the name of an employee for whom you want to generate the QR code.
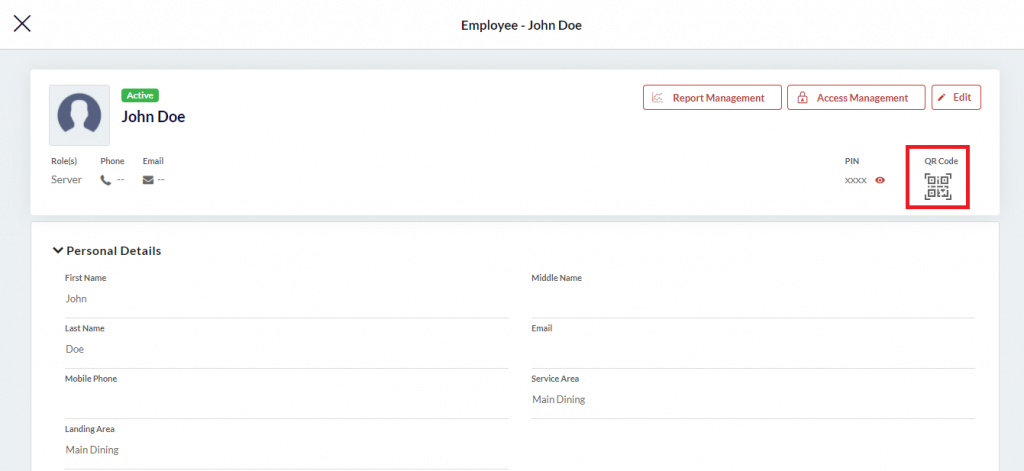
- Here you need to click on the QR code on the right side of the screen.
- The QR code will be downloaded in PDF format.
How to Add a Pay Rate for an Employee?
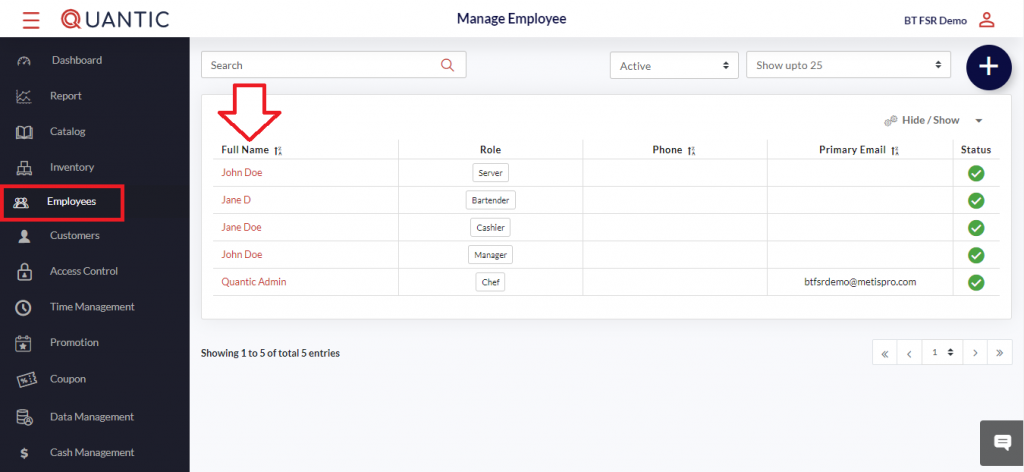
- Login to the Quantic backend portal.
- Click the Left Navigation button and click Employees.
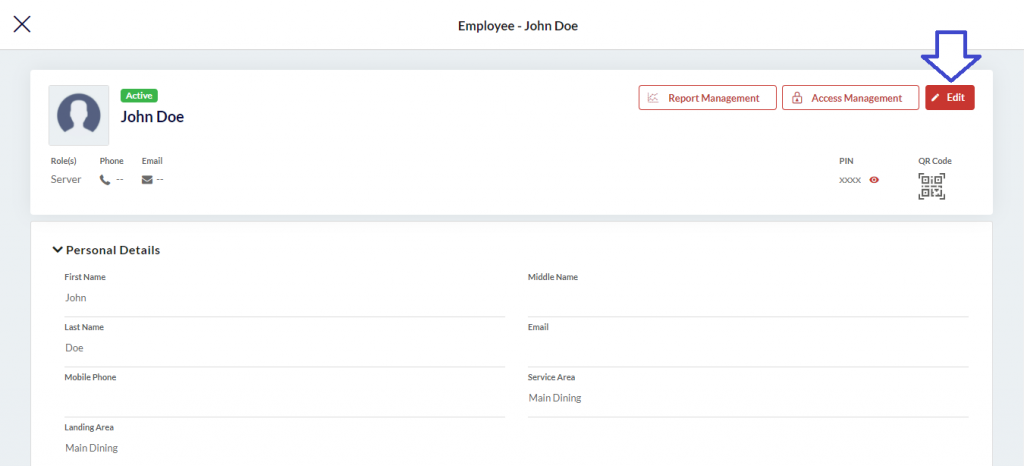
- On the Employee screen, click the Edit button on the top right-hand side.
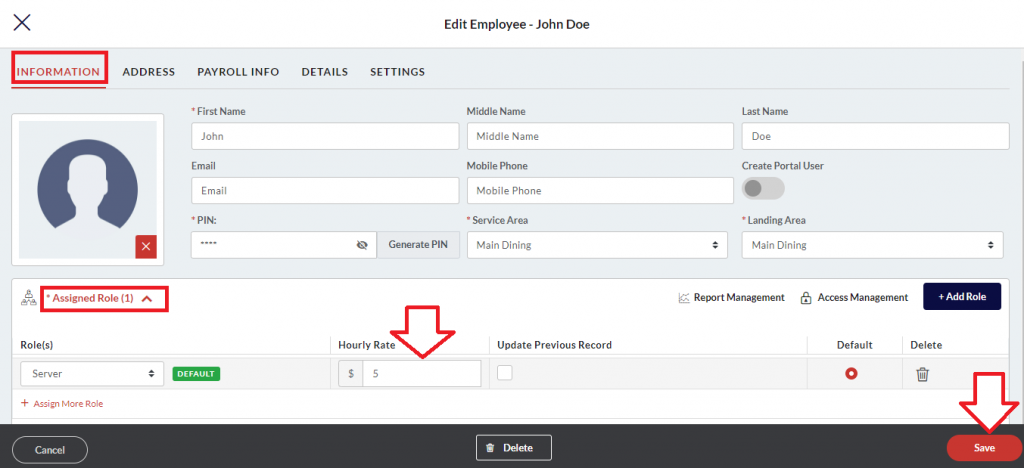
- Click the Assigned Role field to expand the further sections.
- Now simply update the current Hourly rate for a particular employee.
- Once done click the Save button.
How to Set Up Only Clock In Acess for an Employee?
- Login to your Quantic backend portal.
- Go to the Employee section under the left navigation bar.
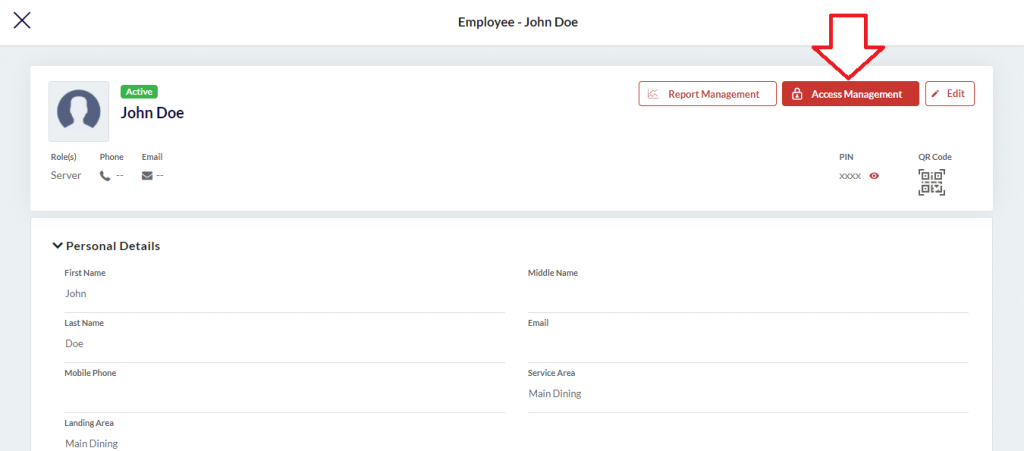
- Click Access Management on the top right-hand side of the screen.
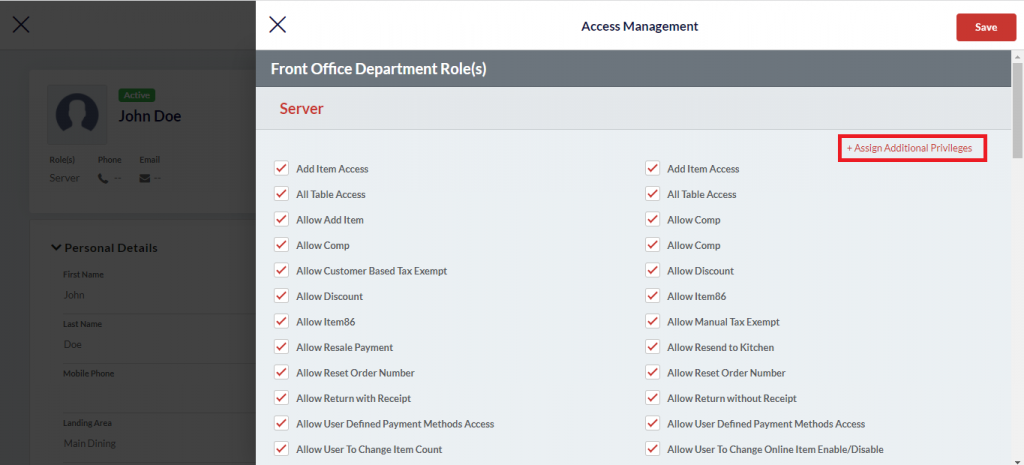
- Search for Enable Only Clock in under the Access Management window (use Ctrl+F) and check the box that says enable only clock in.
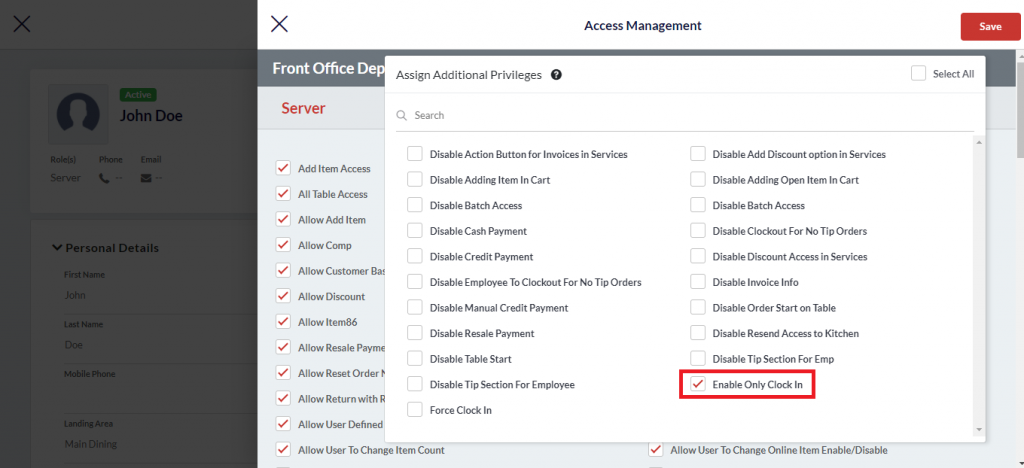
- If you could not find it, click +Assign Additional Privileges and you’ll surely find it under the hidden settings.
- Select the appropriate checkbox as seen on the screen and click Save.


