Quantic Lite
Employee Clock In/Clock Out
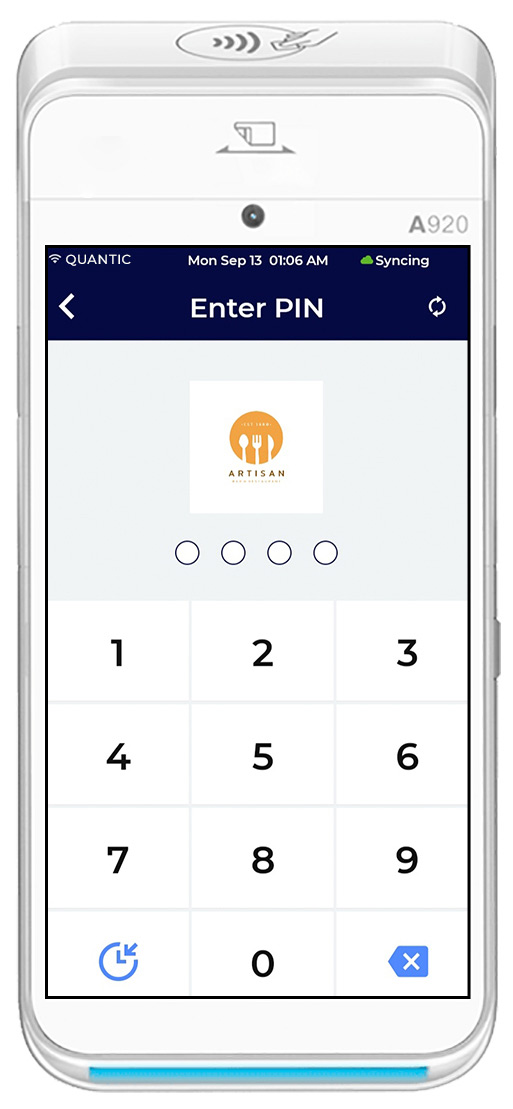
Login to the QLite app with Username and Password.The Pin Pad screen appears, click  at the bottom left corner to clock in or clock out.

Enter your employee pin.
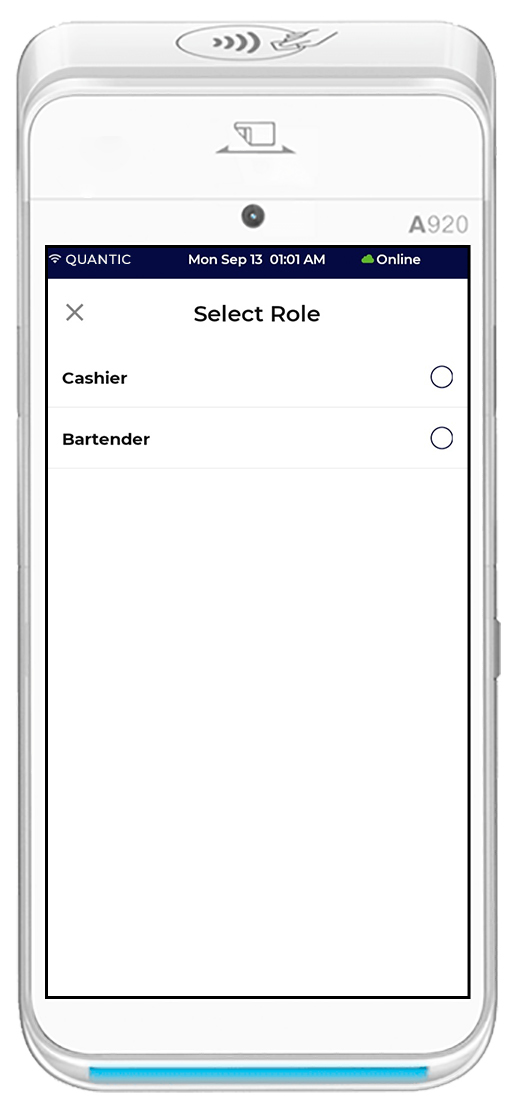
If an employee has multiple roles, the Select Role screen appears.Here an employee should select the role that s/he is currently clocking in as.
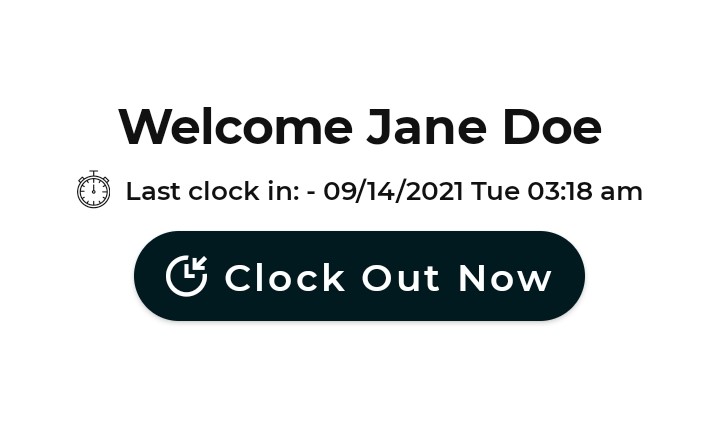
On the Clock In/Clock Out screen, the employee’s name will appear with a greeting message.Click the Clock In Now button if you want to clock in.Or, click the Clock Out Now button if you want to clock out.
Quick Charge
Quick charge allows a user to do a quick transaction from the Lite terminal. This allows a user to sell the items that are not there in the catalog but you still wants to sell that item from the Lite terminal. Before a quick charge transaction, the user need to enable a configuration- Enable Quick Order on Lite from the backend portal and do the setup as mentioned below.
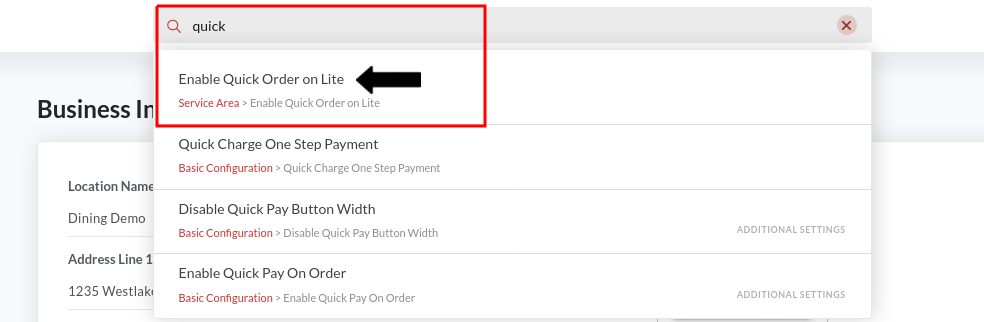
- Go to the Configurations in the backend portal.
- Search the configuration- Enable Quick Order on Lite and tap on it as shown in the screenshot above.

- Now go to the Catalog, click Item and create a new Open Item.
- Enter the item name, select category and fill in the other details before clicking the Add & Save button.
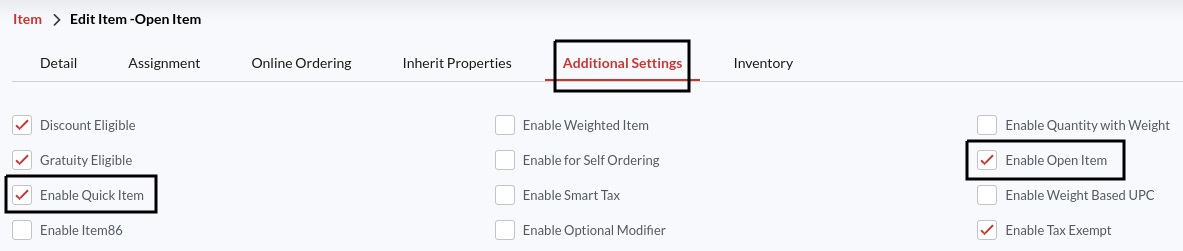
- Go to the Additional Settings section and tap the checkboxes next to Open Item and Quick Item.
- Click Save to save the changes.

- Once you log in to the QLite app, the service area list opens up.
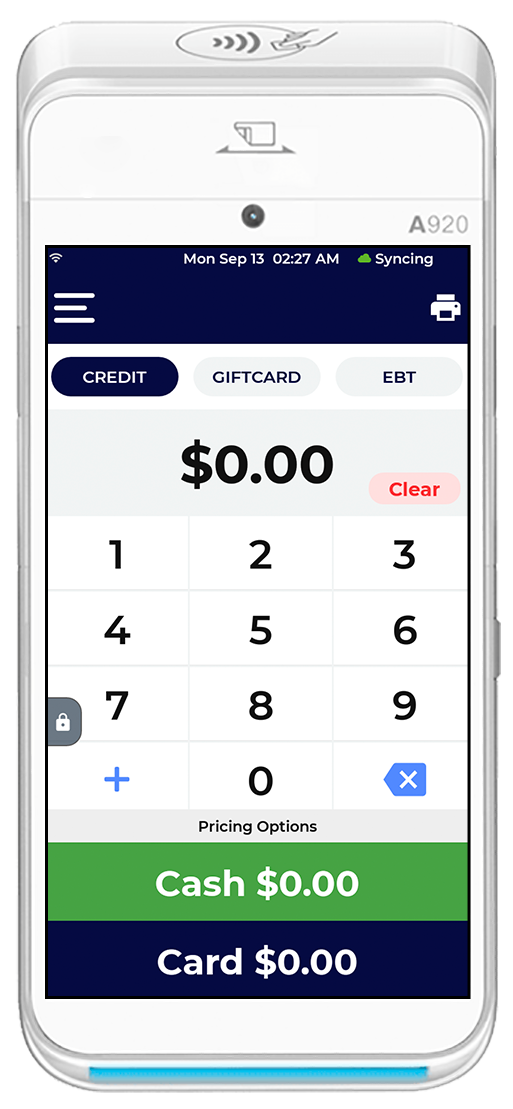
- Click the Quick Charge button on the top.
- On the Quick Charge screen, enter the amount you want to charge the customer.
- Select the payment option at the bottom – Cash or Card.
- You can also explore other payment options at the top of the screen (for example gift cards and EBT payments).
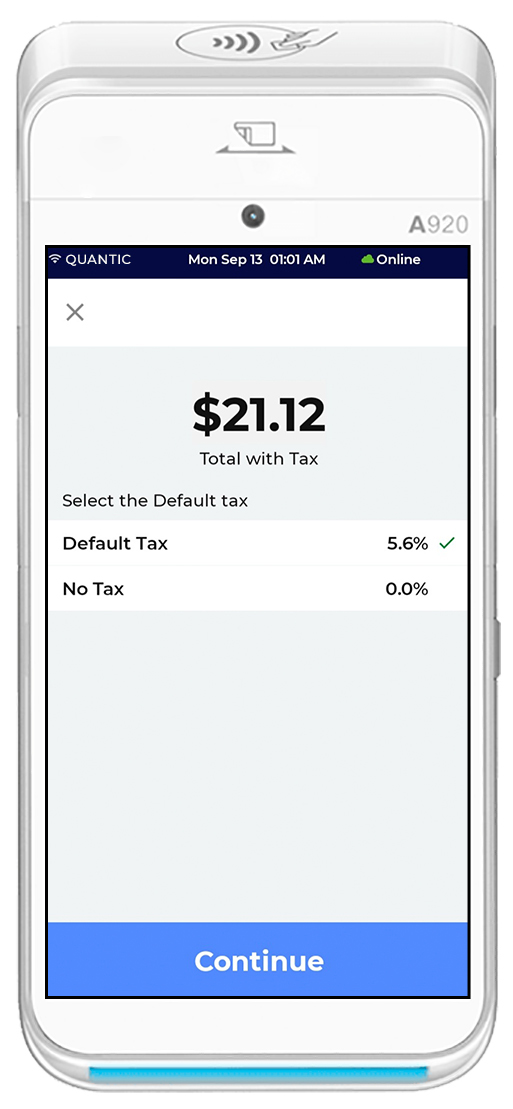
- If you are choosing the credit option, you may be prompted to select the tax.
- Click Continue to charge the amount.
- If you only have 1 default tax rate or no taxes, you will skip this screen.

- On successful transaction, the order details will be displayed on screen with Open Item as the item name.
Placing a Quick Order
On the Service Area screen, tap the Quick Order option.
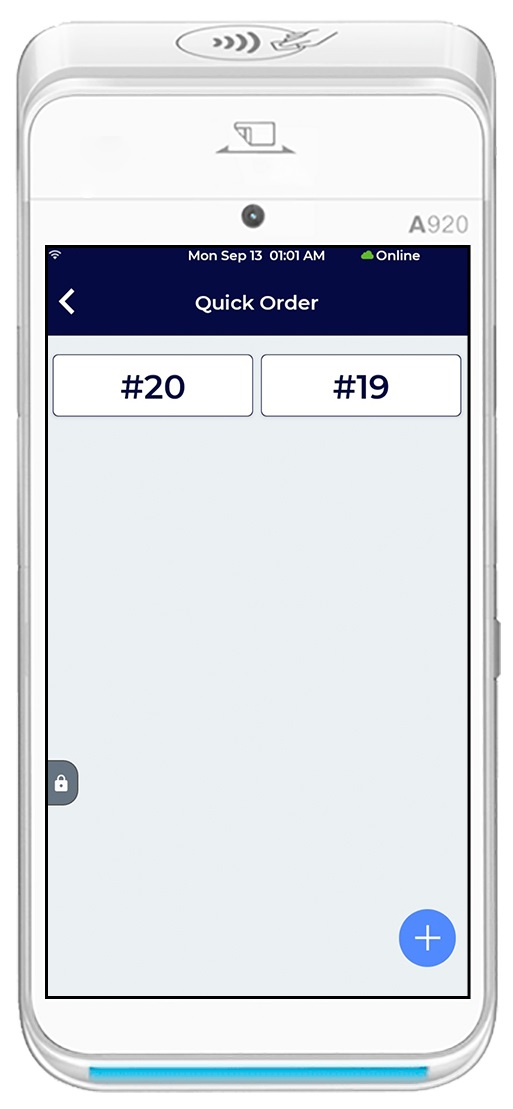
The Quick Order screen opens up displaying the currently open orders.
Click the ➕ icon at the bottom right corner to create a new quick order.
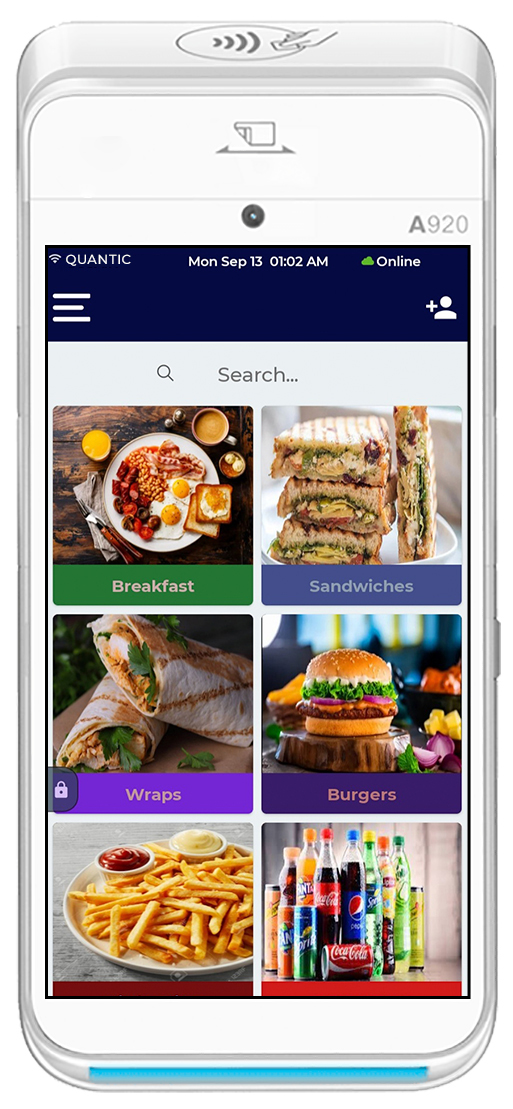
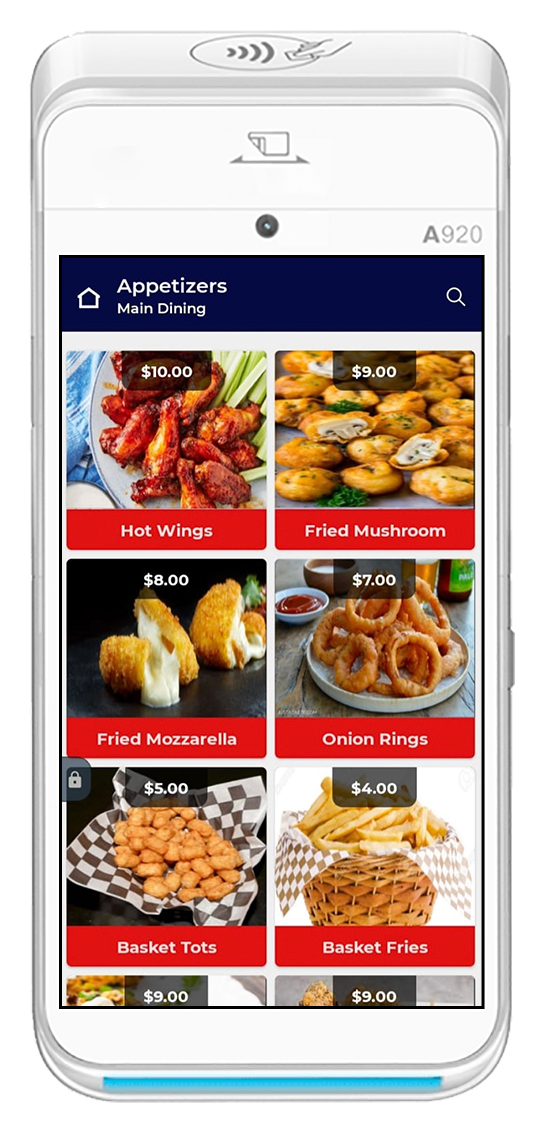
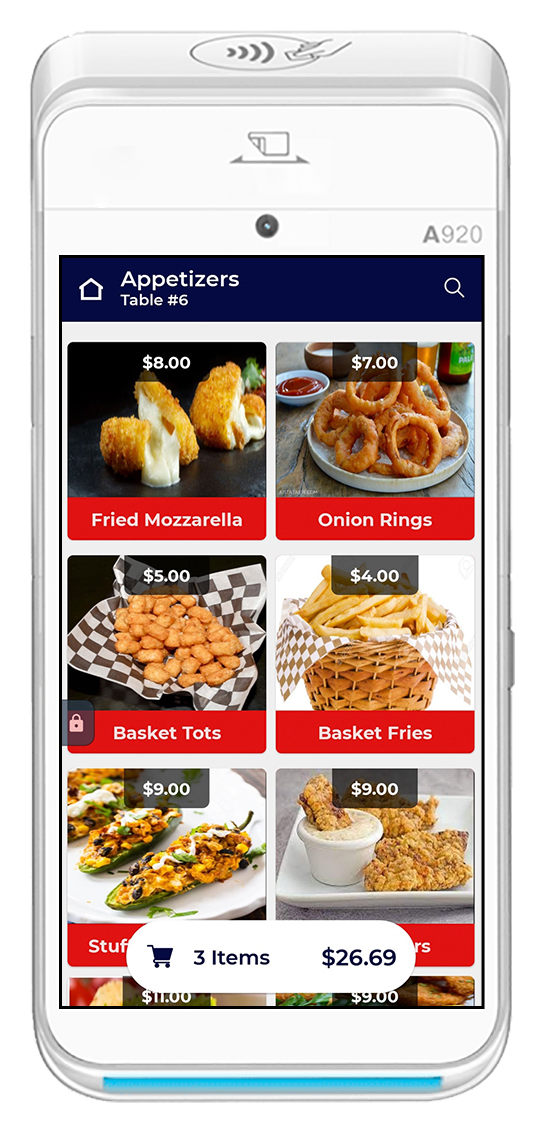
Tap the category you want to select an item from or search using a search bar on top.
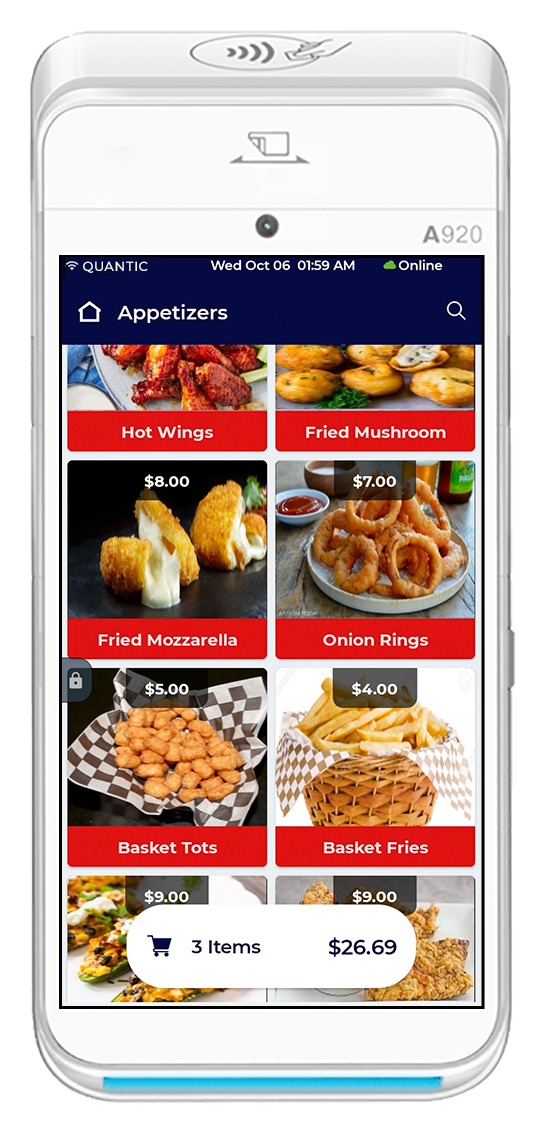
The item list will open with images and prices for each item.
Select the item(s) to be added to the cart.
Click ![]() cart icon at the bottom to checkout.
cart icon at the bottom to checkout.

Verify the order at the checkout screen.
Click Pay at the bottom. You can also send the order to the kitchen by clicking Send.Note: To add more items, you can click the back arrow in the top left to go back to the menu screen.
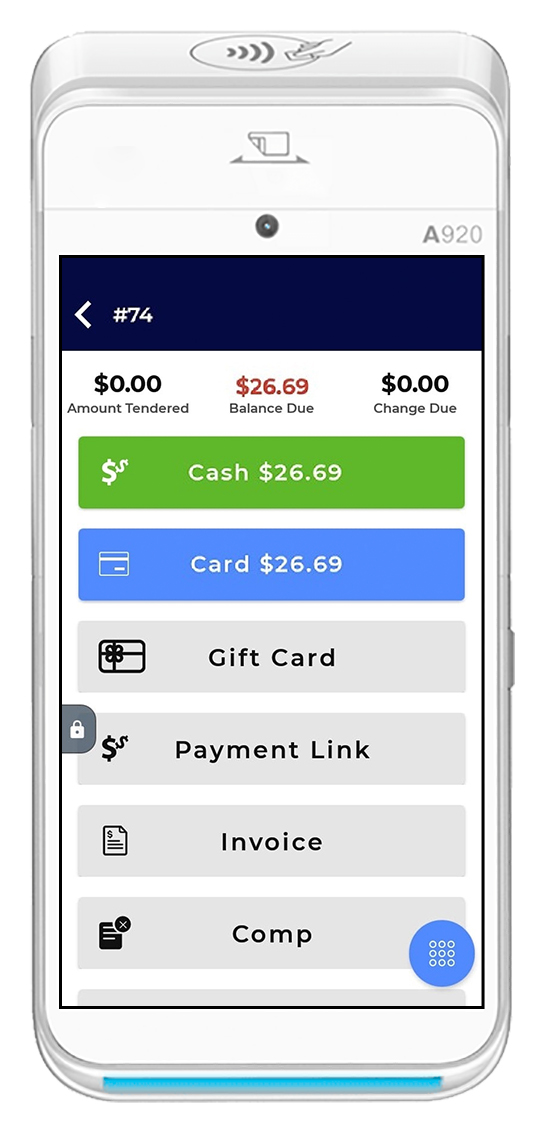
The next screen will display differentnt payment options.Select the payment option the customer will be using.
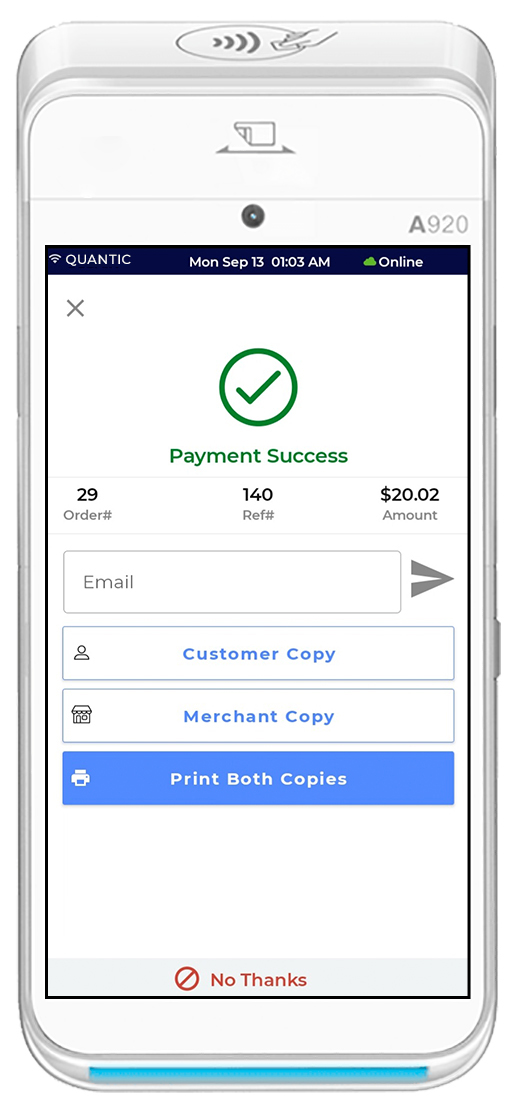
The Payment Success message appears confirming that the amount has been accepted successfully.Now you can choose to print either a customer receipt copy, merchant receipt copy, or both.Click No Thanks, if you do not need to print a receipt.You can also enter the customer’s email address to send an e-receipt.
Coursing and Positioning
QLite allows the servers to assign seats and courses when building an order. Orders will be split into the respective positions when ordered. It begins with adding a course list in the backend portal and enabling the course for categories. If you have already added the course list and enabled the course for categories/items from the back-end portal, skip to the next section, Starting a Table.
Creating a Course List
QLite allows the servers to assign seats and courses when building an order. Orders will be split into the respective positions when ordered. It begins with adding a course list in the backend portal and enabling the course for categories. If you have already added the course list and enabled the course for categories/items from the back-end portal, skip to the next section, Starting a Table.
Coursing and Positioning

Login to the Quantic back-end portal.
Click the Hamburger button and select Configuration on the left.

Expand the Setup menu and click Course List.
Click the Edit button on the top right corner.

Click ➕Add Course List button.
A new row will be added underneath the Course Name. Click on the empty field, put the name of the course, and click Save Changes.
To add more, click ➕Add Course List button, enter the name of the course, and keep repeating this step until you are done.
Click the Back to Dashboard button on the top left corner.
Enabling Course
1. On category level
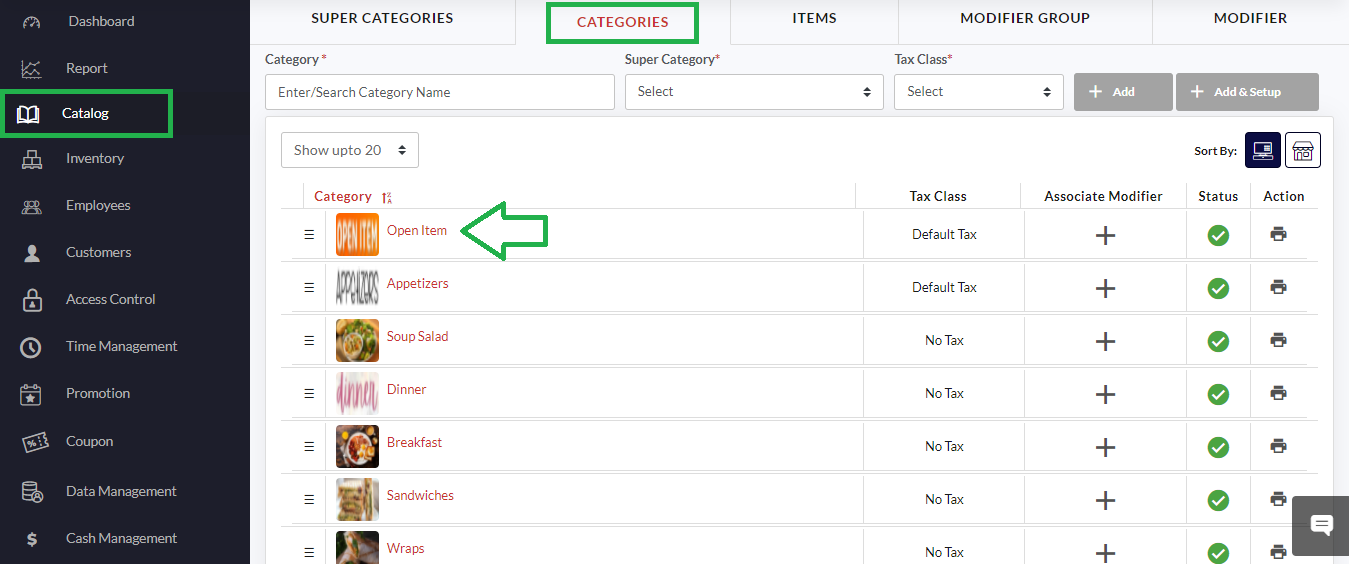
Click the Catalog button on the left menu.
Click the Categories tab.
Select the Category you want to enable the coursing for.
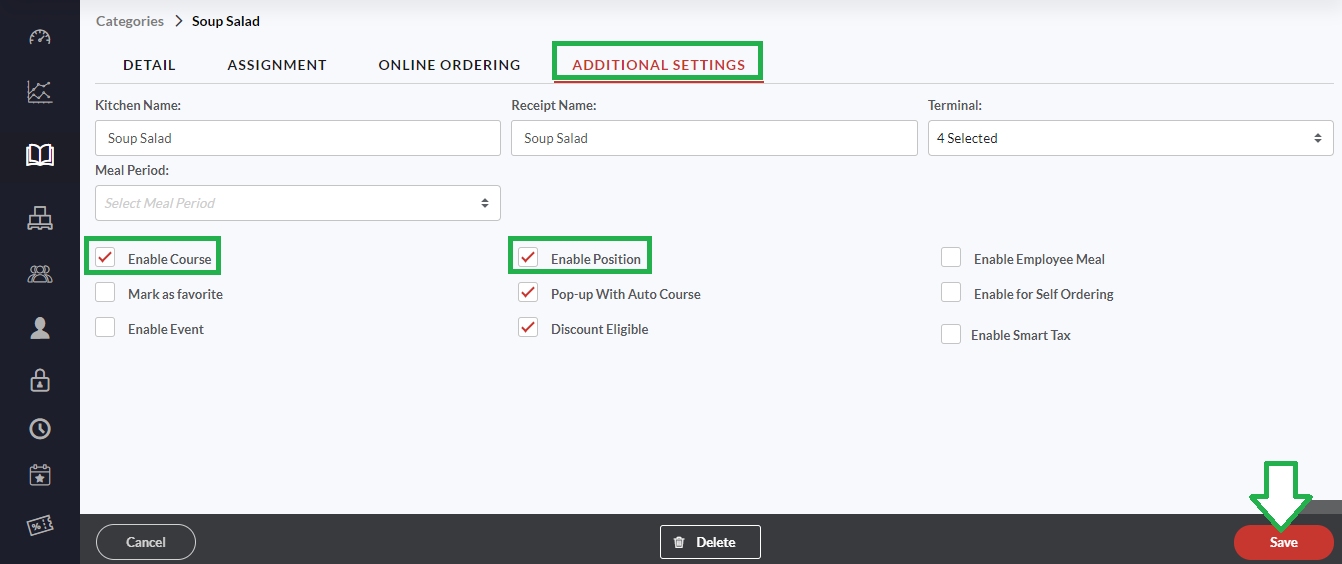
Click Additional Settings.
✔️ mark the Enable Course and Enable Position checkbox.
Click Save.
Now all items in this category will inherit the setting for course and position.
2. On item level

Click the Catalog button on the left menu.
Click the Item tab.
Select the Item you want to enable the coursing for.

Click Additional Settings.
✔️ mark the Enable Course (Auto-Coursing) checkbox or select the course from the drop-down list.
✔️ mark the Enable Position checkbox.
Click Save.
Starting a Table
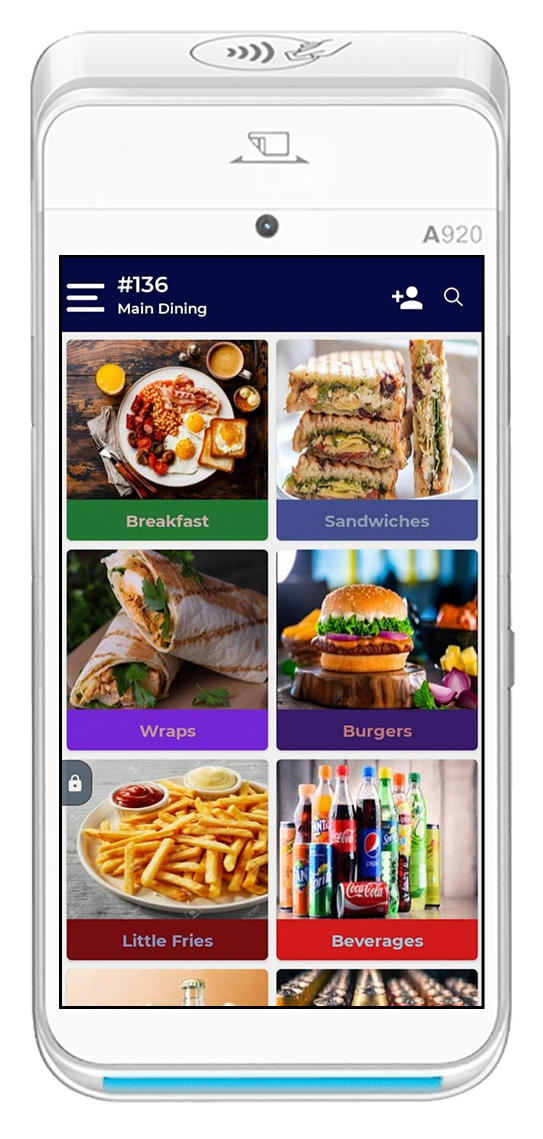
Go to the Service Area screen.Click the Main Dining tab to start a table.
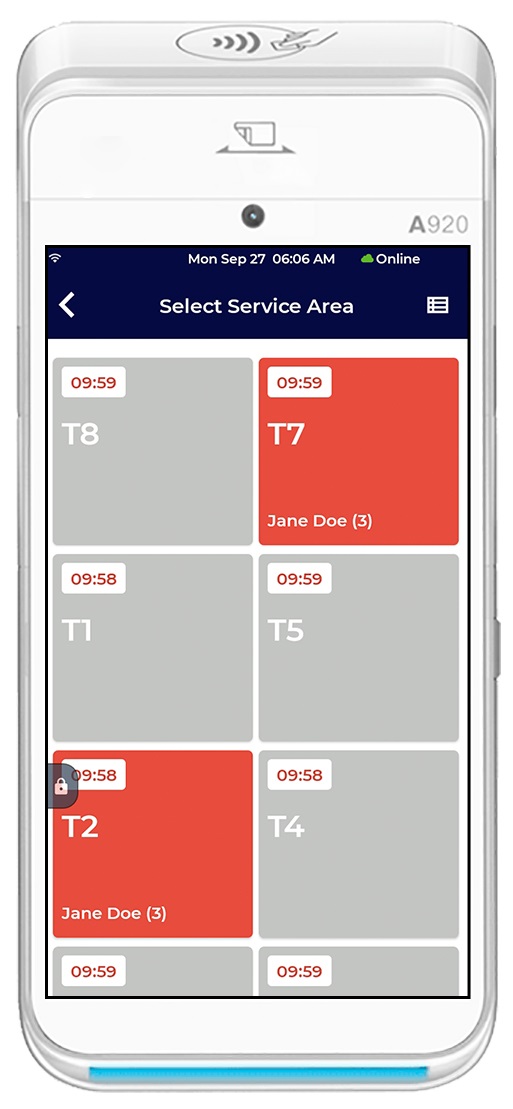
A list of tables will appear. The blocks will appear grey if the tables are empty, or red if occupied.
Tap the table where you want to start an order.

Enter the guest count.Click Done.

Tap the category you want to select an item from.Note:To add a customer to a table, click  on the top right corner. Select the customer from the pre-added list or you can add a new customer on the table as well.

The item list will open with images and prices for each item.
Select the item(s) to be added to the cart.
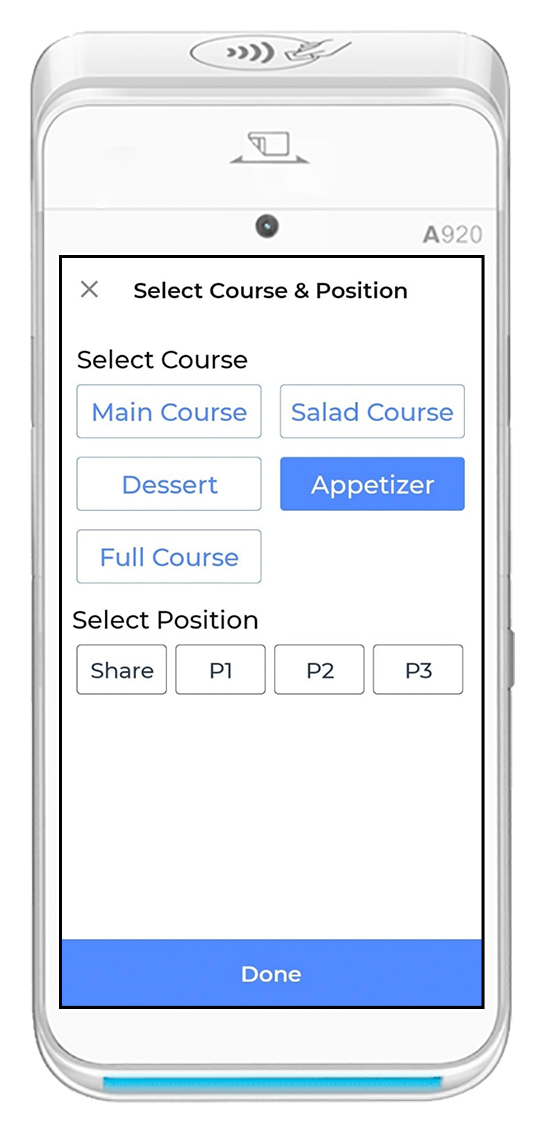
The Course and Position window appears. Here you can select the course for the selected item. Every time a new item is added to the cart, the course and position need to be selected.
Click Done.

Once all the required items are added tot he cart, click  at the bottom to checkout.

Verify the order at the checkout screen.
Click Pay at the bottom and select the payment option. You can also send the order to the kitchen by clicking Send.
Viewing Orders (Paid or Unpaid)
Login to your QLite app.
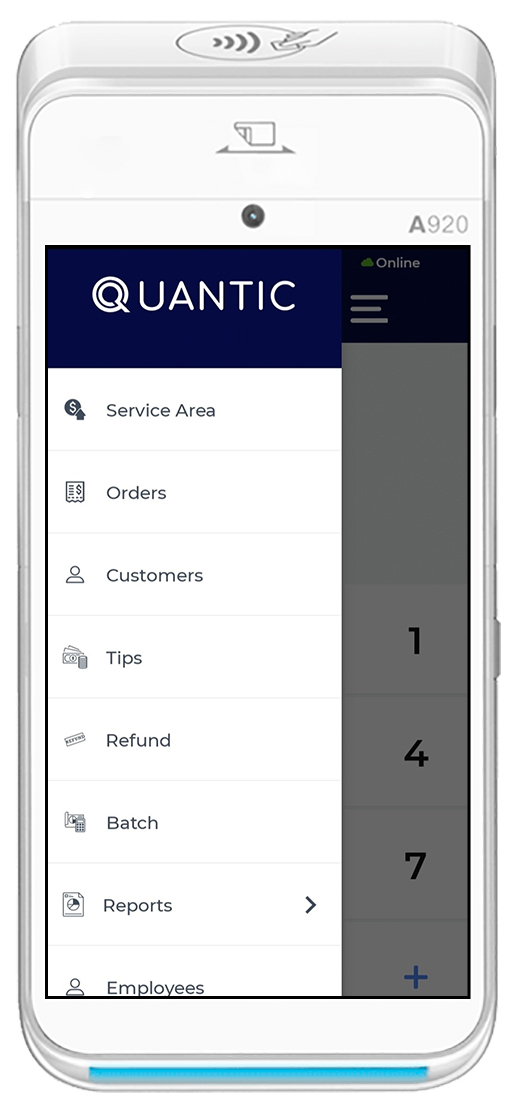
Tap the left navigation icon.
Click Orders.
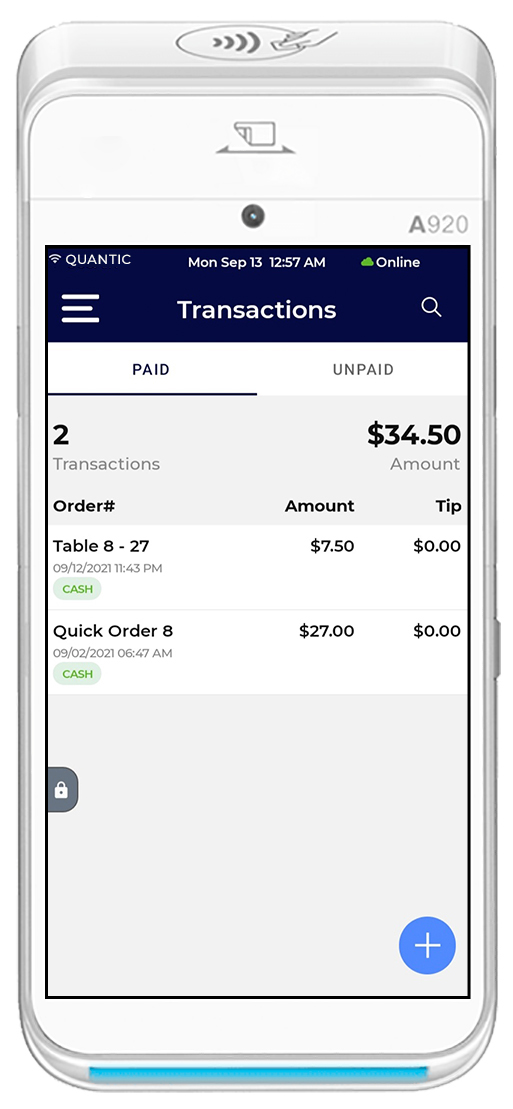
Now tap on Paid or Unpaid tabs to view the transactions.Tap on an order to open a check and perform any action, like printng a receipt or processing payment.
Adding a Customer
Login to your QLite app. Tap on the left navigation icon. Click Customers.
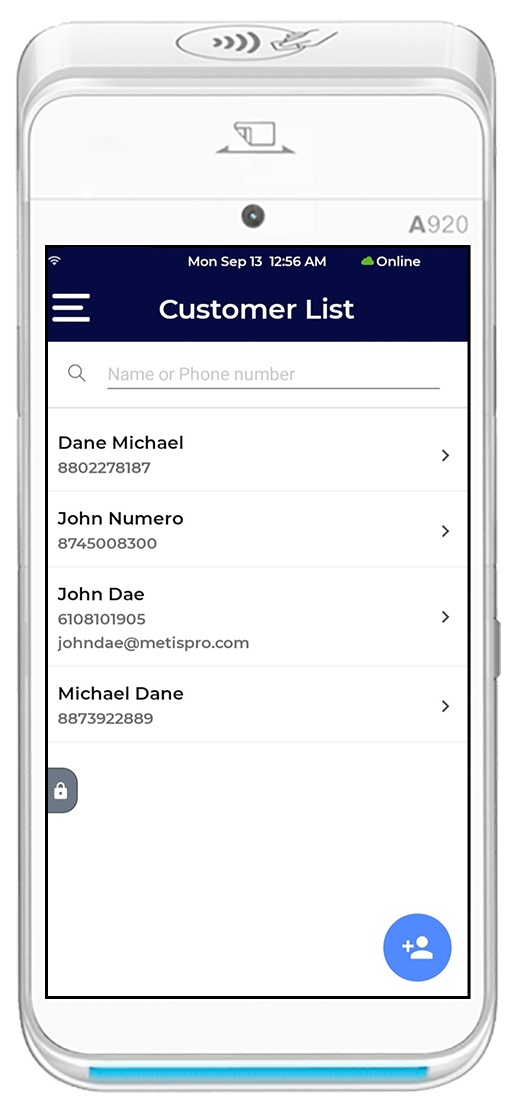
The pre-saved customer’s list opens up. Click ![]() at the bottom right corner to add a new
at the bottom right corner to add a new
customer.Enter customer name, email, phone number, and address.
Applying Tips
Login to your QLite app. Tap on the left navigation icon.Click Tips.
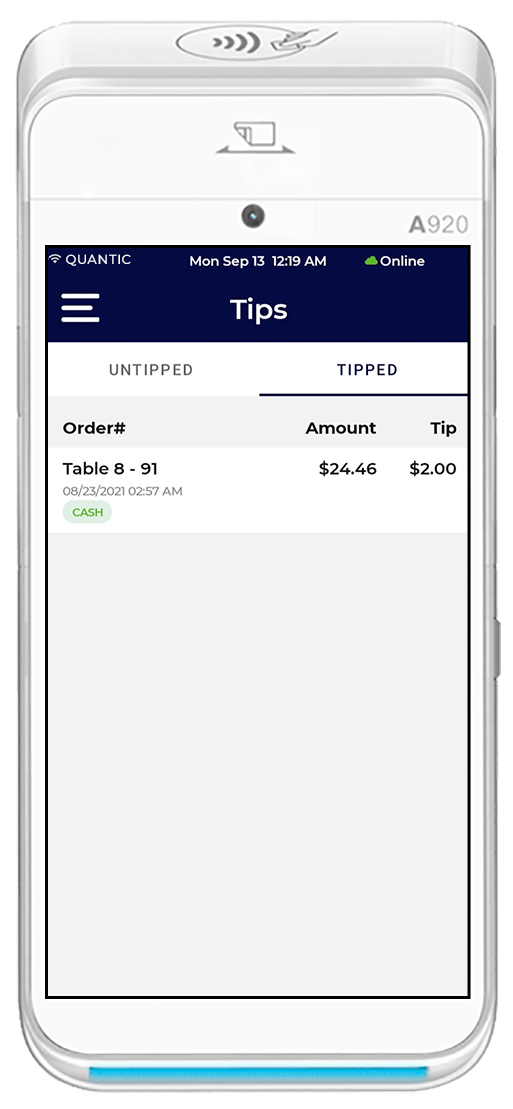
Switch between the Untipped and Tipped tabs to select the order in which you want to edit the tip amount.Select the order for which you have received the tip.
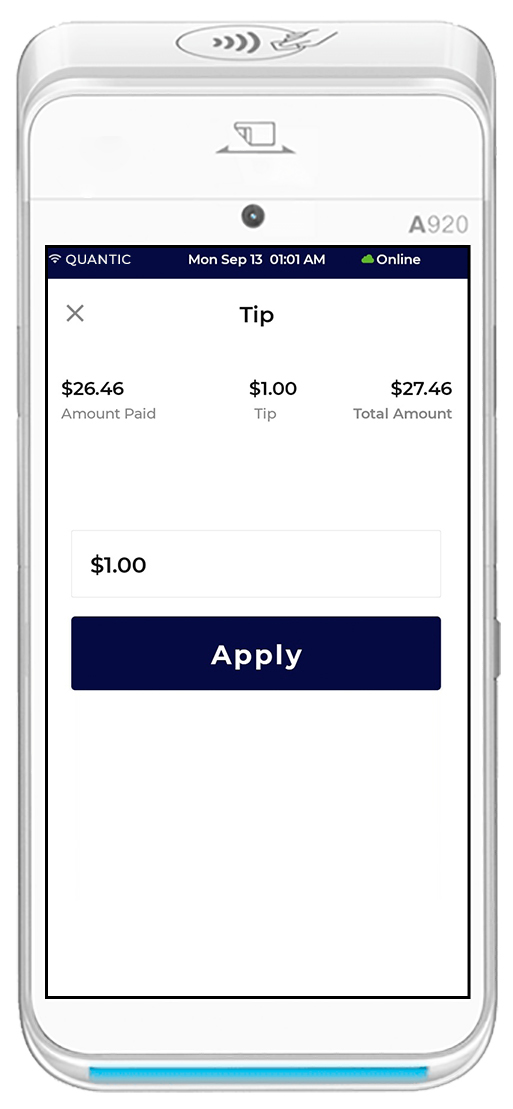
Enter the tip amount. Click Apply.In case you don't want to apply tip, click No Tip at the bottom.
Adding Employees
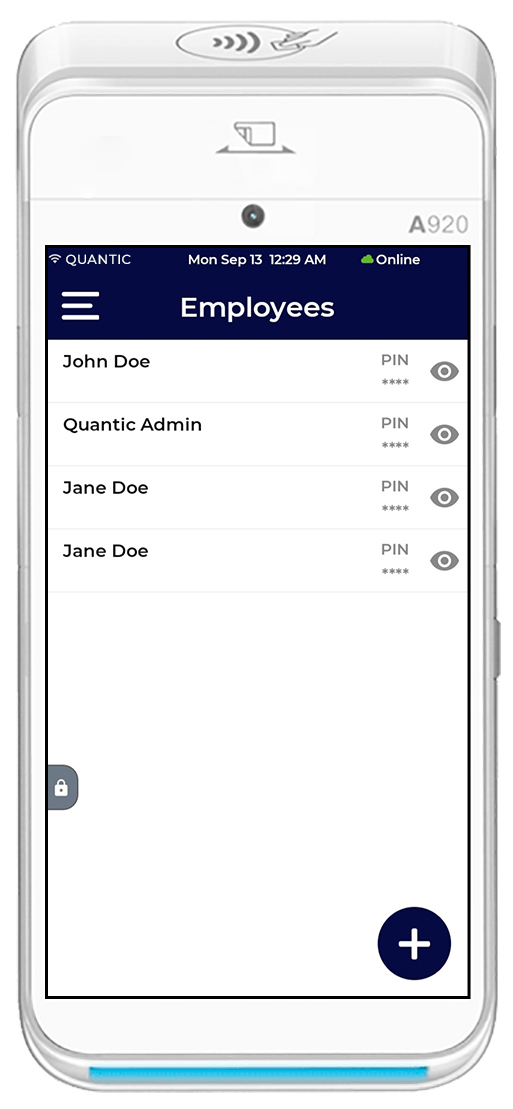
Click the left navigation. Tap the Employees option.A list of employees shows up with their security pins on the right. Tap the eye icon to show the specific employee's pin.Click the ➕ icon on the bottom right corner to add a new employee.

Enter the employee name, first and last name in the separate fields Select the role from the drop-down list. Enter the pin and click Save.
Adding Employees
How to Run Reports?
Click the left navigation button.
Tap Reports.Select the report you want to run. Here are different reports you can choose from.
- Employee Sales/Tip.
- Weekly Time Report.
- Employee Sales.
- Cash Drawer Report.
- Employee Sales.
- Sales Summary/EOD.
- Tip By Terminal.
- Hourly Sales Reports.
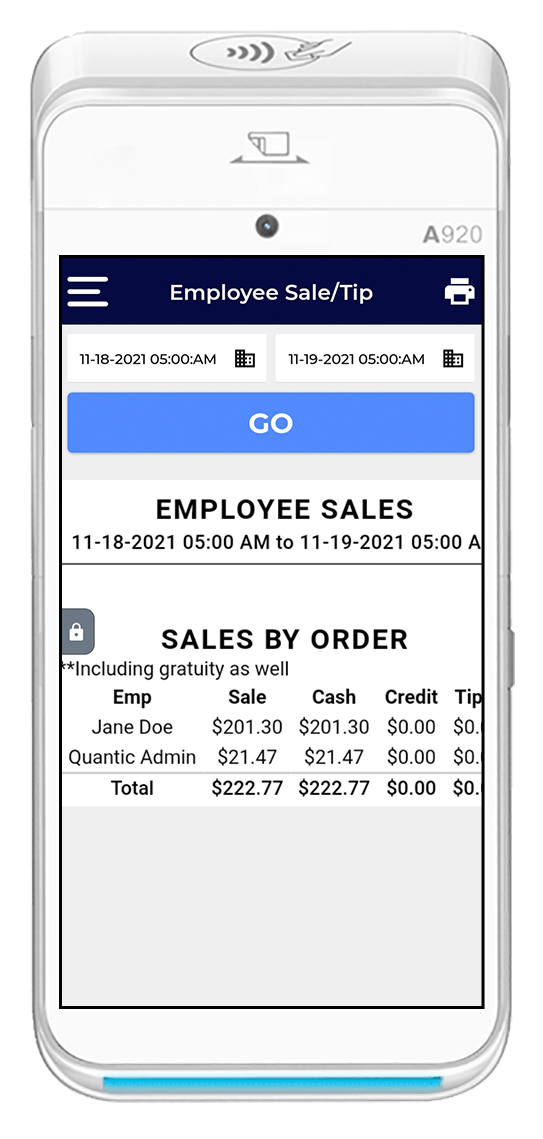
Here's an example of a typical Employee Sales Report. You can select the date range from the top to view the report for a particular time period and click Go.You can also print this report by clicking the Printer icon on the top right corner.
Taking Orders from Customer Management Screen
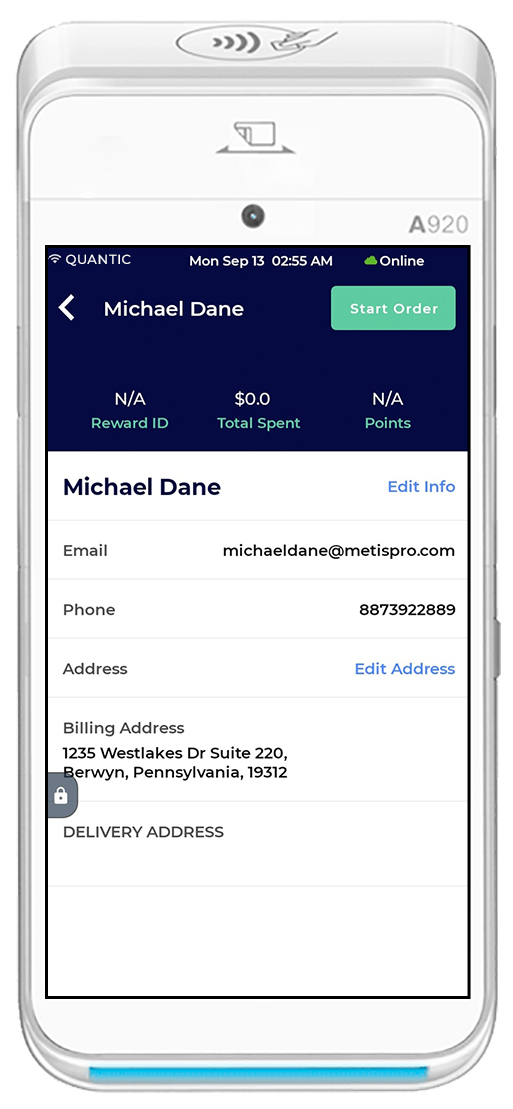
Click the left navigation, select Customers.A list of saved customers shows up.
Tap on the customer you want to start the order for.
Click the Start Order button on the top right corner.
Tap the category you want to select an item from.Note: To add a different customer to a table, click on the top right corner and select the customer from the pre-added list.
The item list will open with images and prices for each item.Select the item(s) to be added to the cart.

The Course and Position window appears. Here you can select the course for the selected item. Every time a new item is added to the cart, the course and position need to be selected.
Click Done.
Once all the required items are added to the cart, click at the bottom to checkout. Now you will be heading towards the checkout screen.

Verify the order at the checkout screen.
Click Pay at the bottom and select the payment method on the next scrceen. You can also send the order to the kitchen by clicking Send.
Applying Void
You can void the entire order from the checkout page after clicking the Pay button and selecting Void on the screen.

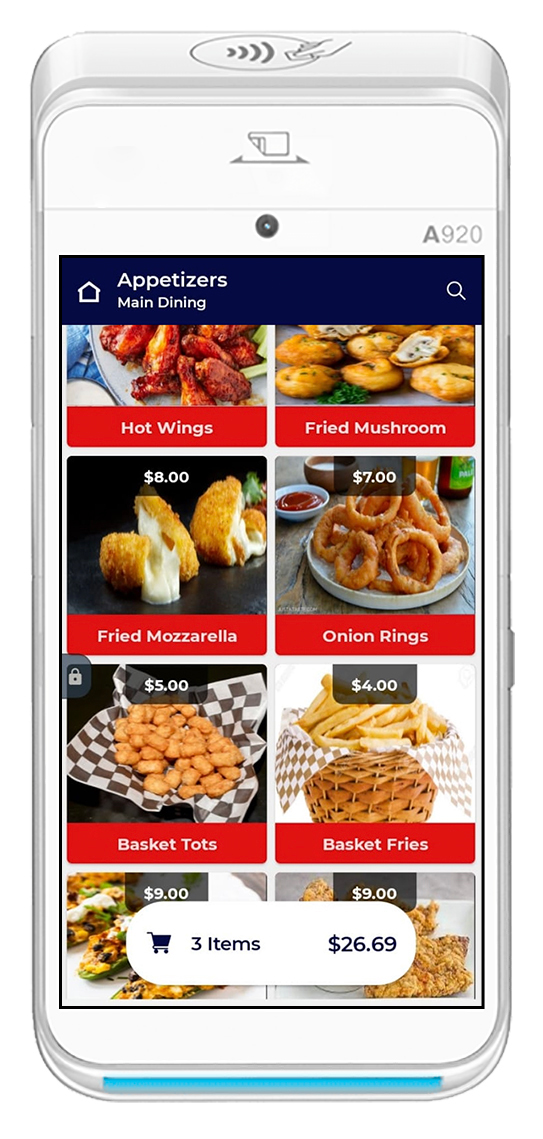
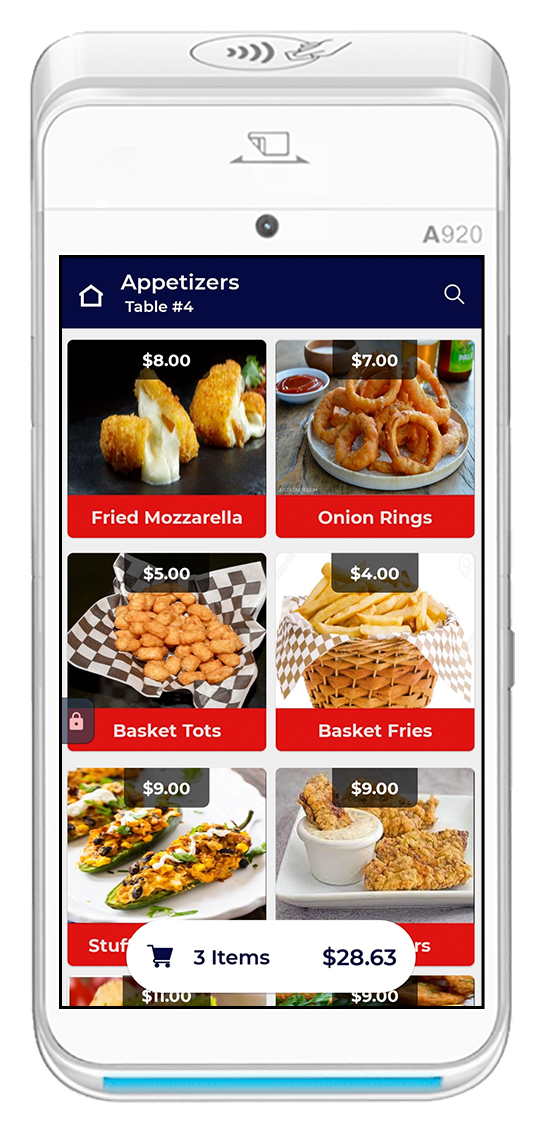
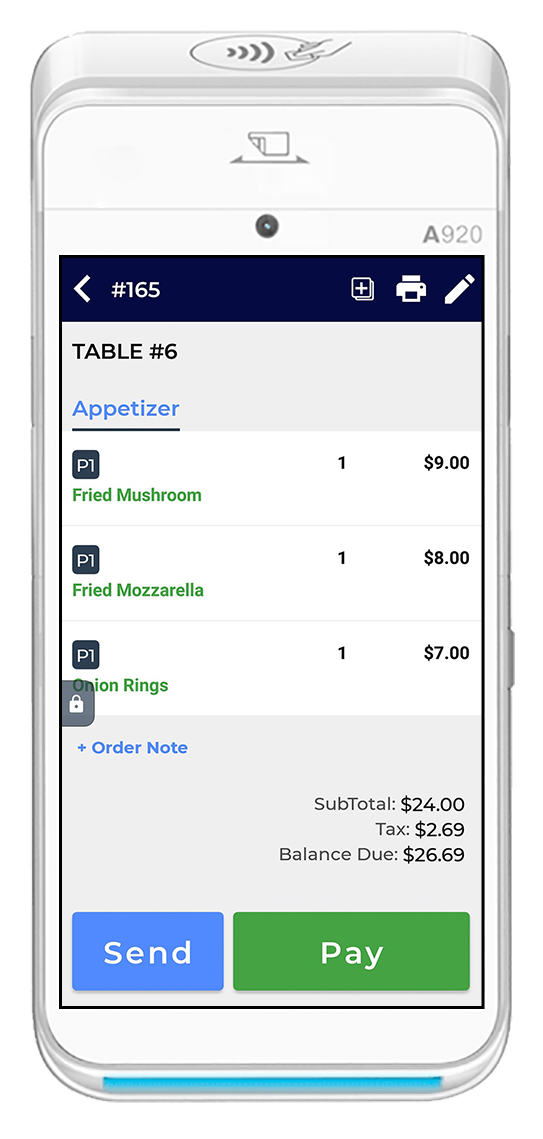
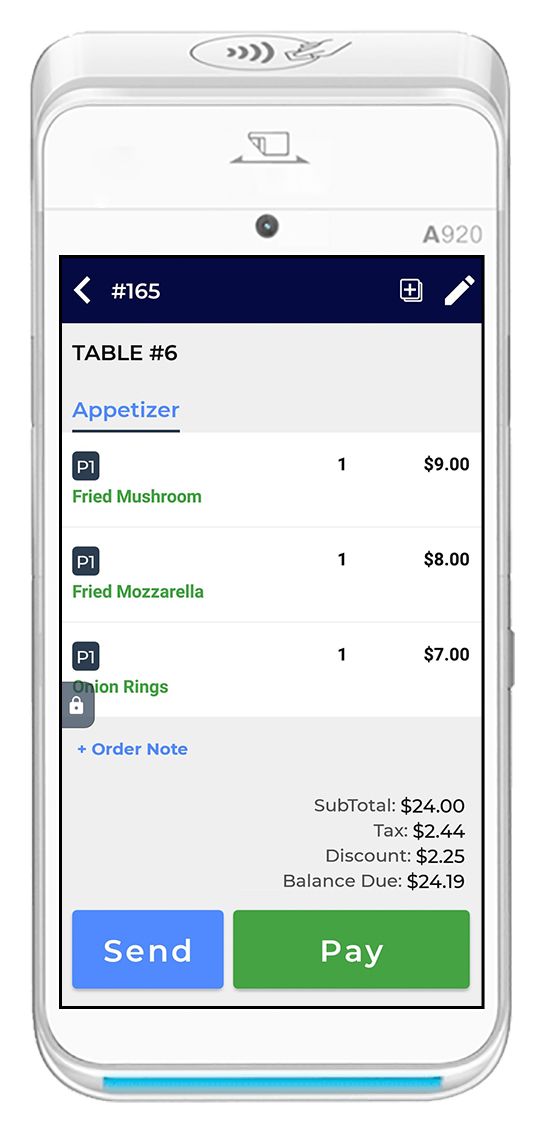
This screen shows the order taken from Main Dining with 3 items added to it. The balance to be paid is displayed at the bottom.
After verifying the order at the checkout screen, click the Pay button at the bottom.
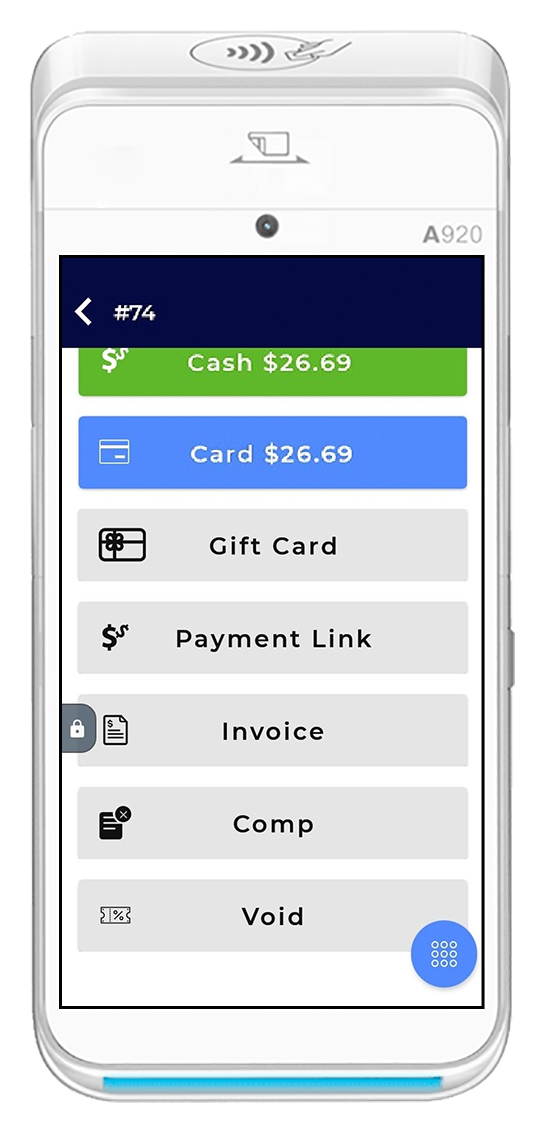
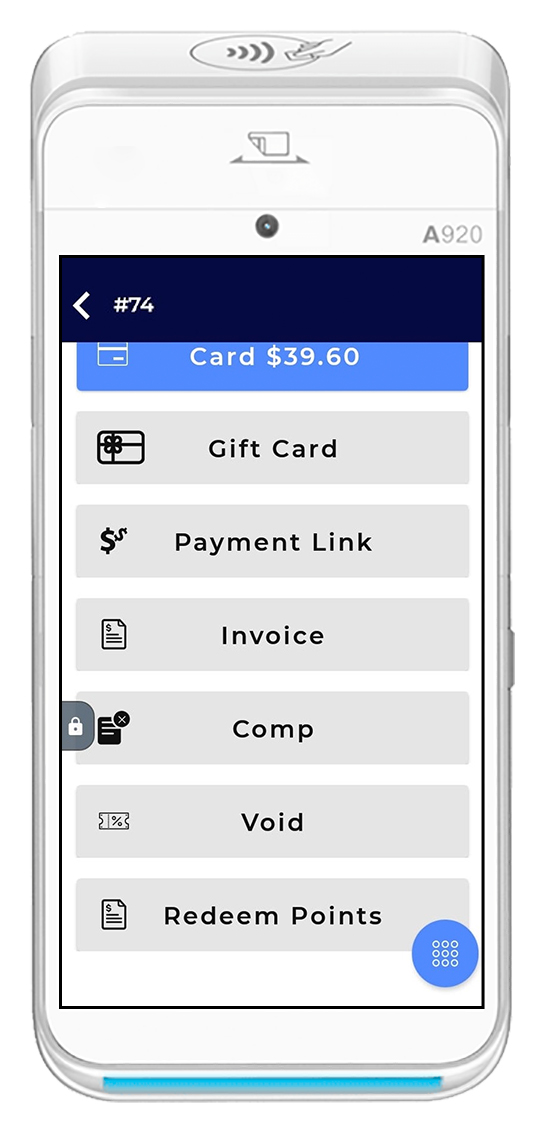
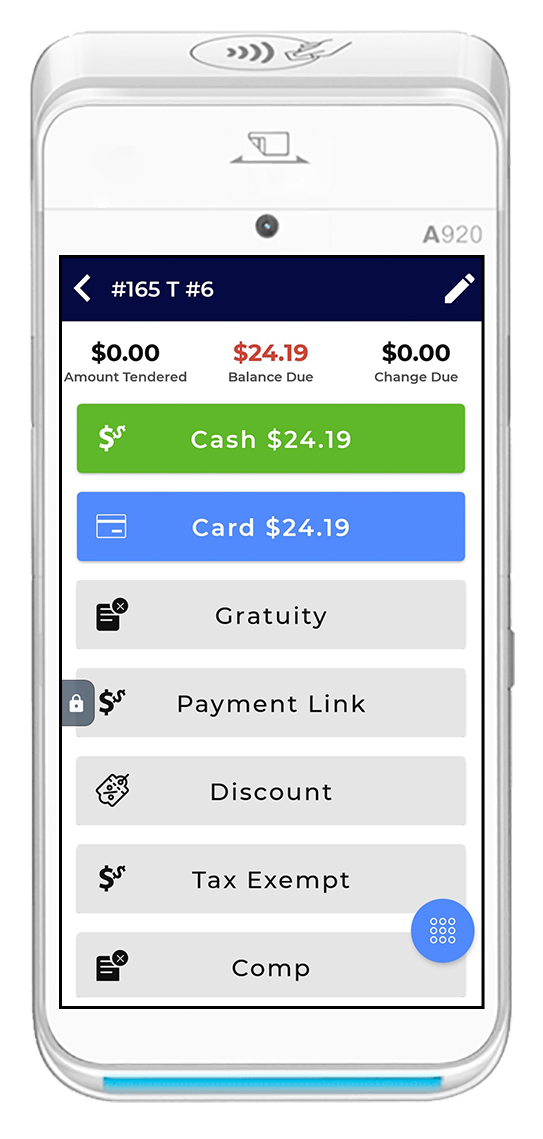
A new screen will appear where you can choose the mode of payment. It also displays the Void and Comp options; choose Void at the bottom.
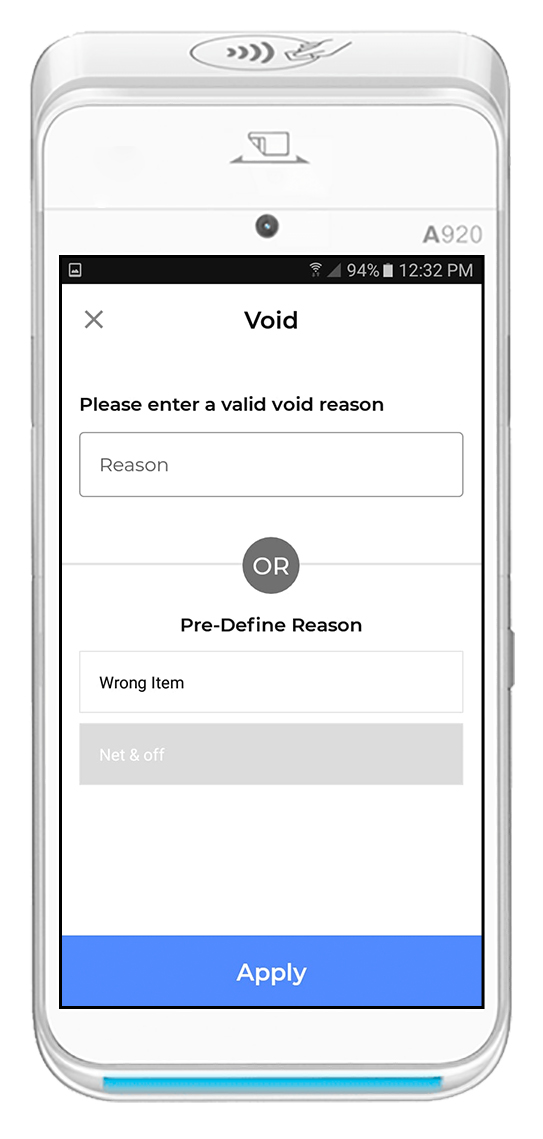
The Void screen pops up. Either enter the valid reason to void the order or select from the pre-defined reasons. Once you are done with the selection, click Apply at the bottom.
Now you can go to the Orders section to verify the specific order has been voided.
Applying Comp
You can mark the order as a comp from the checkout page after clicking the Pay button and selecting Comp on the screen.
This screen shows the order taken from Main Dining with 3 items added to it. The balance to be paid is displayed at the bottom.
After verifying the order at the checkout screen, click the Pay button at the bottom.
A new screen will appear where you can choose the mode of payment. It also displays the Void and Comp options; choose Comp at the bottom.
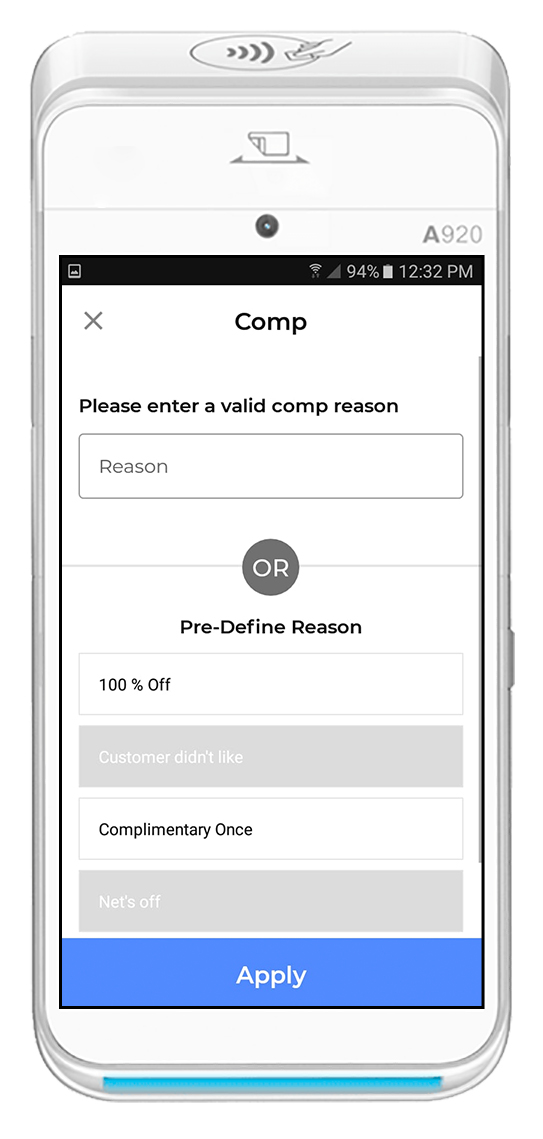
The Comp screen pops up. Either enter the valid reason to mark the order as comp or select from the pre-defined reasons. Once you are done with the selection, click Apply at the bottom.
Now you can go to the Orders section to verify the specific order has been marked comp.
Redeeming the Reward Points
Your guests can redeem the reward points by tapping the Redeem Points button on the checkout page. The Reward Points screen shows the Balance Points and the remaining points after deducting the points redeemed.
On the checkout page, scroll down to the bottom to view the Redeem Points button. Click over it to proceed.Note: Redeem Points feature will be enabled only if the customer is added to the order.
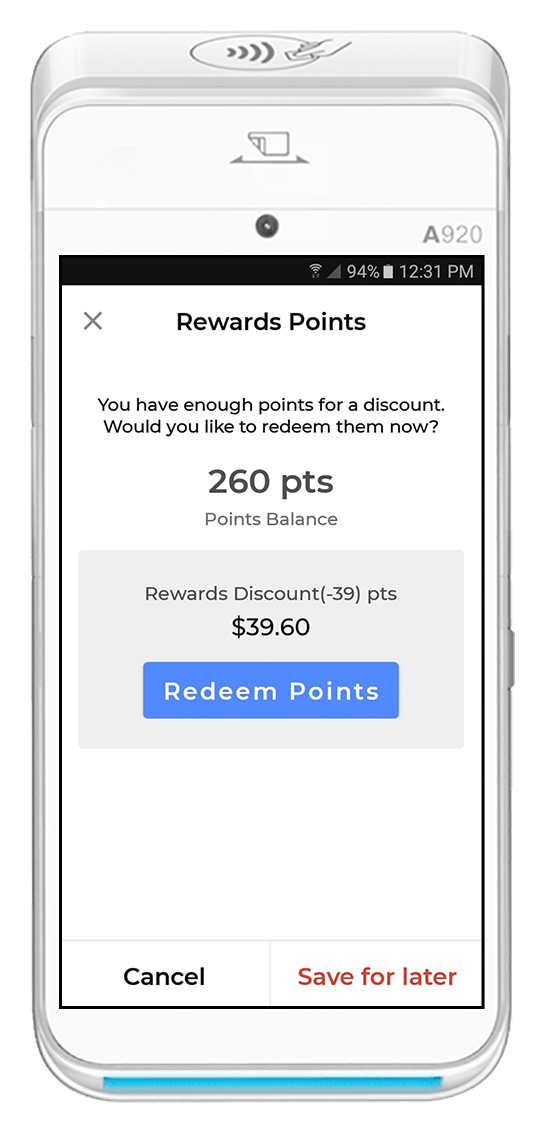
The Reward Points screen shows points balanced in the customer's QLite account.
In this example, the guest has 260 points redeemable, and s/he wants to redeem 39 points to pay for the order.
To redeem, click the Redeem Points button, and you are good to go.
If a customer does not want to redeem the reward points, click Cancel or click Save for Later.
Sending a payment link to the guests
Now no more worries about accepting payments from remotely situated guests. Just send the payment link via email or text and get paid instantly. You can generate a unique QR code from the checkout screen by tapping on the Payment Link button.
On the checkout page, scroll down to view the Payment Link button. Click over it to proceed.
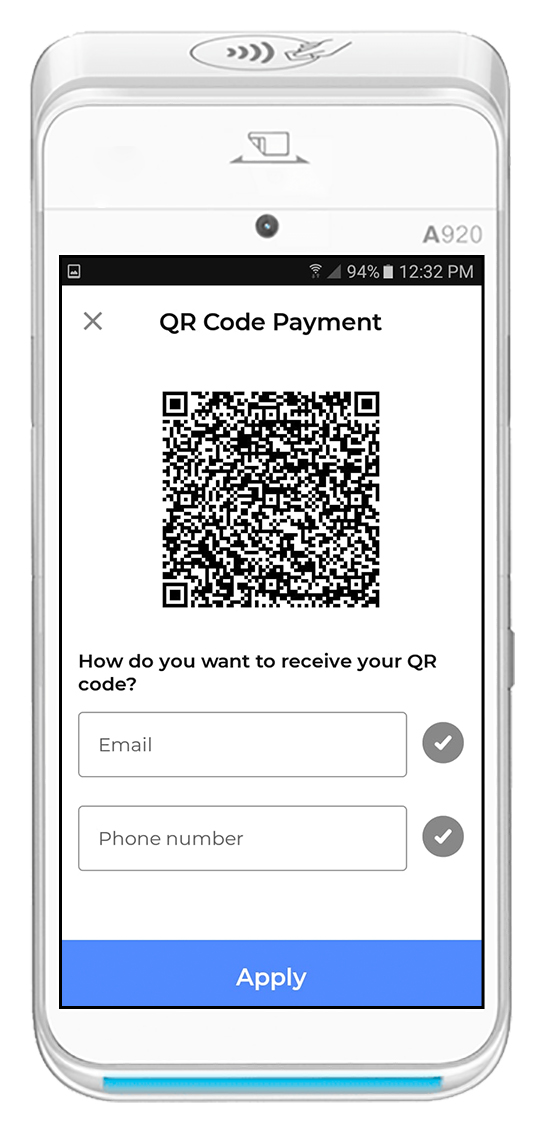
The QR Code Payment screen appears that shows a unique QR code for every new payment.
Enter customer’s Email or Phone Number or both on the respective fields and click Apply.
The QR code has been sent via email, text, or both to the customer. Ask them to scan the QR code and proceed with the payment.
Adding a new item
Now you can offer a variety of items to your guests by adding as many items as you want on the QLite app.
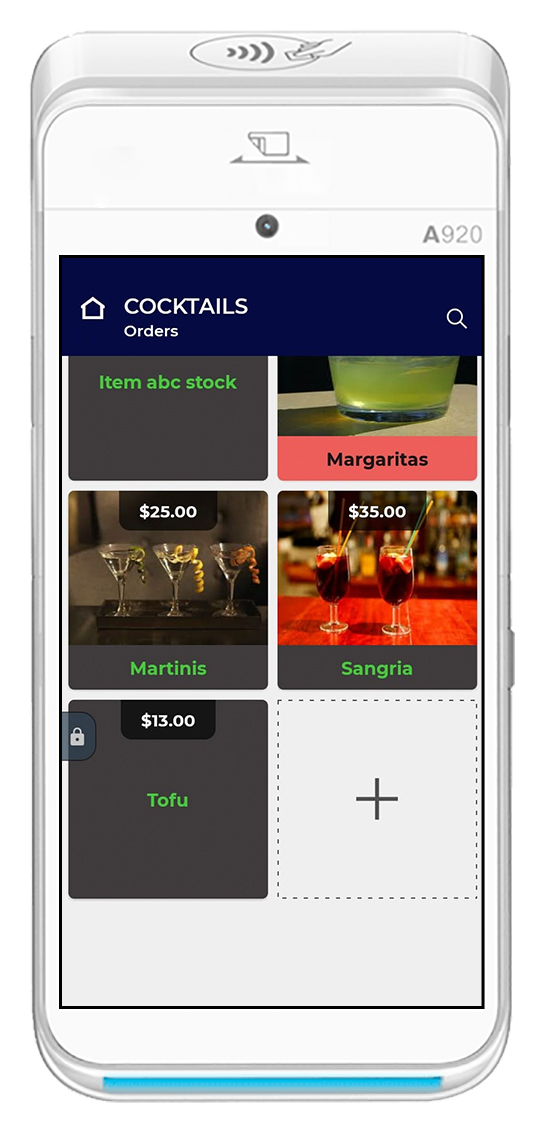
Open the category where you want to add new items.
Scroll down to the bottom. Tap on the empty box with ➕ on it.
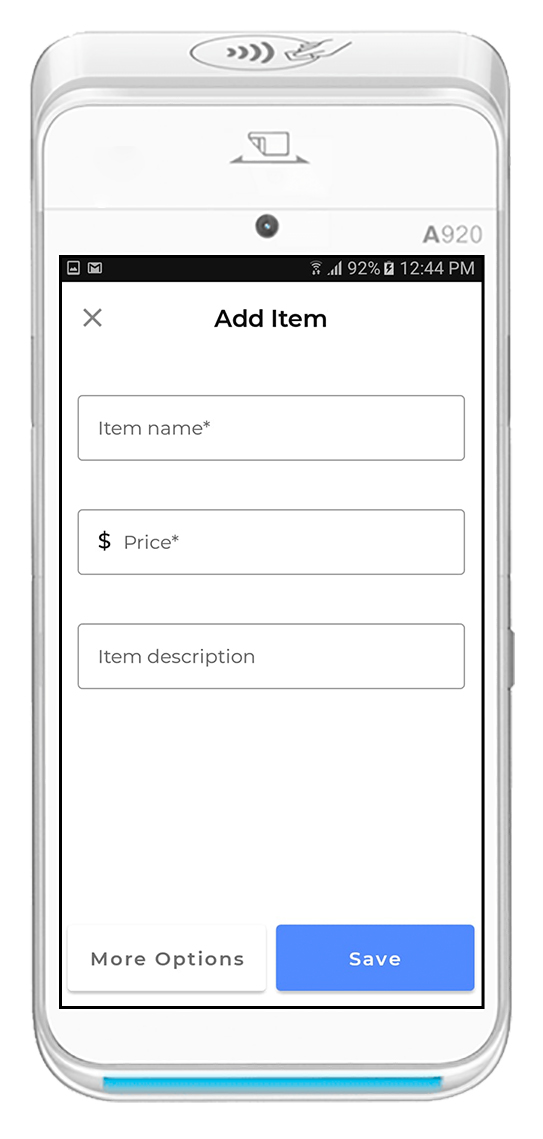
The Add Item window appears. Enter the Item Name, Price, and Item Description and click Save
Accepting Payments via Gift Card
Adding a new item
Besides cash or card, QLite allows you to accept payments via Gift Card. You can issue a new gift card, top up the balance or deactivate the gift card from the QLite app.
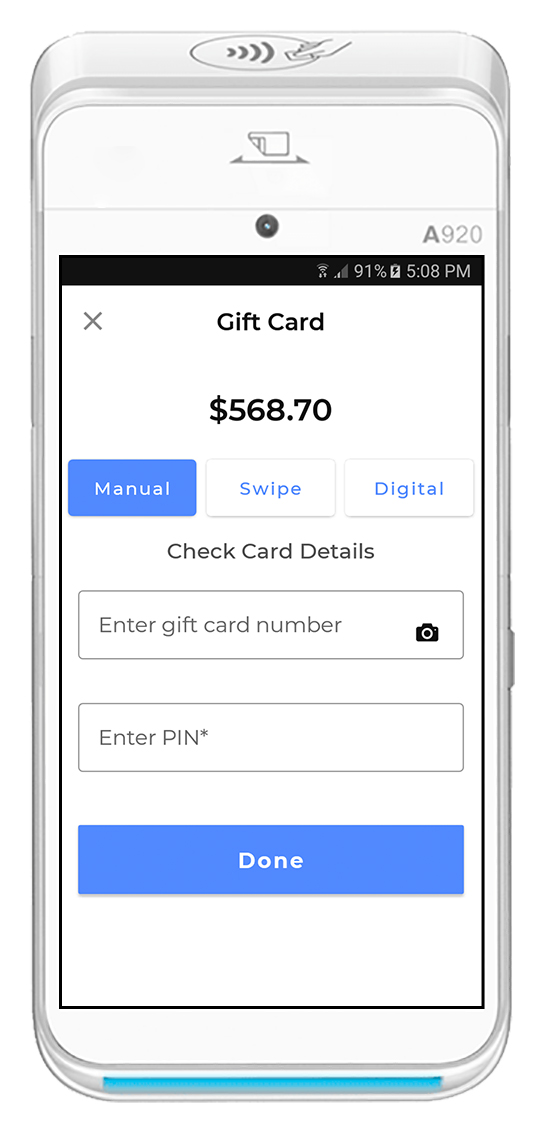
Once the items are added to the order, click the Gift Card button on the checkout screen.
The Gift Card screen shows the due amount to be paid. You can choose to pay the amount by:
- Entering the pin.
- Swiping the gift card.
- Digitally through one-time password (OTP).
Tap on the Manual tab, enter the gift card number, enter PIN and click Done. If the gift card is not having a sufficient balance you can charge the remaining amount via other modes.
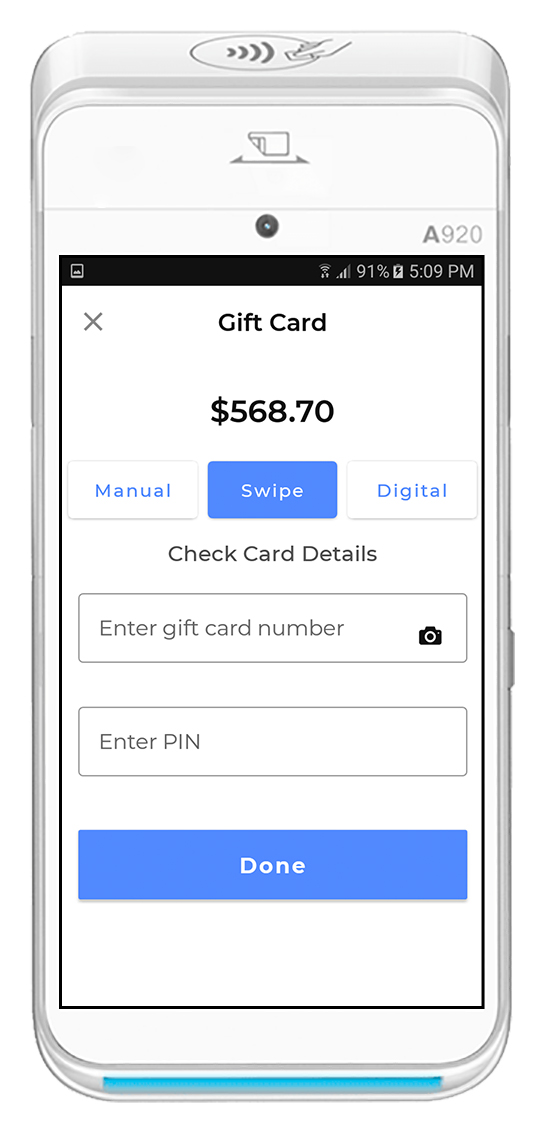
Alternatively, you can charge by swiping the gift card on the terminal. If the gift card is not having a sufficient balance you can charge the remaining amount via other modes.
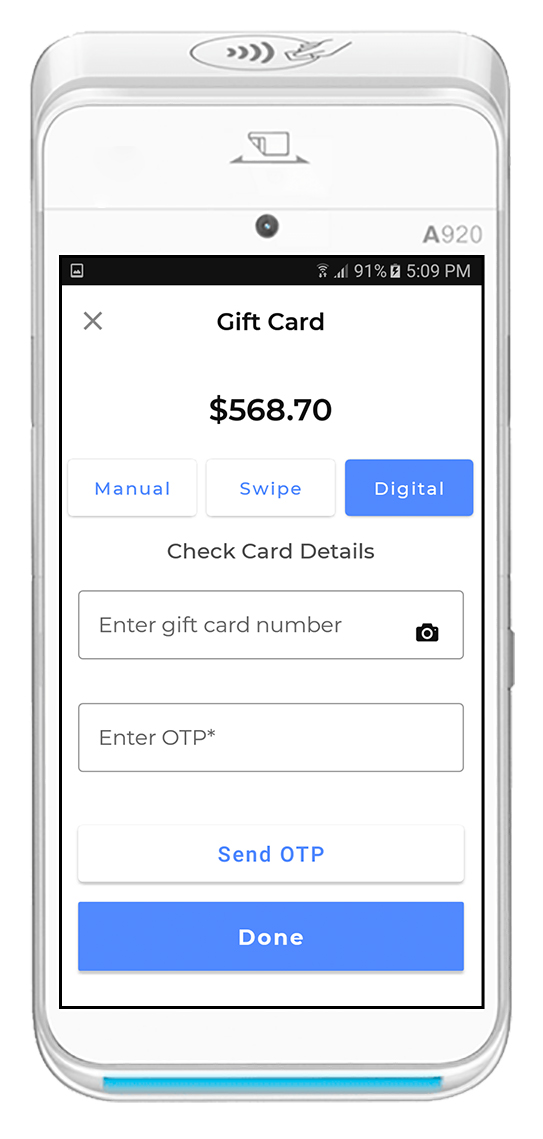
Lastly, you can also charge the amount by tapping the Digital tab.
Enter the gift card number and click Send OTP. The guest will receive the one-time password in the registered number. Enter the OTP in the appropriate field and click Done.
If the gift card is not having a sufficient balance you can charge the remaining amount via other modes.
Adding Notes to Order
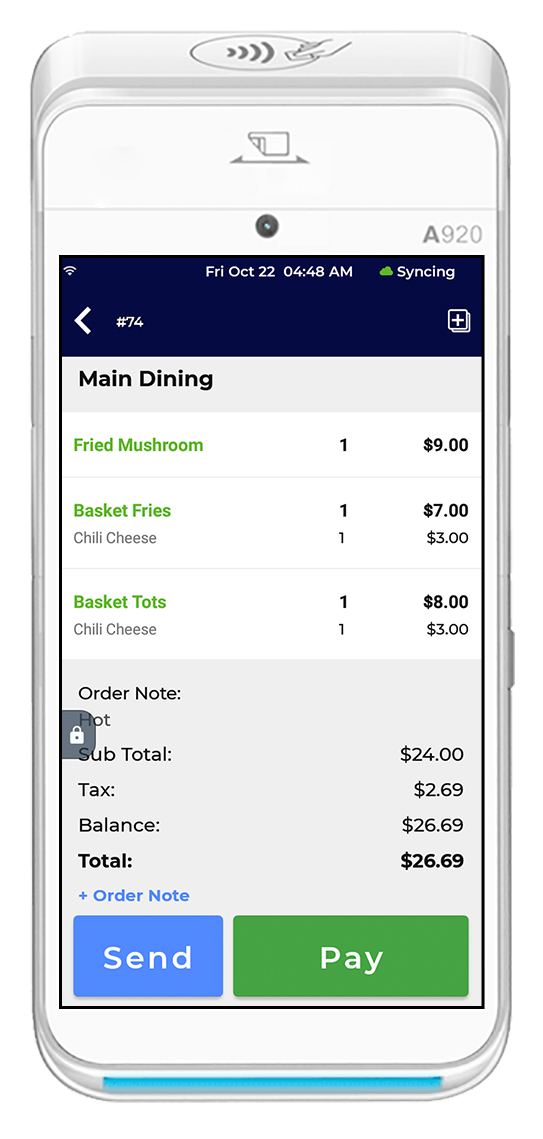
At the checkout screen, you can add the notes to an order.
Tap the ➕Order Note button at the bottom of the screen.
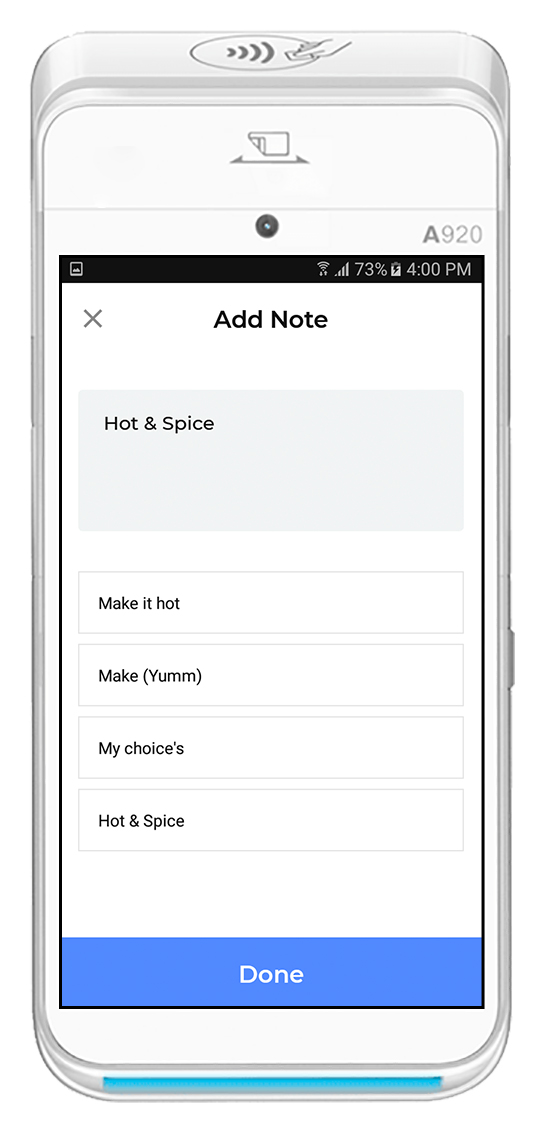
On the Add Note screen, select the note from the pre-defined options or just write it on the dedicated field. Click Done to apply the note to an order.
Applying Discounts
After adding items to the cart, click the icon to move forward to the checkout screen.

Review the cart and click Pay to accept payment from the guests.
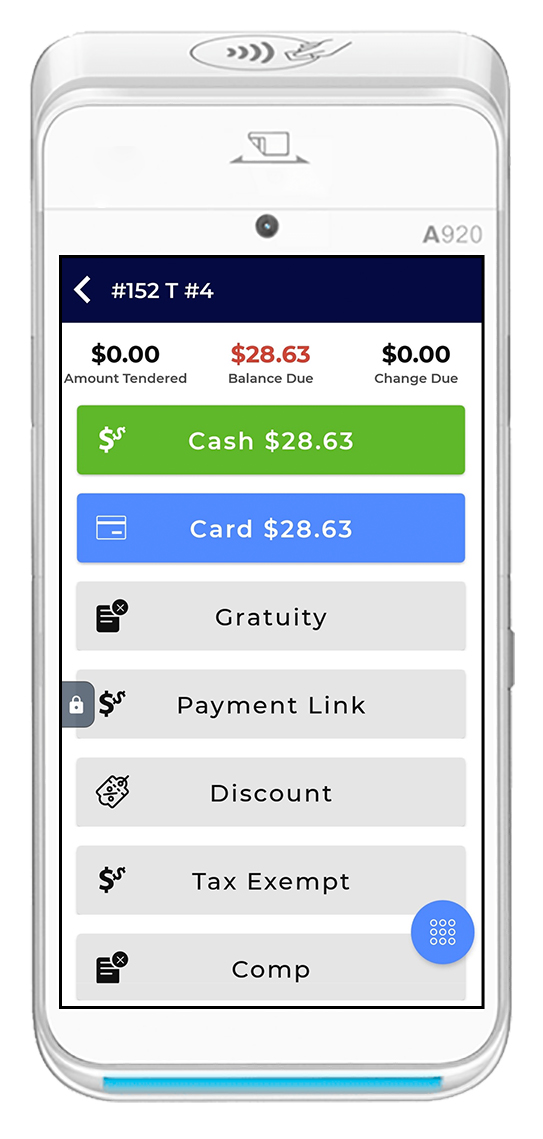
Click the Discount button on the screen to apply for a discount.
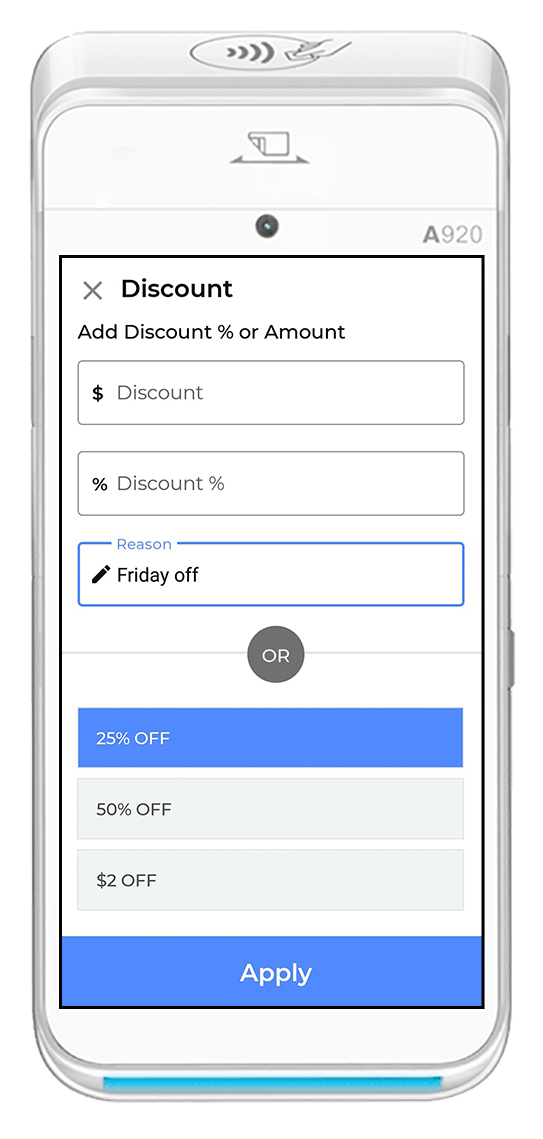
On the Discount screen, you can either enter the discount (% or $) or select from the predefined discount value.
Enter the valid discounting reason.
Click Apply.
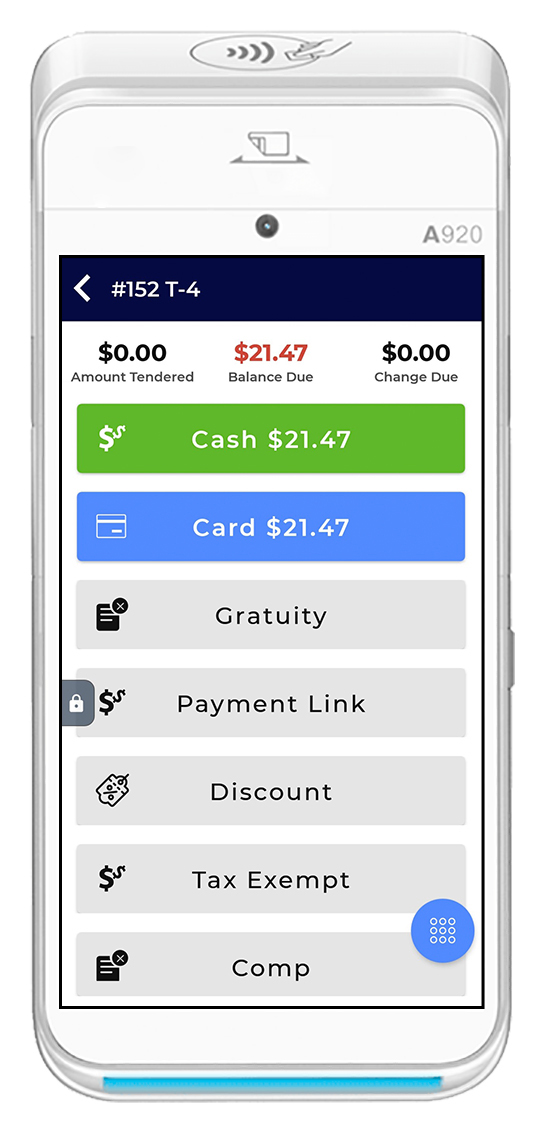
You will be redirected to the checkout page having revised Balance Due that needs to be paid.
Select either Cash or Card to pay for the due amount.
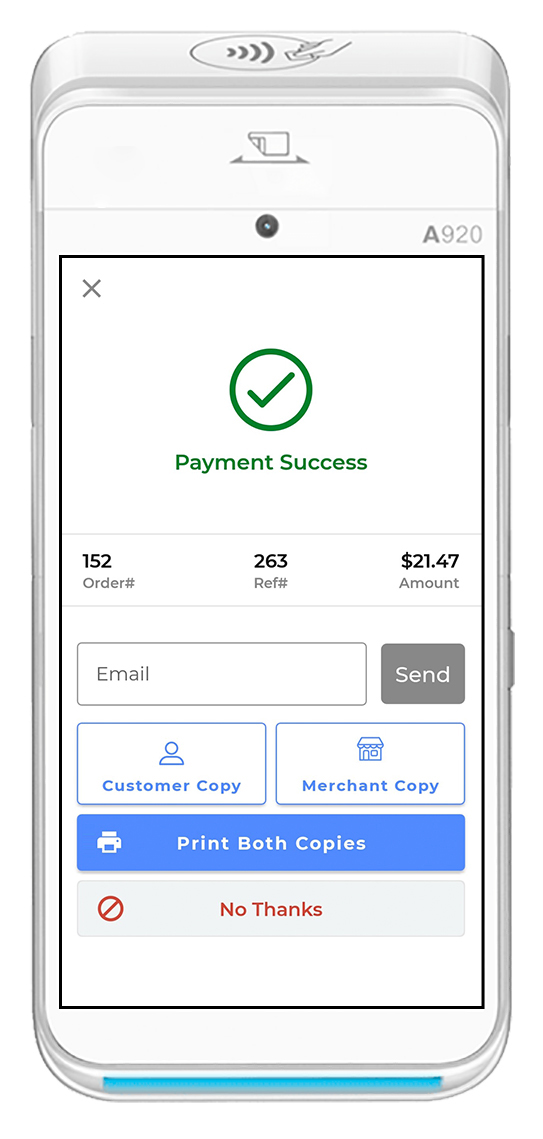
The Payment Success screen will appear.
To email, the receipt to the guest, enter the customer’s email address in the Email field and click Send.
You can also print the receipt copies by clicking on the Customer Copy, Merchant Copy or Print Both Copies.
Click No Thanks to avoid printing the receipts.
Applying Tax Exemption
After adding items to the cart, click the ![]() icon to move forward to the checkout screen.
icon to move forward to the checkout screen.
Review the cart and click Pay to accept payment from the guests.
Click the Tax Exempt button on the screen to apply tax exemption.
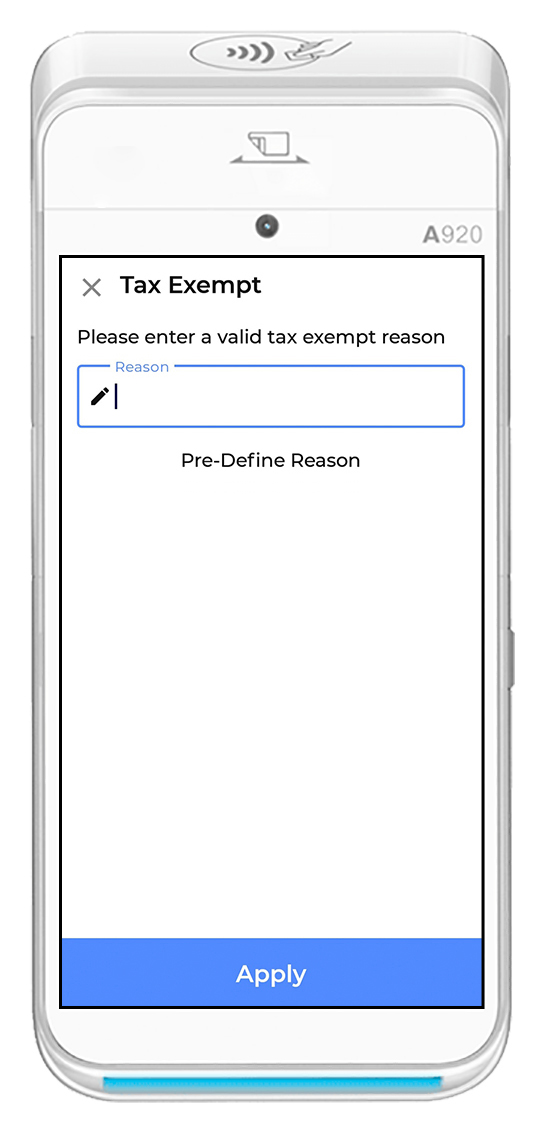
On the Tax Exempt screen, enter the reason for tax exemption.
Click Apply.
You will be redirected to the checkout page having revised Balance Due that needs to be paid.
Select either Cash or Card to pay for the due amount.
The Payment Success screen will appear.
To email, the receipt to the guest, enter the customer’s email address in the Email field and click Send.
You can also print the receipt copies by clicking on the Customer Copy, Merchant Copy or Print Both Copies.
Click No Thanks to avoid printing the receipts.
Applying Gratuity
After adding items to the cart, click the icon to move forward to the checkout screen.
Review the cart and click Pay to accept payment from the guests.
Click the Gratuity button on the screen.
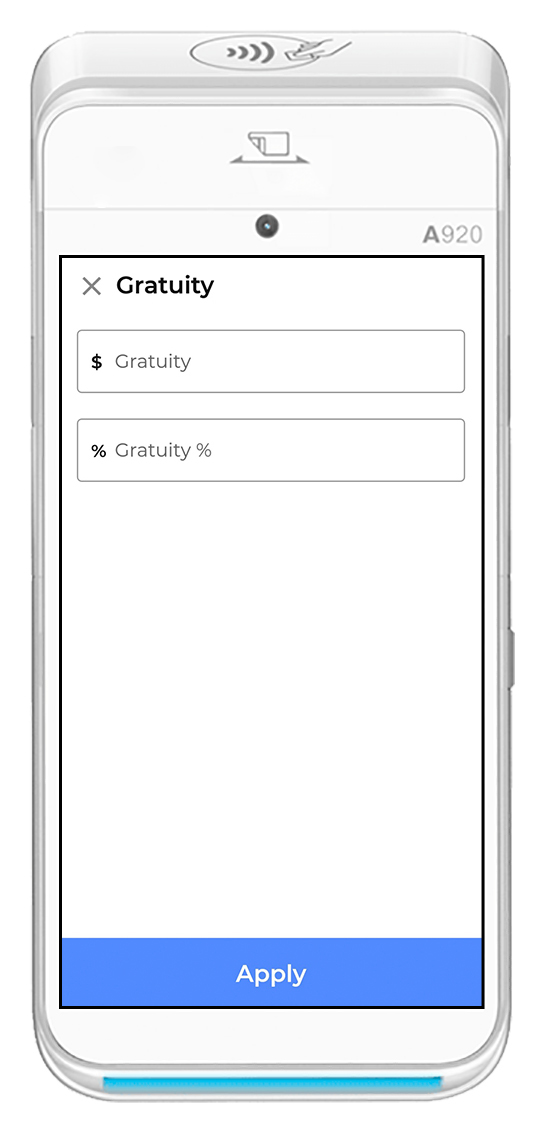
On the Gratuity screen, enter the gratuity in $ or %.
Click Apply. You may be prompted to enter the manager pin to proceed. Make sure you have the privilege to apply the gratuity to an order.
You will be redirected to the checkout page having revised Balance Due that needs to be paid.
Select either Cash or Card to pay for the due amount.
The Payment Success screen will appear.
To email, the receipt to the guest, enter the customer’s email address in the Email field and click Send.
You can also print the receipt copies by clicking on the Customer Copy, Merchant Copy or Print Both Copies.
Click No Thanks to avoid printing the receipts.
Item Level Operations
You can apply discounts, void, comp, Tax Exempt on a single item or the entire order. Here are the steps that need to be followed to perform these operations on an item in the order.
After adding items to the cart, click the icon to move forward to the checkout screen.
The final check will open, here you can review the orders. To perform an item level operation, click the ![]() icon on the top right corner.
icon on the top right corner.
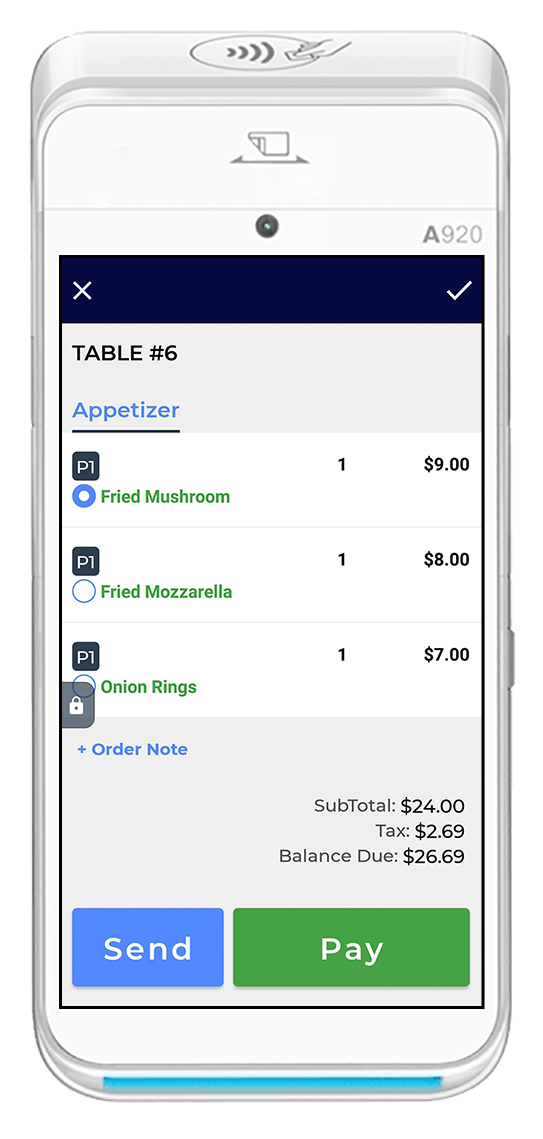
Select the item that you want to edit.
In this example, we need to apply a discount on Fried Mushroom, so we tap on that item. The circle adjacent to it will be highlighted indicating it is selected.
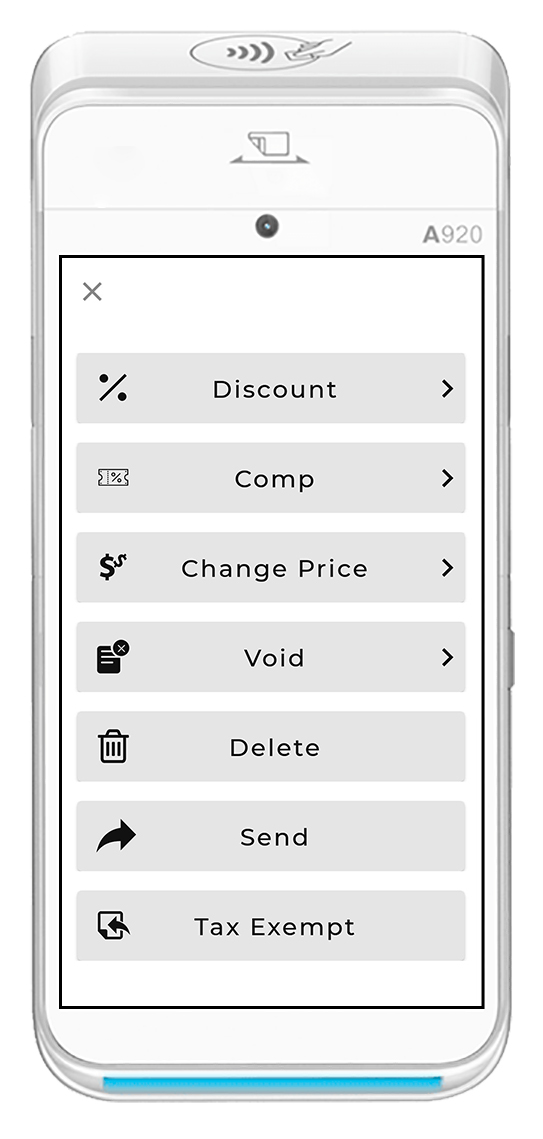
The list of operations will open. Select the one you want to apply on an item.
Since we have to apply for a discount, we will tap on the Discount button.
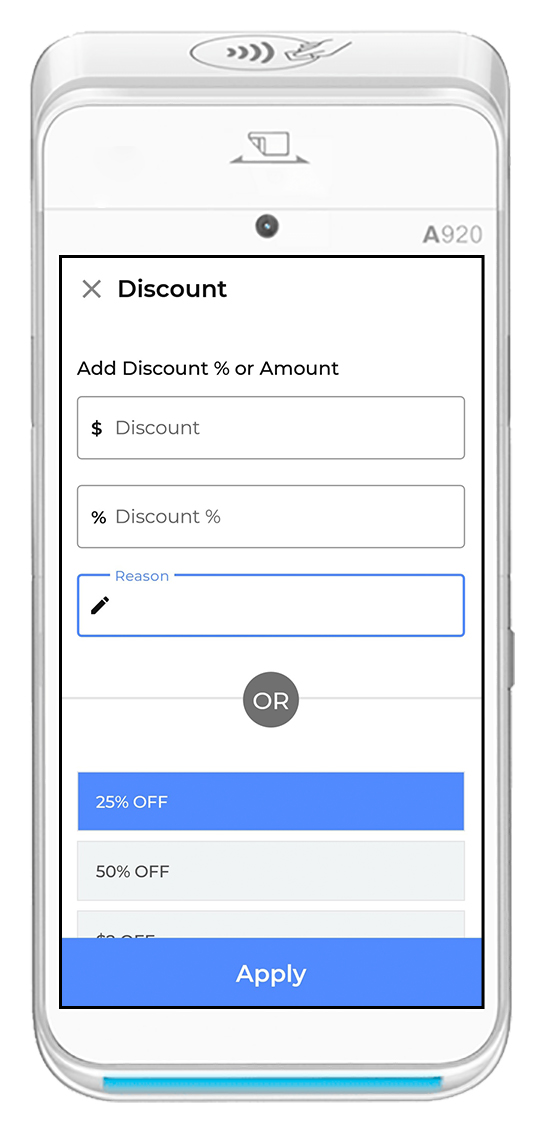
The Discount screen will open.
Enter the discount in % or $ and put the reason for discounting the item.
Alternatively, you can also select from the predefined discounts.
Click Apply.
The discount has been applied and it will show up at the bottom. The balance due will be revised as well.
Now click Send to send an order to the kitchen or click Pay to pay for the order.
Select the payment method the customer wants to pay through.
Great! You have successfully completed the item level operations.
Applying Promotions on Category/Item Level
Restaurants can offer special promotions or discounts to the guests on special events. The promotional pricing can be applied to the entire group of items in the store. Rather than changing the price of items individually, you can create a promotion rule that will apply to all the items in a category. Also, you can apply the promotion rule to the individual items and set the start and end date of the promotion rule
Setup the Promotion Rule
Item Level Operations
You can customize the promotion rules here, such as the start and end date/time of the promotion, price of the item during the promotional period, and whether the promotion should keep repeating without any end date. For example, you can offer promotional prices for summer holidays, weekends, clearance sales, etc. Below are the steps to set up the promotion rule in Quantic.
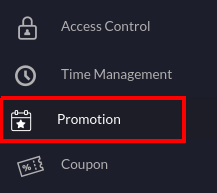
- Navigate to the Promotions in the left navigation menu.

- Select the Promotion Rule tab as shown in the screenshot.
- Click
 to create a new promotion rule

- A new window will appear here. You can create a new rule and customize it the way you want. Below are the descriptions.
- Rule name: Enter the name of the promotion rule such as 10% off on cakes, Happy Hours, Friday 20% off, etc.
- Start Date: Select the start date of this promotion rule. From this date onwards, the promotion rule can be applied to items. So if you select April/17/2022 as the start date, the promotion rule will come into effect from the 17th of April.
- End Date: Select the end date of this promotion rule. The promotion rule will end on this date. If you select April/24/2022 as the end date, this promotion will end on the 24th of April.
- Repeat: Tap the Repeat button if you want the promotion rule to keep repeating every day, without any end date. This will apply the same promotional price every day on the associated items
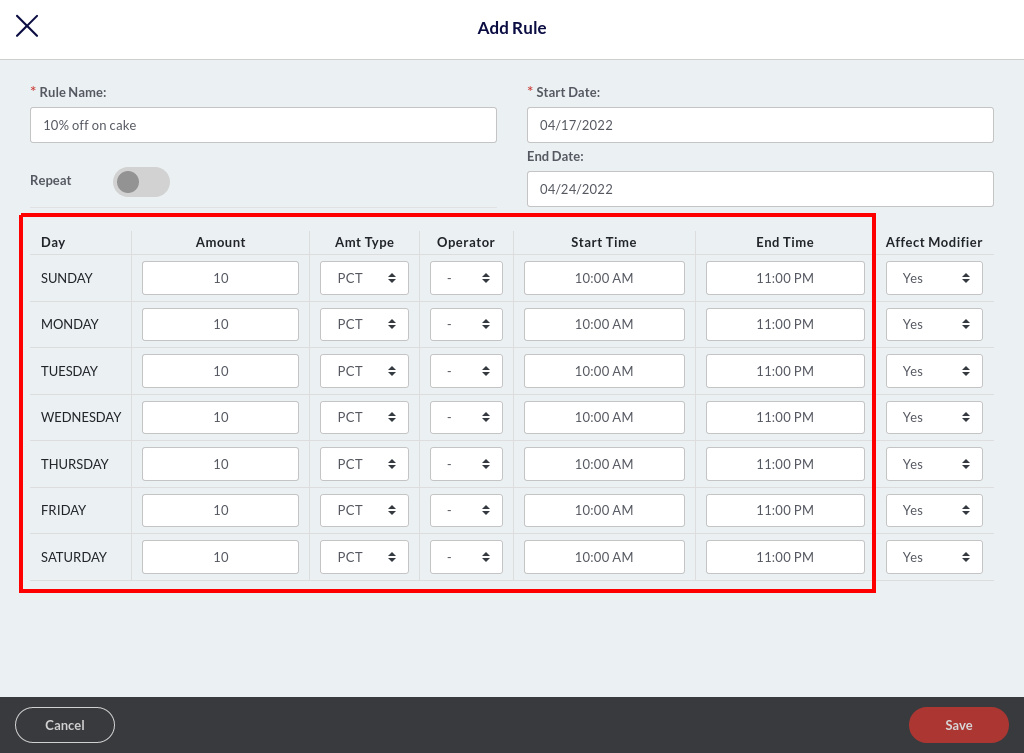
- Enter the amount next to the day. The amount should be in numbers. So, if you want to offer the 10% off on cakes, enter 10 next to Friday, select PCT (percent) in Amt Type, and select (➖) in the Operator Type. Below are some important abbreviations to help set up the rules.
- PCT: Percentage%. For example, 10%.
- AMT: Amount. For example, $10.
- Operator (➖): Apply this operator when you want to offer a discount. For example, to activate the 10% off on items, simply put 10 in Amount and (➖) in Operator.
- Operator (➕): Apply this operator when you want to increase the price of items. For example, to raise the price of items by 10%, simply put 10 in Amount and (➕) in Operator.
- Operator (=): Apply this operator when you want to override the existing amount of the item. For example, if you put 10 in the Amount field and select (=) operator, the existing price of the associated item will be overridden to $10.
- Next, you should select the start and end time to choose the duration during which you want the promotion rule to remain in effect during the day. For example, you want the 10% off on cakes promotion rule to stay active between 10:00 am to 11:00 pm, so select 10:00 am as the Start Time and 11:00 PM as the End Time.
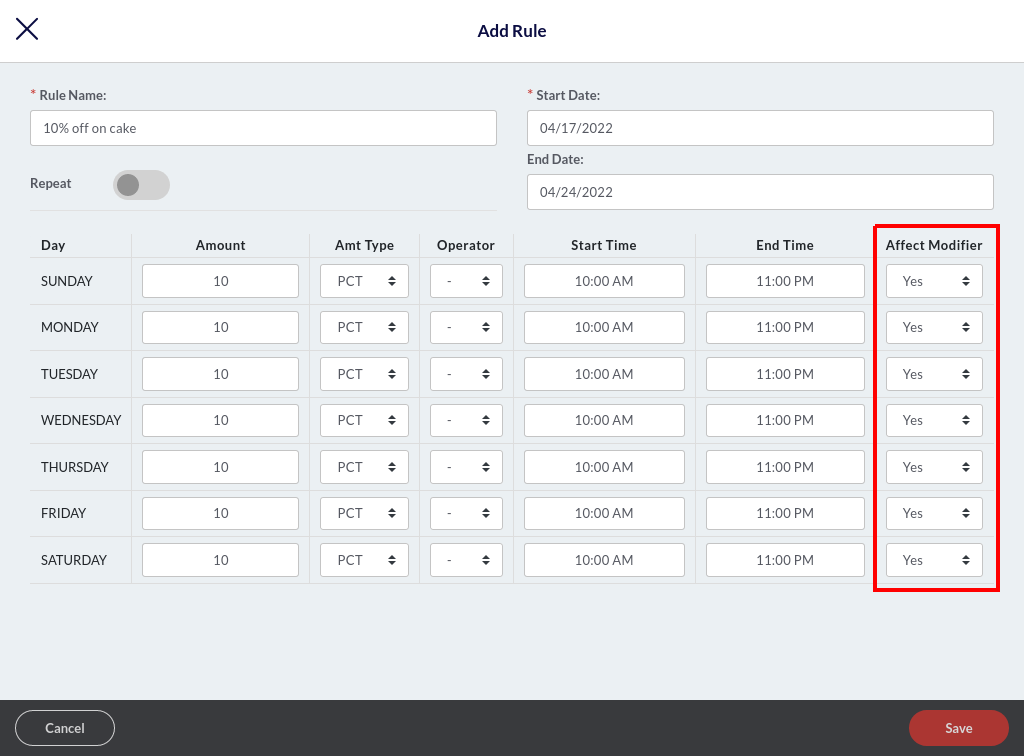
- Select Yes in the Affect Modifier field if you want the promotion rule to be applied to the associated modifiers as well. Let’s understand this with an example of an item - Hot Wings. It is usually served with a Sweet Chilly modifier. So, there can be two scenarios - first, you want the promotion rule to be applied on the modifier as well, and second, you want to exclude the modifier from the promotion rule. Let’s see the calculations in both scenarios.
Scenario 1. Applying the promotion rule on item and modifier.
You apply a 10% off promotion rule on Hot Wings and select Yes in the Affect Modifier field; the final price will be calculated on Hot Wings + Sweet Chilly, as given below.
Price of Hot Wings = $5.00
Price of Sweet Chilly = $1.00
Total Price = $6.00
Final price after applying the promotion rule (10% off) = $5.40.
Scenario 2. Applying the promotion rule on item only.
You apply a 10% off promotion rule on Hot Wings and select No in the Affect Modifier field; the 10% off will be applied on the item only and the modifier will be excluded from it. The final price will be calculated as given below.
Price of Hot Wings = $5.00
Price of Sweet Chilly = $1.00
Final price after applying the promotion rule (10% off) = $5.50.
Don’t forget to click the Save button to save the changes.
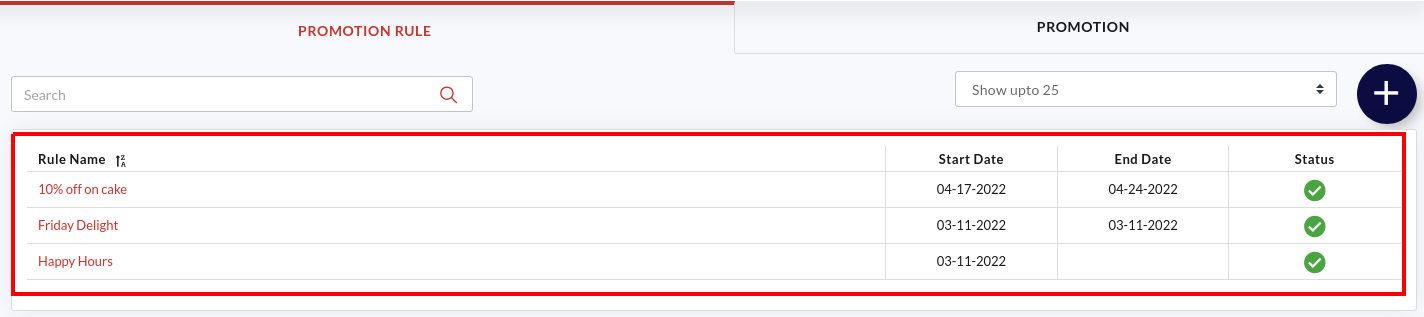
- The added promotion rules will appear under the Promotion Rule tab, as shown in the screenshot above.
- The Start and End Date will also appear next to the promotion rules.
- The
 under Status symbolizes the promotion rule is active and means a promotion rule is inactive. You can tap on the or to reverse the action.
Setup the Promotion
Once you have set up the promotion rules, it’s time to create an event and associate a promotion rule with it. This section will allow you to choose employees who can apply the promotion rule to an item and the service areas and terminals where the promotion rule can be applied. For example, you have an Easter Event around the corner. And you want to offer 10% off on chocolate truffles. Here is how you can do it - create a promotion rule called 10% off on chocolate truffles, create a promotion called the Easter Event, and associate the chocolate truffles item with Easter Event. Follow this path to associate an item with specific promotion - Catalog > select chocolate truffles cake > Additional Settings > Enable Event.

- Tap the Promotion tab as shown in the screenshot above.
- Click to create a new promotion.

- A new window will appear, here you can create an event and customize it the way you want.
- Event Name: Enter the event name. For example, Easter Event.
- Select Rule: Tap this field and select the promotion rule from the drop-down. This will associate the event with the selected promotion rule, and the preset prices will apply during the promotional period. For example, you can select 10% off on cake promotional rules for the Easter Event.
- Employees: Select the employees to authorize them to apply this promotional price. Other employees won’t be able to apply the Promotion.
- Service Areas: Select the service areas where you want this promotion to be applicable.
- Terminals: Select the terminals where you want this promotion to be applicable.
- Once done, please click the Save button.

- The added events will appear under the Promotion tab as shown in the screenshot above.
- The under Status symbolizes the promotion rule is active and means a promotion rule is inactive. You can tap on the or to reverse the action.
- The added events will appear under the Promotion tab as shown in the screenshot above.
- The under Status symbolizes the promotion rule is active and means a promotion rule is inactive. You can tap on the or to reverse the action.
Associate an item with the promotion
Once you have created the promotion and set up the rules, the next step is to associate the items with an apt event. It allows you to offer the items as per the rules set in the promotional rule. For example, you can set the chocolate truffle to be associated with the Easter Event (10% off promotion rule).
Note: You can also associate the entire category with a promotion. This will apply the promotion rule to all the items in that category. To apply the category-level promotion, go to the Catalog > Category > select category from the list > Additional Settings and tap the checkbox next to the Enable Event. Now select the event to be applied and click Save.

- Navigate to the Catalog section on the left panel.
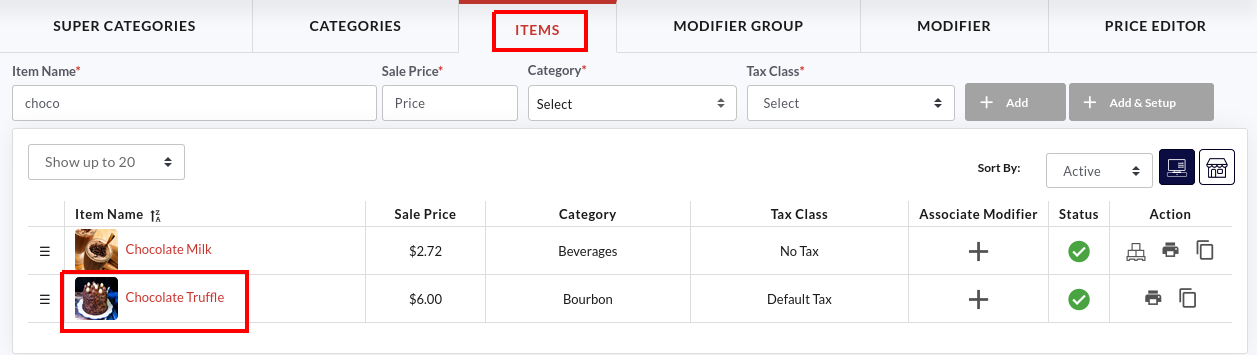
- Click the Items tab and tap on the item that you want to associate with an event.
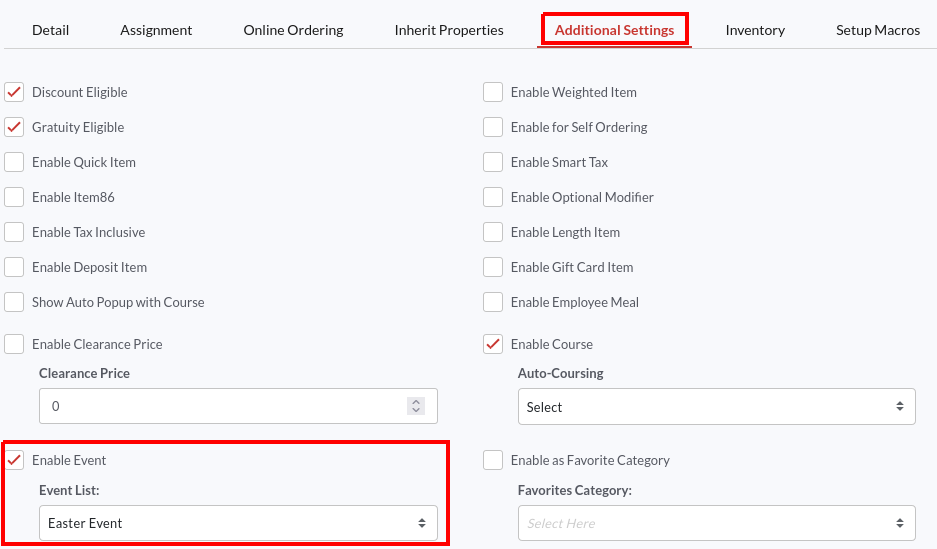
- Go to the Additional Settings tab, select the Enable Event option and select the promotion from the Event List. The preset rules of the promotion will be applicable to this item. In this example, we have associated the chocolate truffle cake with an Easter Event promotion, and during that period, the chocolate truffle cake will be offered at 10% less price.
- Once done, click Save.
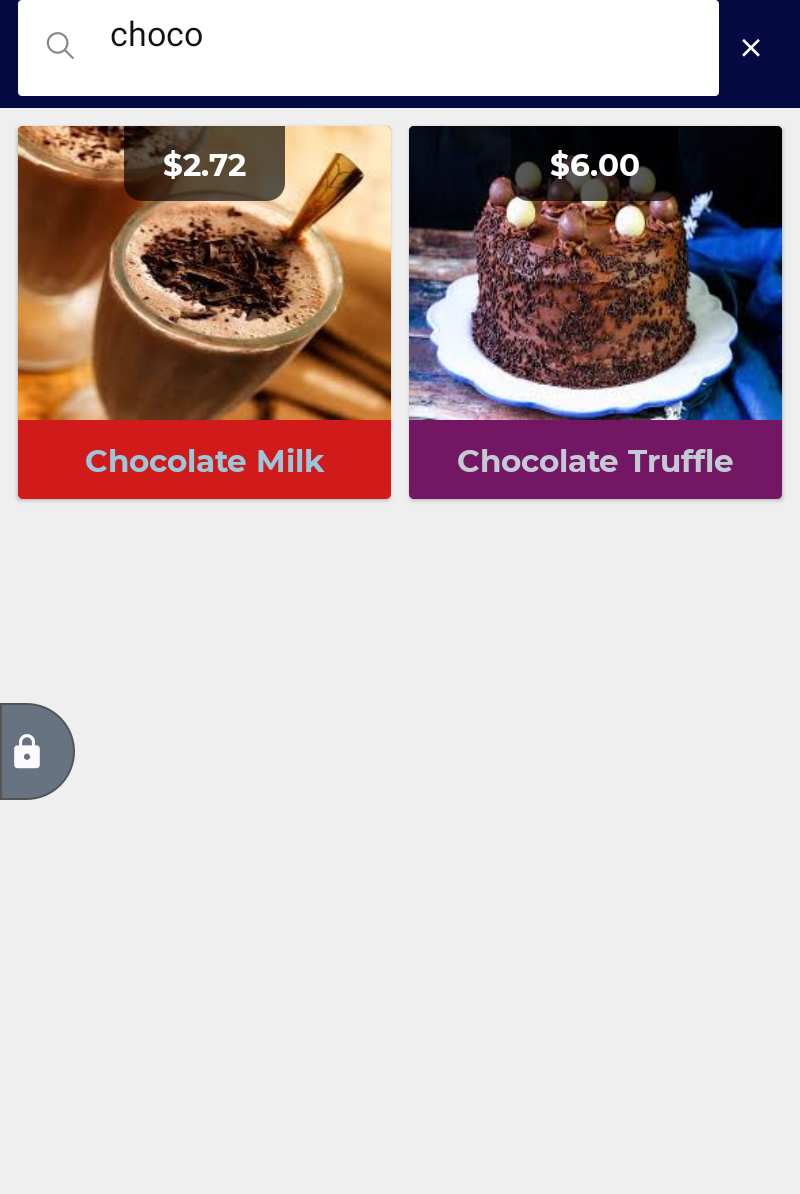
- Take a look at this QLite screen. We are trying to order the chocolate truffle cake during the Easter Event promotion period. The Chocolate Truffle (priced at $6.00) is added to the cart.

- Once the Chocolate Trufffe is added to the cart, the Easter Event is written underneath the chocolate truffle cake. The revised item price will be displayed next to the item. Here, you can see the actual price of chocolate truffle cake was $6.00, but during the Easter Event (10% off on cakes), the new price comes out to be $5.40.
- Now the guests can pay for the order and enjoy their meal.
How to Auto Close the batch?
Let’s understand what is batch processing first! The customer’s credit or debit card is processed at the time of the transaction but the amount is not credited to the merchant’s bank account instantly. Instead, all the transactions processed in a day are stored in a file and sent to the credit card processing company later as one single file. When the file is sent, it is called batch processing. When the merchant’s bank reads this data, the money is released to the payment processor, who then sends the funds to the merchant’s bank. Now it depends on the merchant, at what time of the day they want to close the batch. Due to Batch processing, the transactions between the customer and the merchant become convenient and more secure than ever.
What is Auto Batch Close?
Let’s understand what is batch processing first! The customer’s credit or debit card is processed at the time of the transaction but the amount is not credited to the merchant’s bank account instantly. Instead, all the transactions processed in a day are stored in a file and sent to the credit card processing company later as one single file. When the file is sent, it is called batch processing. When the merchant’s bank reads this data, the money is released to the payment processor, who then sends the funds to the merchant’s bank. Now it depends on the merchant, at what time of the day they want to close the batch. Due to Batch processing, the transactions between the customer and the merchant become convenient and more secure than ever.
Item Level Operations
Batch Close is functionality that triggers the closing of debit and credit transactions that were currently open on the terminal. Open transactions are those that have been processed on the terminal since the last batch close time. Quantic allows the merchants to auto-close the batch at any set time of the day. In two ways the batch can be closed automatically.
- Auto Batch Close at Processor end: The merchant can request the processor to set the automatic batch close time at the time of merchant registration.
- Merchant Automated (Application level): This merchant can select the auto batch close time from the backend portal. This will lead to closing the batch automatically at the merchant-defined time. For example, the merchant may decide to close the batch at 5 am.
How to Set Up the Auto-Batch Close Time?
The batch close time can be set up from the location’s backend portal. Please remember when you do the batch close the pending transactions will not be included in a batch. Below is a complete overview of how you can set up the batch close time.
- Log in to the location’s backend portal.
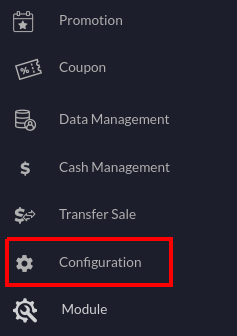
- Navigate to the Configurations tab on the left panel.
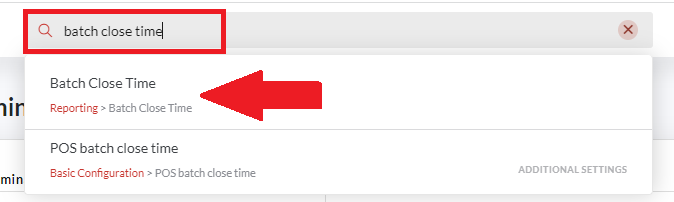
- Search Batch Close Time and select the configuration from the drop-down.
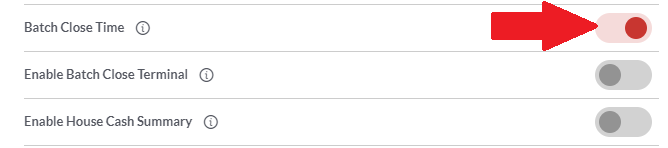
- Now tap the Grey toggle button next to the Batch Close Time configuration. The configuration will be enabled if the toggle switch turns red.
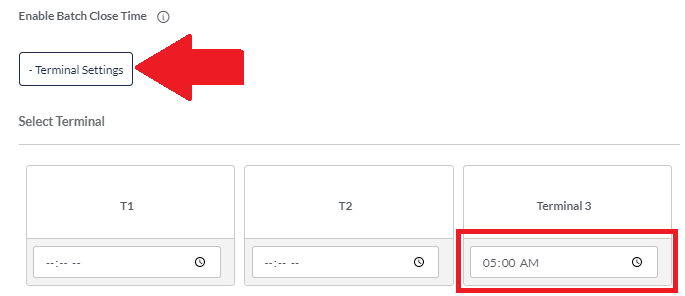
- Tap the
 button, and select the batch close time for any specific terminal or all the terminals.
 - For example, here we have set 5 am as the batch close time for Terminal 3. Now all the open transactions (those that have been processed on the terminal since the last batch close time) will be closed at 5 am every day.
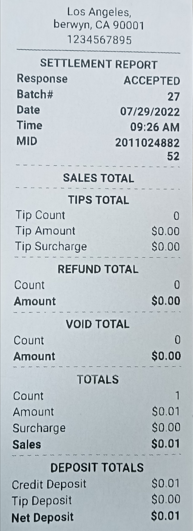
- On a successful batch close completion, the receipt will be generated from the QLite terminal stating all the transactions have been processed including tips, refund, void, etc. See the screenshot above, this is how the batch close settlement report will be generated from the QLite terminal.
What if the QLite terminal is closed or offline at the batch close time?
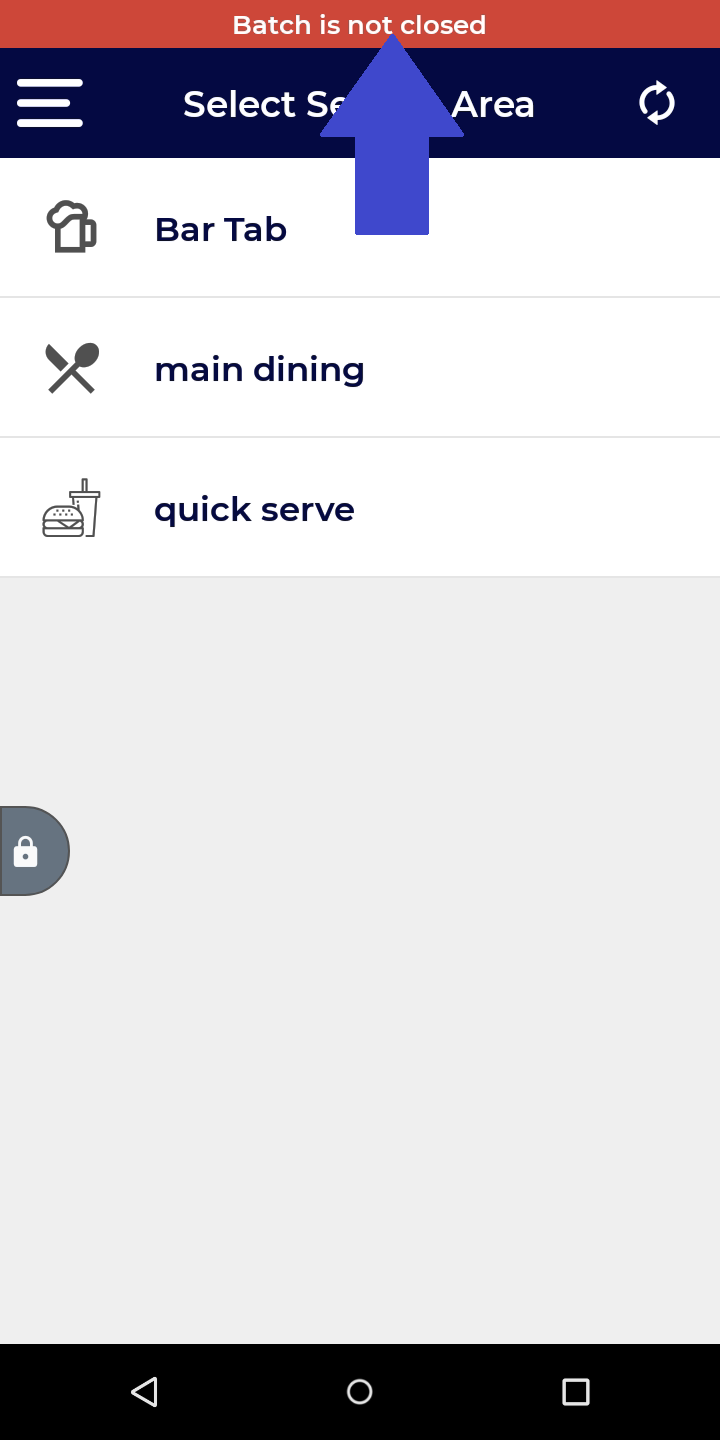
Since our readers connect to the cloud to close the batch at the scheduled batch close time, if the device is closed or offline during that time, there might be an instance of the missed batch close. In that case, if the difference between the “batch close time” and the “last batch close time” exceeds 24 hours, a notification bar will appear on the reader stating “Batch is not closed”.
For example, if the batch close time is 5 am and the last successful batch close time happened 24 hours ago, you will receive a notification bar on the top stating “Batch is not closed”. Check out the steps below to learn how you can close the batch manually on missed batch close events.
- Make sure your QLite device is online and connected to the internet.
- Log in to your terminal with the Username and Password.
- As soon as you log in to your terminal, the notification bar will appear on the top stating “Batch is not closed”.
- Tap this notification bar to close the batch manually.

- A pop-up will appear stating - “Batch is not closed. Do you want to close the batch now?”.
- Tap Yes to close the batch manually. In case you click No or close the pop-up accidentally by clicking X, the same notification bar will reappear after 24 hours.
- On a successful batch close completion, the receipt will be generated from the QLite terminal stating all the transactions have been processed including tips, refund, void, etc. See the screenshot above, this is how the batch close settlement report will be generated from the QLite terminal.
How to receive the alert notification when the batch is not closed?
In the event of a missed batch close, the merchant can now opt to receive a notification via text and email. The alert notification feature will notify the merchant in the event that a trigger event takes place on the selected alert type.
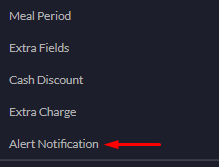
- The alert notification details can be set up from the location’s backend portal. Here is the path to set up the alert notification - Login to the backend portal, select Configurations and click Alert Notification (under Setup).

- Click the Edit button on the Alert Notification page and tap
 . A new page will open, there you can fill in the name, email, phone, and alert type details.
 . A new page will open, there you can fill in the name, email, phone, and alert type details.
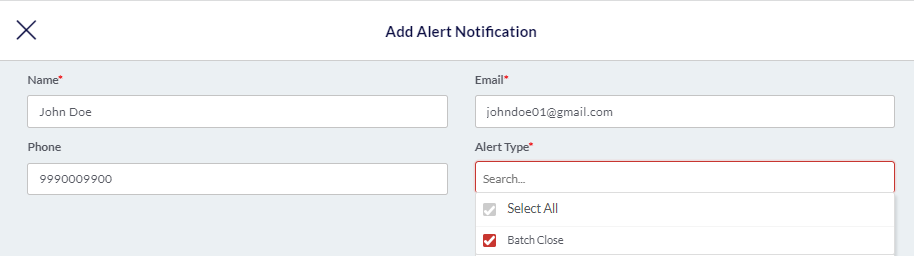
- Here’s an example case. The Merchant wants to be notified in the event that a missed batch close takes place. They can simply enter their details such as name, email, and phone number. Next, they can choose the Batch Close under the Alert Type.

- Once done, the details will be displayed on the Alert Notification page as shown in the illustration above.
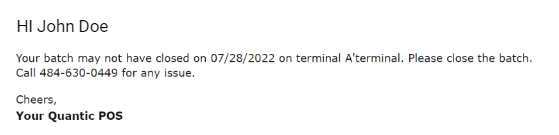
- In this case, the batch close time has passed and the batch did not close due to any one of the following reasons (offline device, switched off device, etc.), the location representatives will be notified via text and email.
