Customer Wait List
Now you can notify the waiting customers about the table availability at your restaurant with the Wait List feature. With this implementation, you will be able to create a list of customers who are waiting for their turn to occupy a table. So when a table frees up, the servers can assign a table to the customers and send an alert message notifying them regarding the assigned table number. This is a configuration-based feature, you will need to enable the setting “Show Table Waiting in Side Menu” to see the Wait List on the left menu.
Key Features:
- Create a Wait list.
- Send a table approved or denied message via text.
- Select the existing customers or add a new one from the Wait List screen.
- Add notes for the table.
- Premium module, has to be subscribed from the backend portal.
Turn on the Wait List setting
There is a setting “Show Table Waiting in Side Menu” that needs to be enabled from the backend to see the Wait List module on the left navigation. Please follow the below steps.
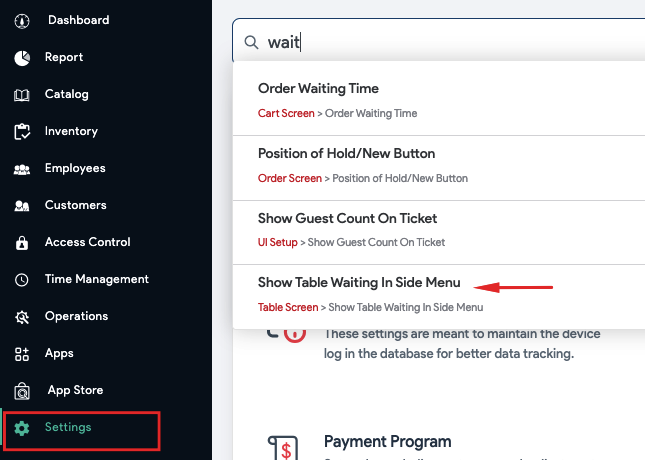
- Go to the Settings section in the backend portal.
- Search for the configuration – “Show Table Waiting in Side Menu” and turn on this setting.

- Go to the App Store and subscribe to the Waitlist module as shown in the image above.
Creating a Waitlist

- Now login to the POS.
- Go to the left navigation and select Wait List.

- Tap the
icon as shown in the image above.
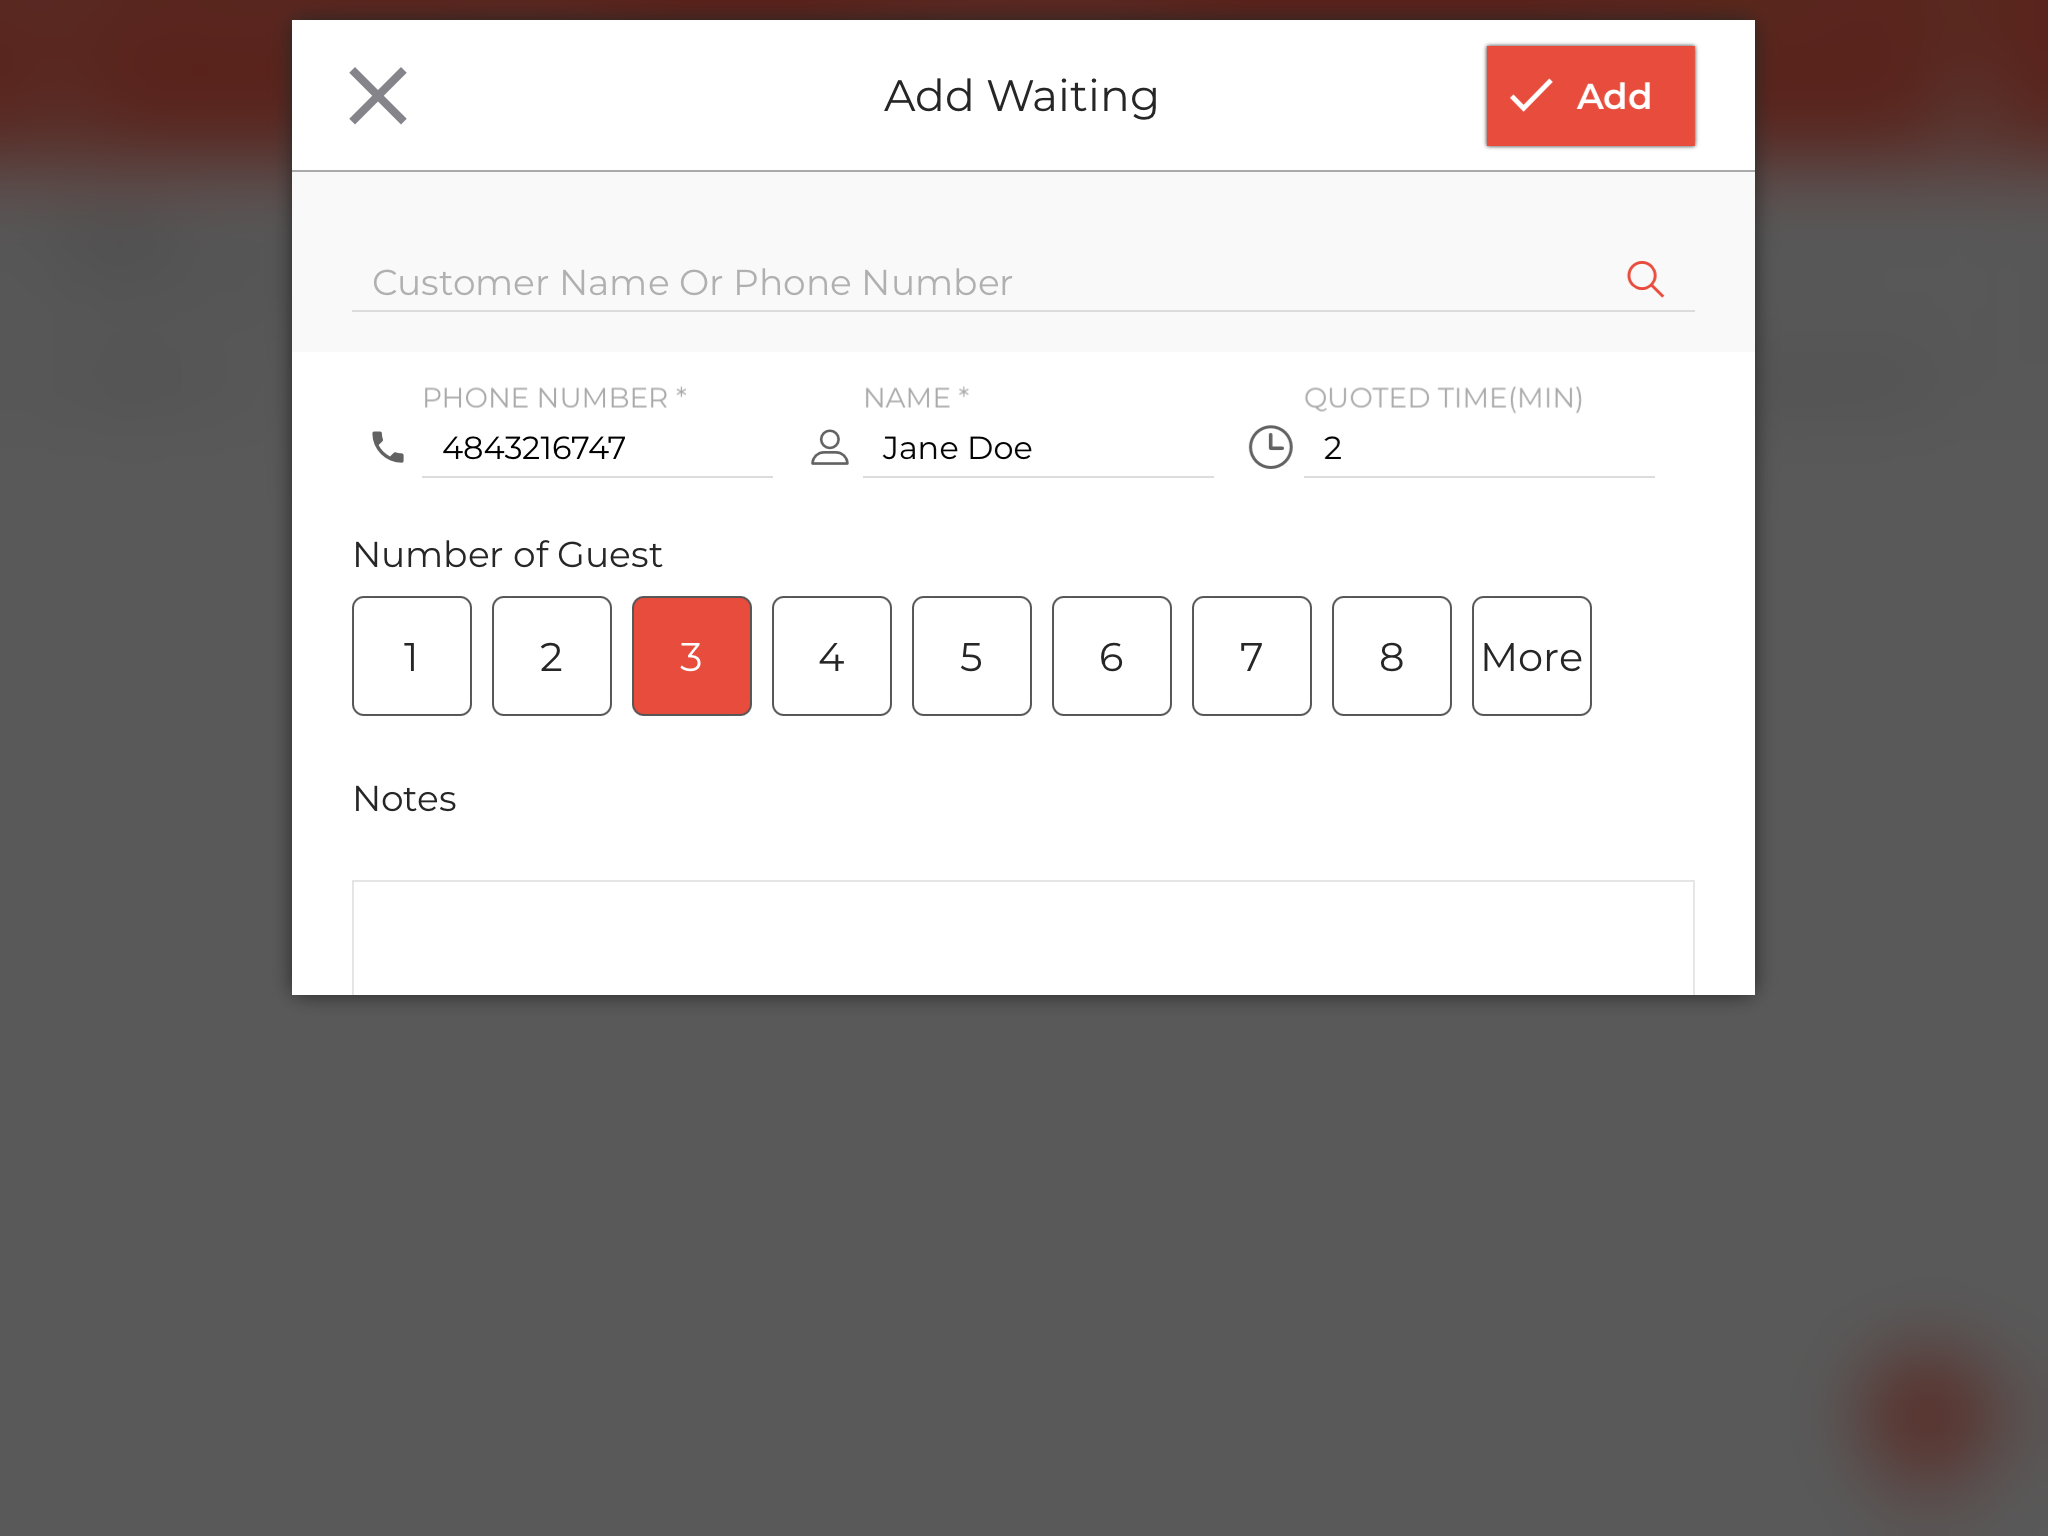
- Add the customer name or you can search via the phone number as well.
- Enter the estimated wait time (in min) in the Quoted Time field.
- Add the number of guests from the predefined options.
- Add the note (if any) and click Add in the top right corner.
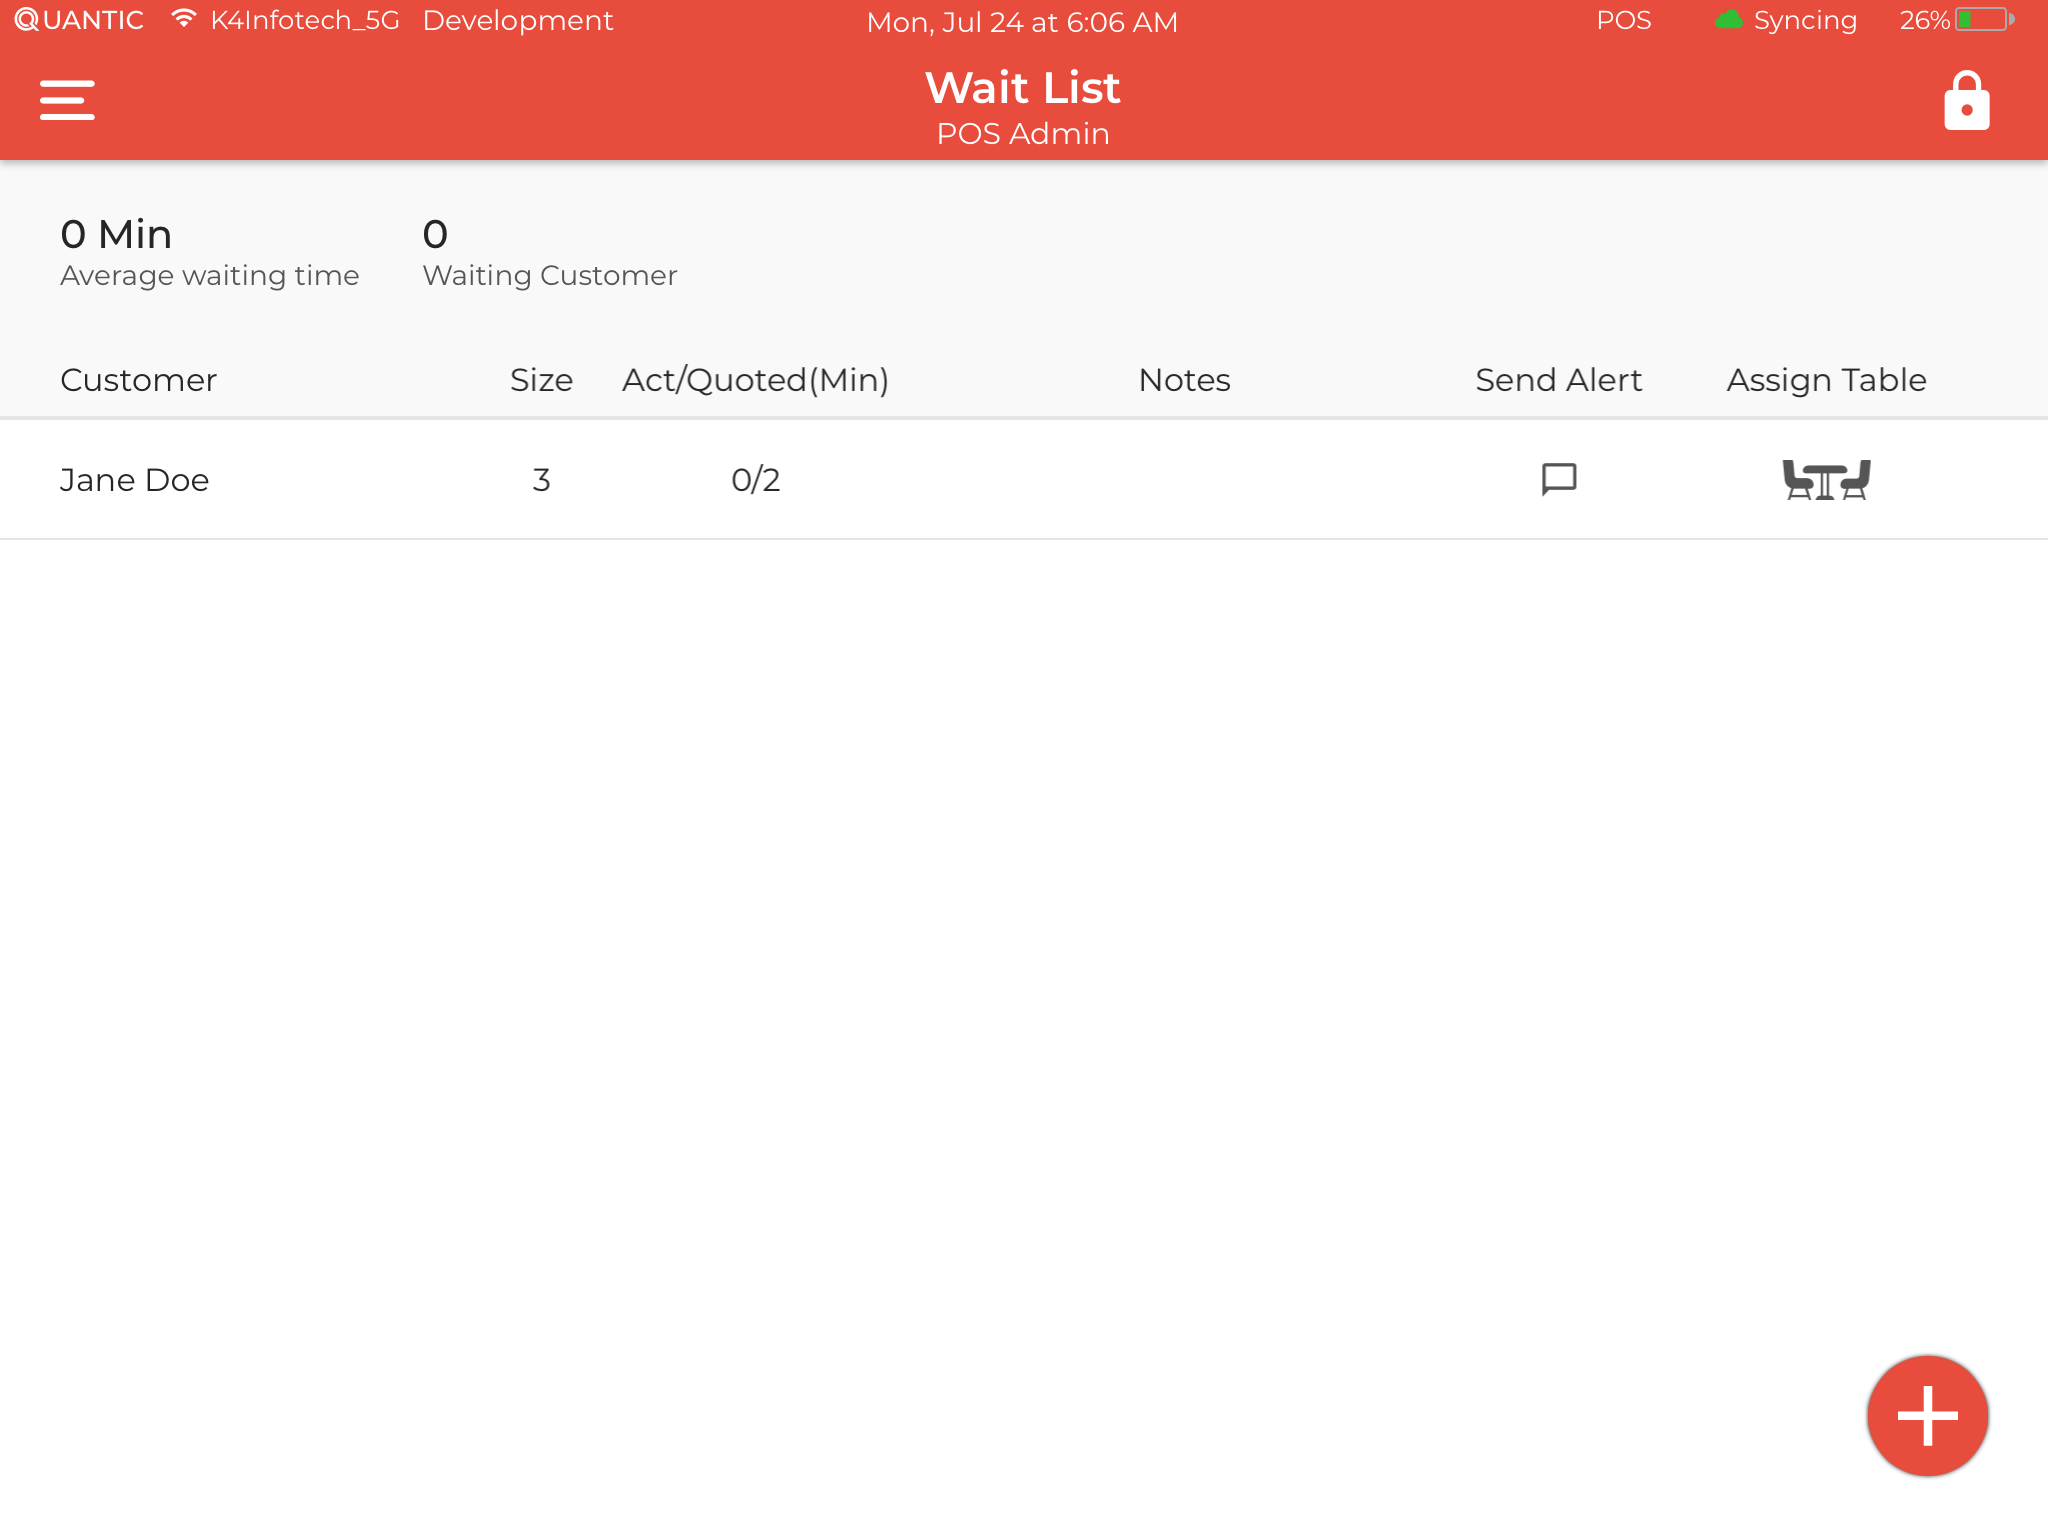
- Once done, the customer will be added to the waitlist:
- Customer – Name of the customer who has requested to book the table.
- Size – Number of guests to book the table for.
- Act/Quoted – Actual time passed vs the time quoted to the customer. In case the actual time becomes more than the time quoted, this section will turn red.
- Notes – Customer note (if any).
- Send Alert – Tap this button to send the alert notification via text message to the customer, for table approval or denial.
- Assign Table – The assigned table number.
Assigning a table and sending an alert notification
Once the table frees up in the restaurant, you can assign a table number to the guest on the waiting list. Here are the steps to do that:

- Tap
in the Assign Table section.
- Select the available table from the list.
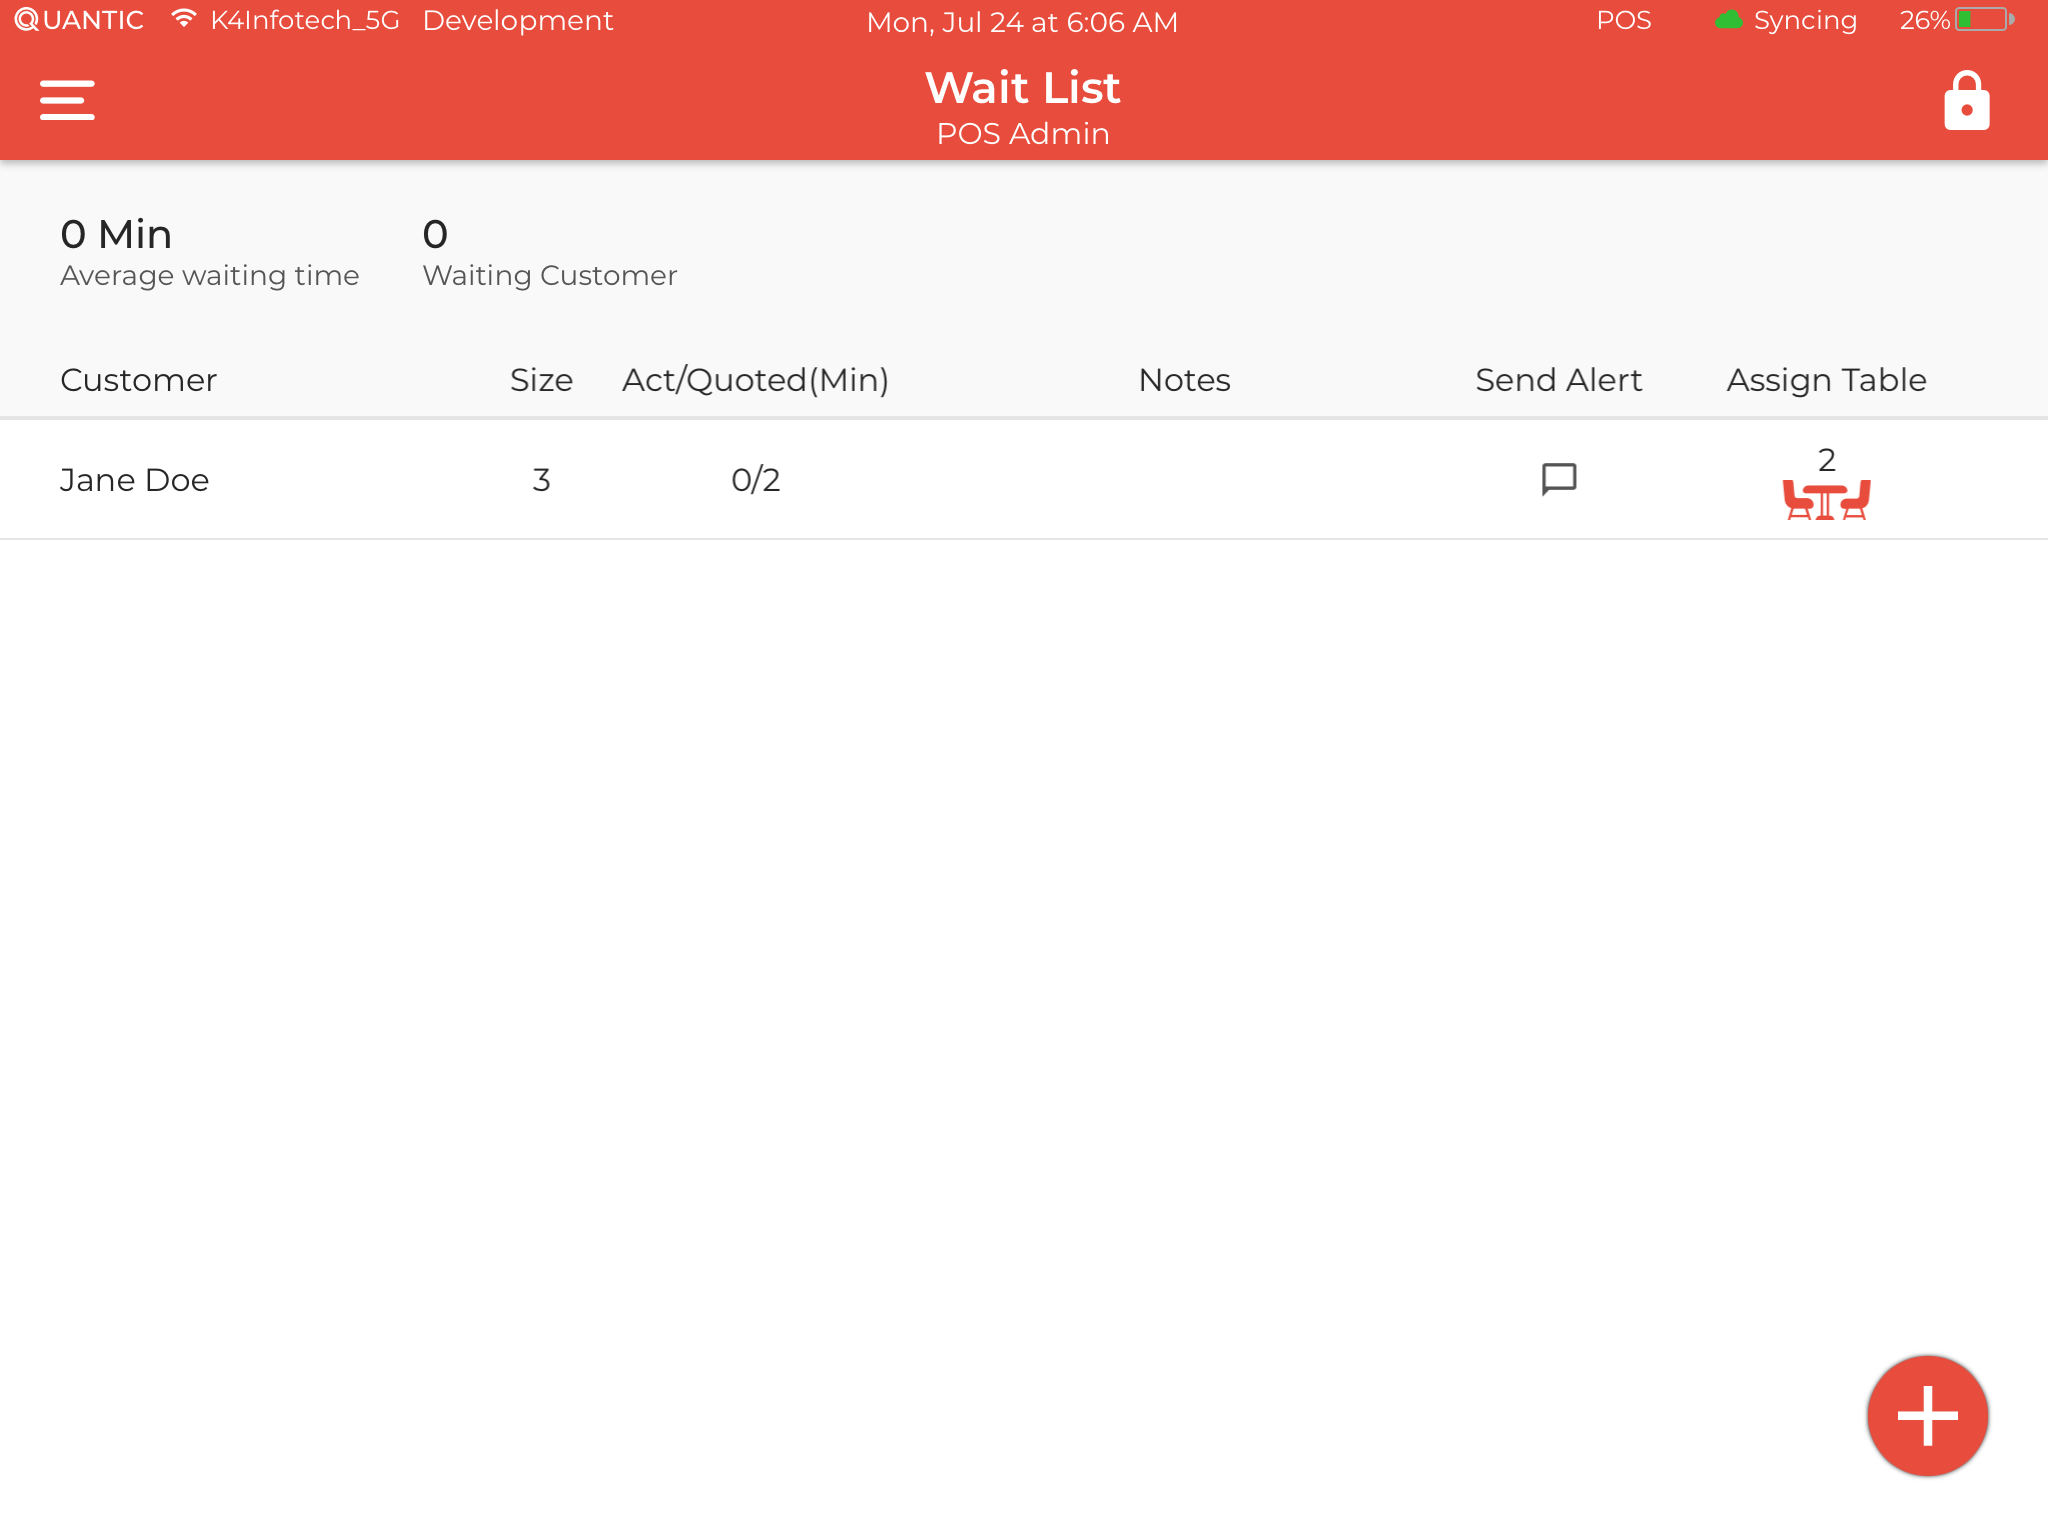
- The selected table will be displayed in the Assign Table section.
- Now tap
to notify the guest about the assigned table.
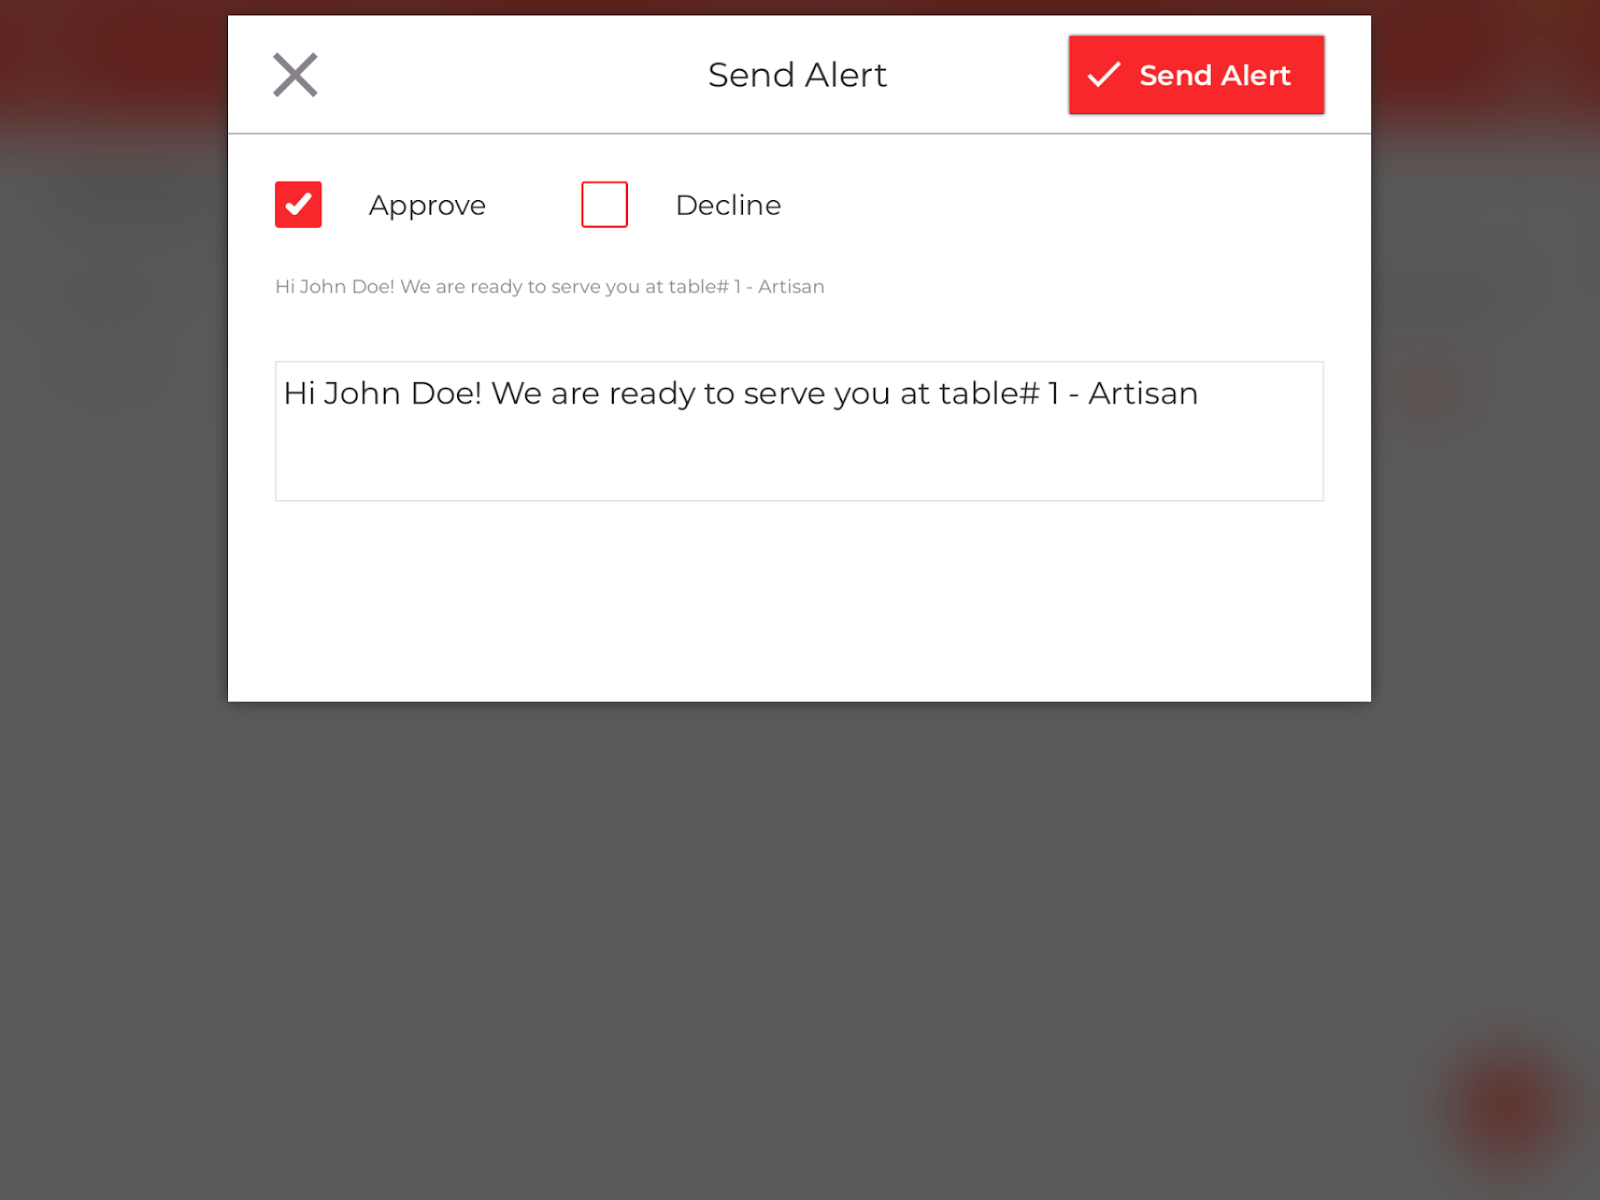
Send alert – Table Approved
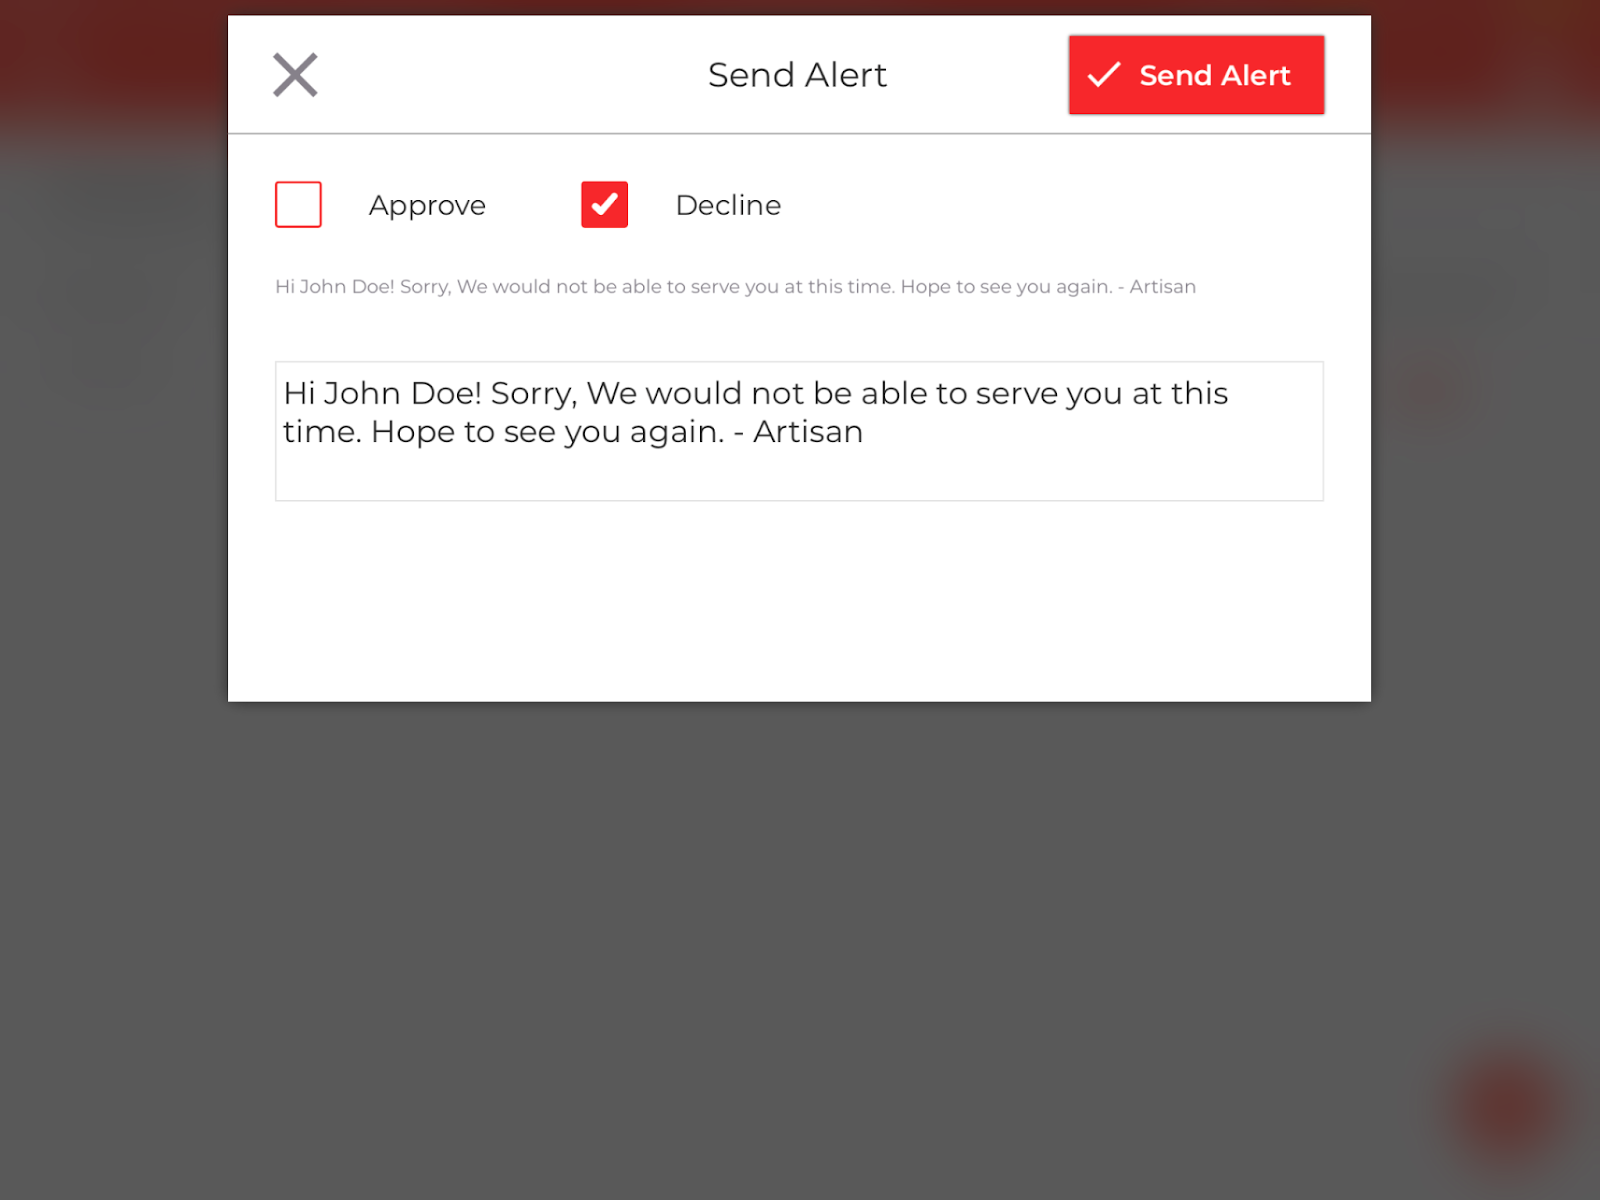
Send alert – Table Declined
- You can either Approve the table or Decline and customize the alert message at the bottom.
- Once done, please select Send Alert to send the text message to the guest.


