How to Add an Item to the Menu?
Adding an item to the menu is the same as creating a category.
Here, you can now enable pricing, if applicable, and create more specific settings, such as adding custom colors, modifiers, images, or changing printers.
Note: Later, if you make changes to categories or modifier groups, items may or may not inherit those changes.
This ultimately depends on the type of changes being made or whether the inherited settings are checked or unchecked.
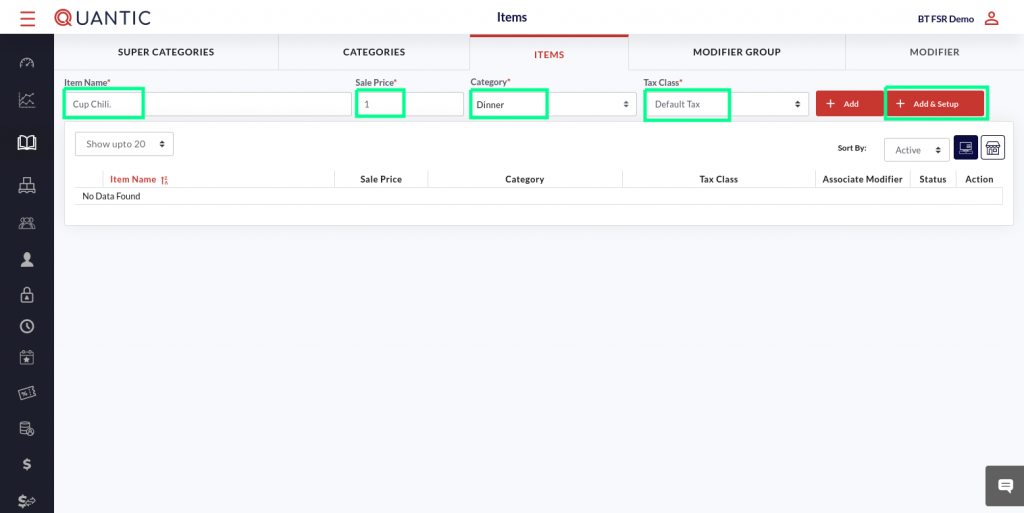
- Click the Item tab located on the top of the Menu Management screen.
- Now enter the name that you want to add and enter the Sale Price.
- Click the box underneath the Category.
- On the drop-down list, select the category/subcategory to be associated with the item being created.
- Select the Tax Class and click the ➕ Add & Setup button (in Red).
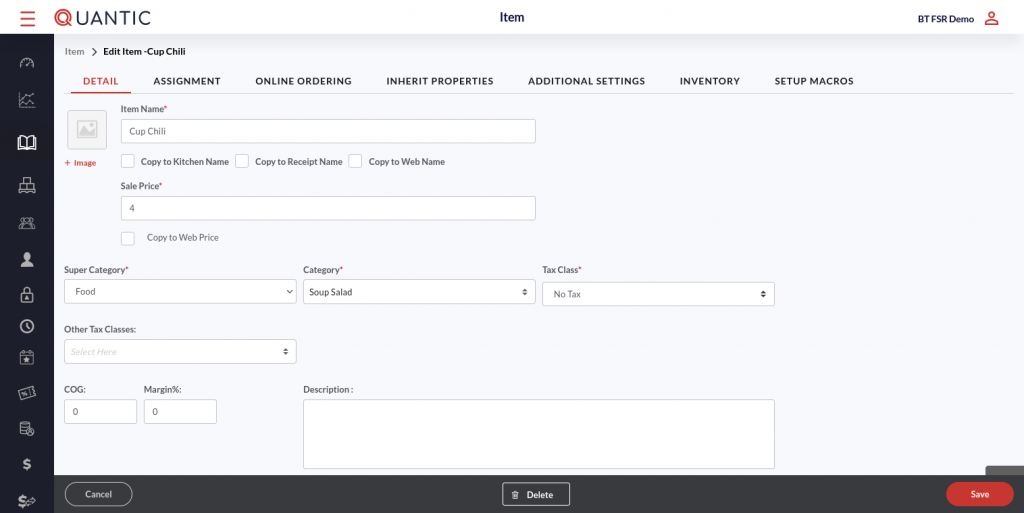
- Fill in all required fields as indicated in the screenshot. Add the image of the item in the image box. Enter the item name in the Item Name field.
- Tap the checkboxes next to Copy to Kitchen name, Copy to Receipt name and Copy to Web name (if you want to keep the same name of the item at these places).
- Enter the Sale Price. If you wish to keep the item price the same for the online orders, check the box next to Copy to Web Price.
- Now select the Super Category, Category, and Tax Class from the dropdown.
- Fill in other details including the Background color and the Font color for the item name in the POS.
Please note: After creating the item and changing the item name, you can choose to keep the same changes for printer, POS, and Web names.
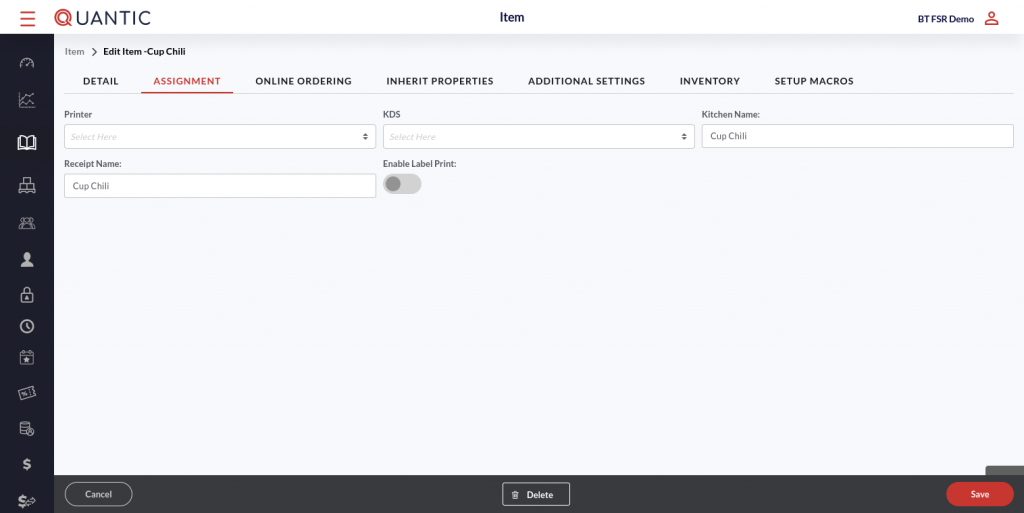
- Click the Assignment tab.
- Now select the Printer and KDS that you want to associate this item with.
- Enter the item name for the kitchen printer and receipt in the Kitchen Name and Receipt Name.

- Click the Online Ordering tab.
- To activate this item for online ordering, turn on the switch next to Enable Web.
- Enter the item name in Web Name with which you want this item to be recognized for online orders.
- Enter the item price for online orders in the Web Price field.
- To mark this as a featured sub-category, ✔️ the checkbox next to Mark as Highlighted/Featured.
- Enter the item description that you want to show up for online orders and select the Designer.
Note: If the Enable Web is activated for the parent category and Inherit Online is activated for this item, it will have Enable Web automatically turned on.
The item price will be reflected as the web price, the item name as the web name, and the item description as the web description.
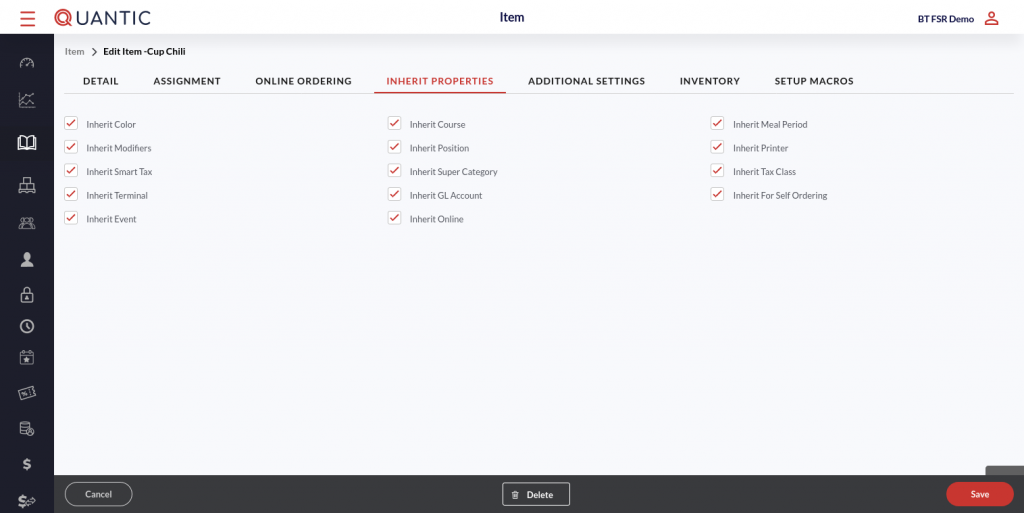
- Click the Inherit Properties tab.
- Here you will see that by default all boxes are marked. If you do not want the item to inherit a specific setting, uncheck the box next to that setting.
Note: If Inherit Online is selected, this item will inherit the settings from the Online Ordering tab.
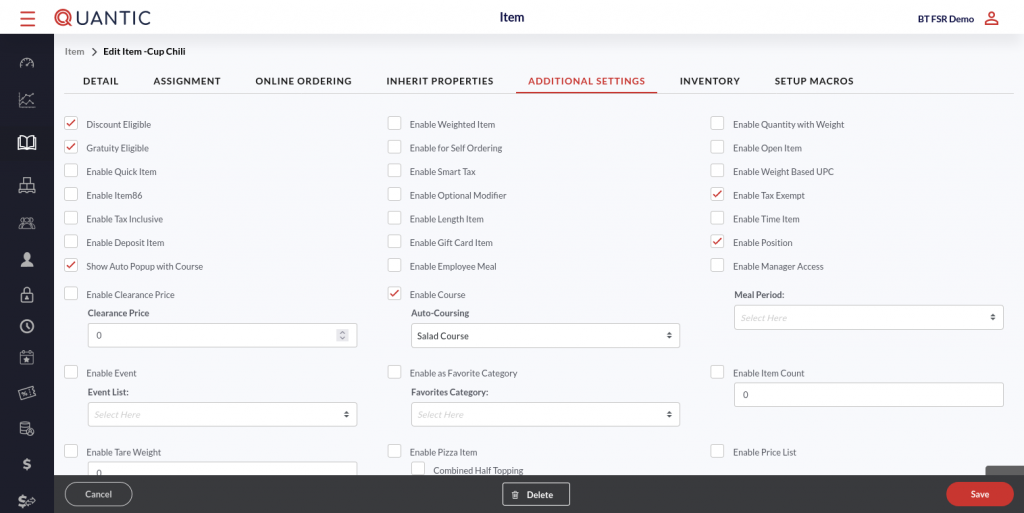
- Go to the Additional Settings, enable or disable the options in order to customize the POS as per your store’s requirement.
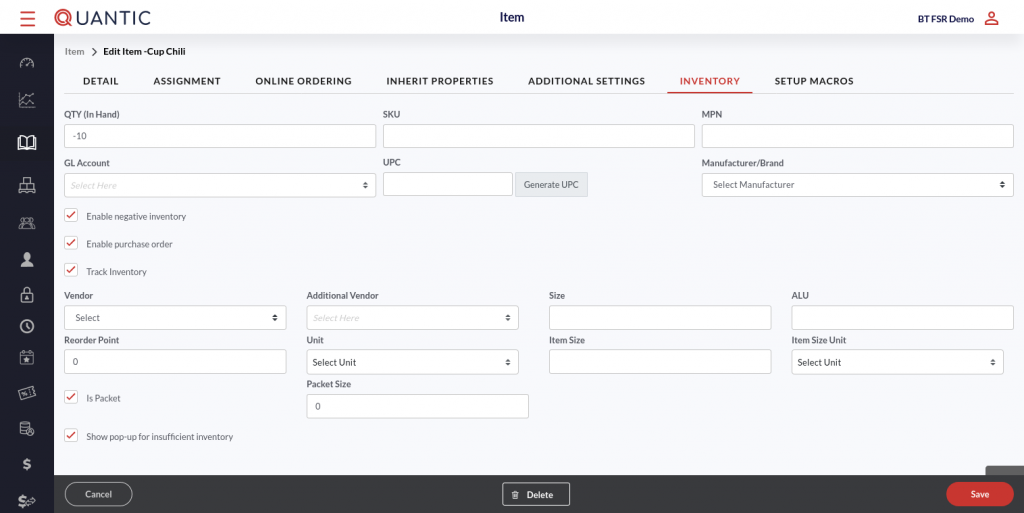
- Go to the Inventory tab, enter the existing in-hand quantity of an item in the QTY (in hand) field and follow the below steps.
- Put the item-related details in SKU, MPN, and GL Account.
- Click Generate UPC. It will generate a unique 12 digit number in the UPC field.
- Select the item manufacturer from the Manufacturer/Brand drop-down.
- Tapping on Enable negative inventory checkbox will allow you to put the negative value in the item quantity.
- Tapping on Enable Purchase Order checkbox will enable the purchase order for this item.
- Tapping on Track Inventory will unhide inventory-related sections for an item.
- Vendor: Select the name of the vendor (who is supplying the said item) from the drop-down list. If you can’t find the vendor in the list, first add it from the Vendor tab under Inventory.
- Additional Vendor: Select the name of the additional vendor if an item has multiple vendors.
- Reorder Point: Put the item quantity at which you want the item to be reordered.
- Unit: Select the unit to measure the item, for example, number, kg, etc.
- Item Size: This field will tell the size of the per piece if the unit is a piece.
- Item Size Unit: Select the item size measurement unit.
- Is Packet: Check this box if an item has been added as a carat or bundle.
- Packet Size: This field enables automatically when the Is Packet checkbox is marked. This field tells how many pieces are there in one carat or bundle.
- Show pop-up for insufficient inventory: Tapping this checkbox will notify you whenever there is insufficient inventory.
- Once done, click Save.
